Notifying a person that a donation was made on their behalf is a great tool to cultivate a relationship and create a special bond.
This can be very easily accomplished on Donately with help from Zapier.
Note: Although Zapier does have a free tier, sending an acknowledgment email requires adding a third step, which is considered a "Premium" feature. For more information on their plans, see their pricing page. Zapier does offer a discount for nonprofits; see here for more information.
Step 1. Create or Edit a Donation Form
To set up what is needed, you'll add the necessary components on the "Fields" step.
We would recommend having the standard "On Behalf Of Donations" field on, then adding two custom fields:
1. Email Field to collect the email for whom to notify.
2. Text Area where the donor can enter a message to the on behalf of the recipient.
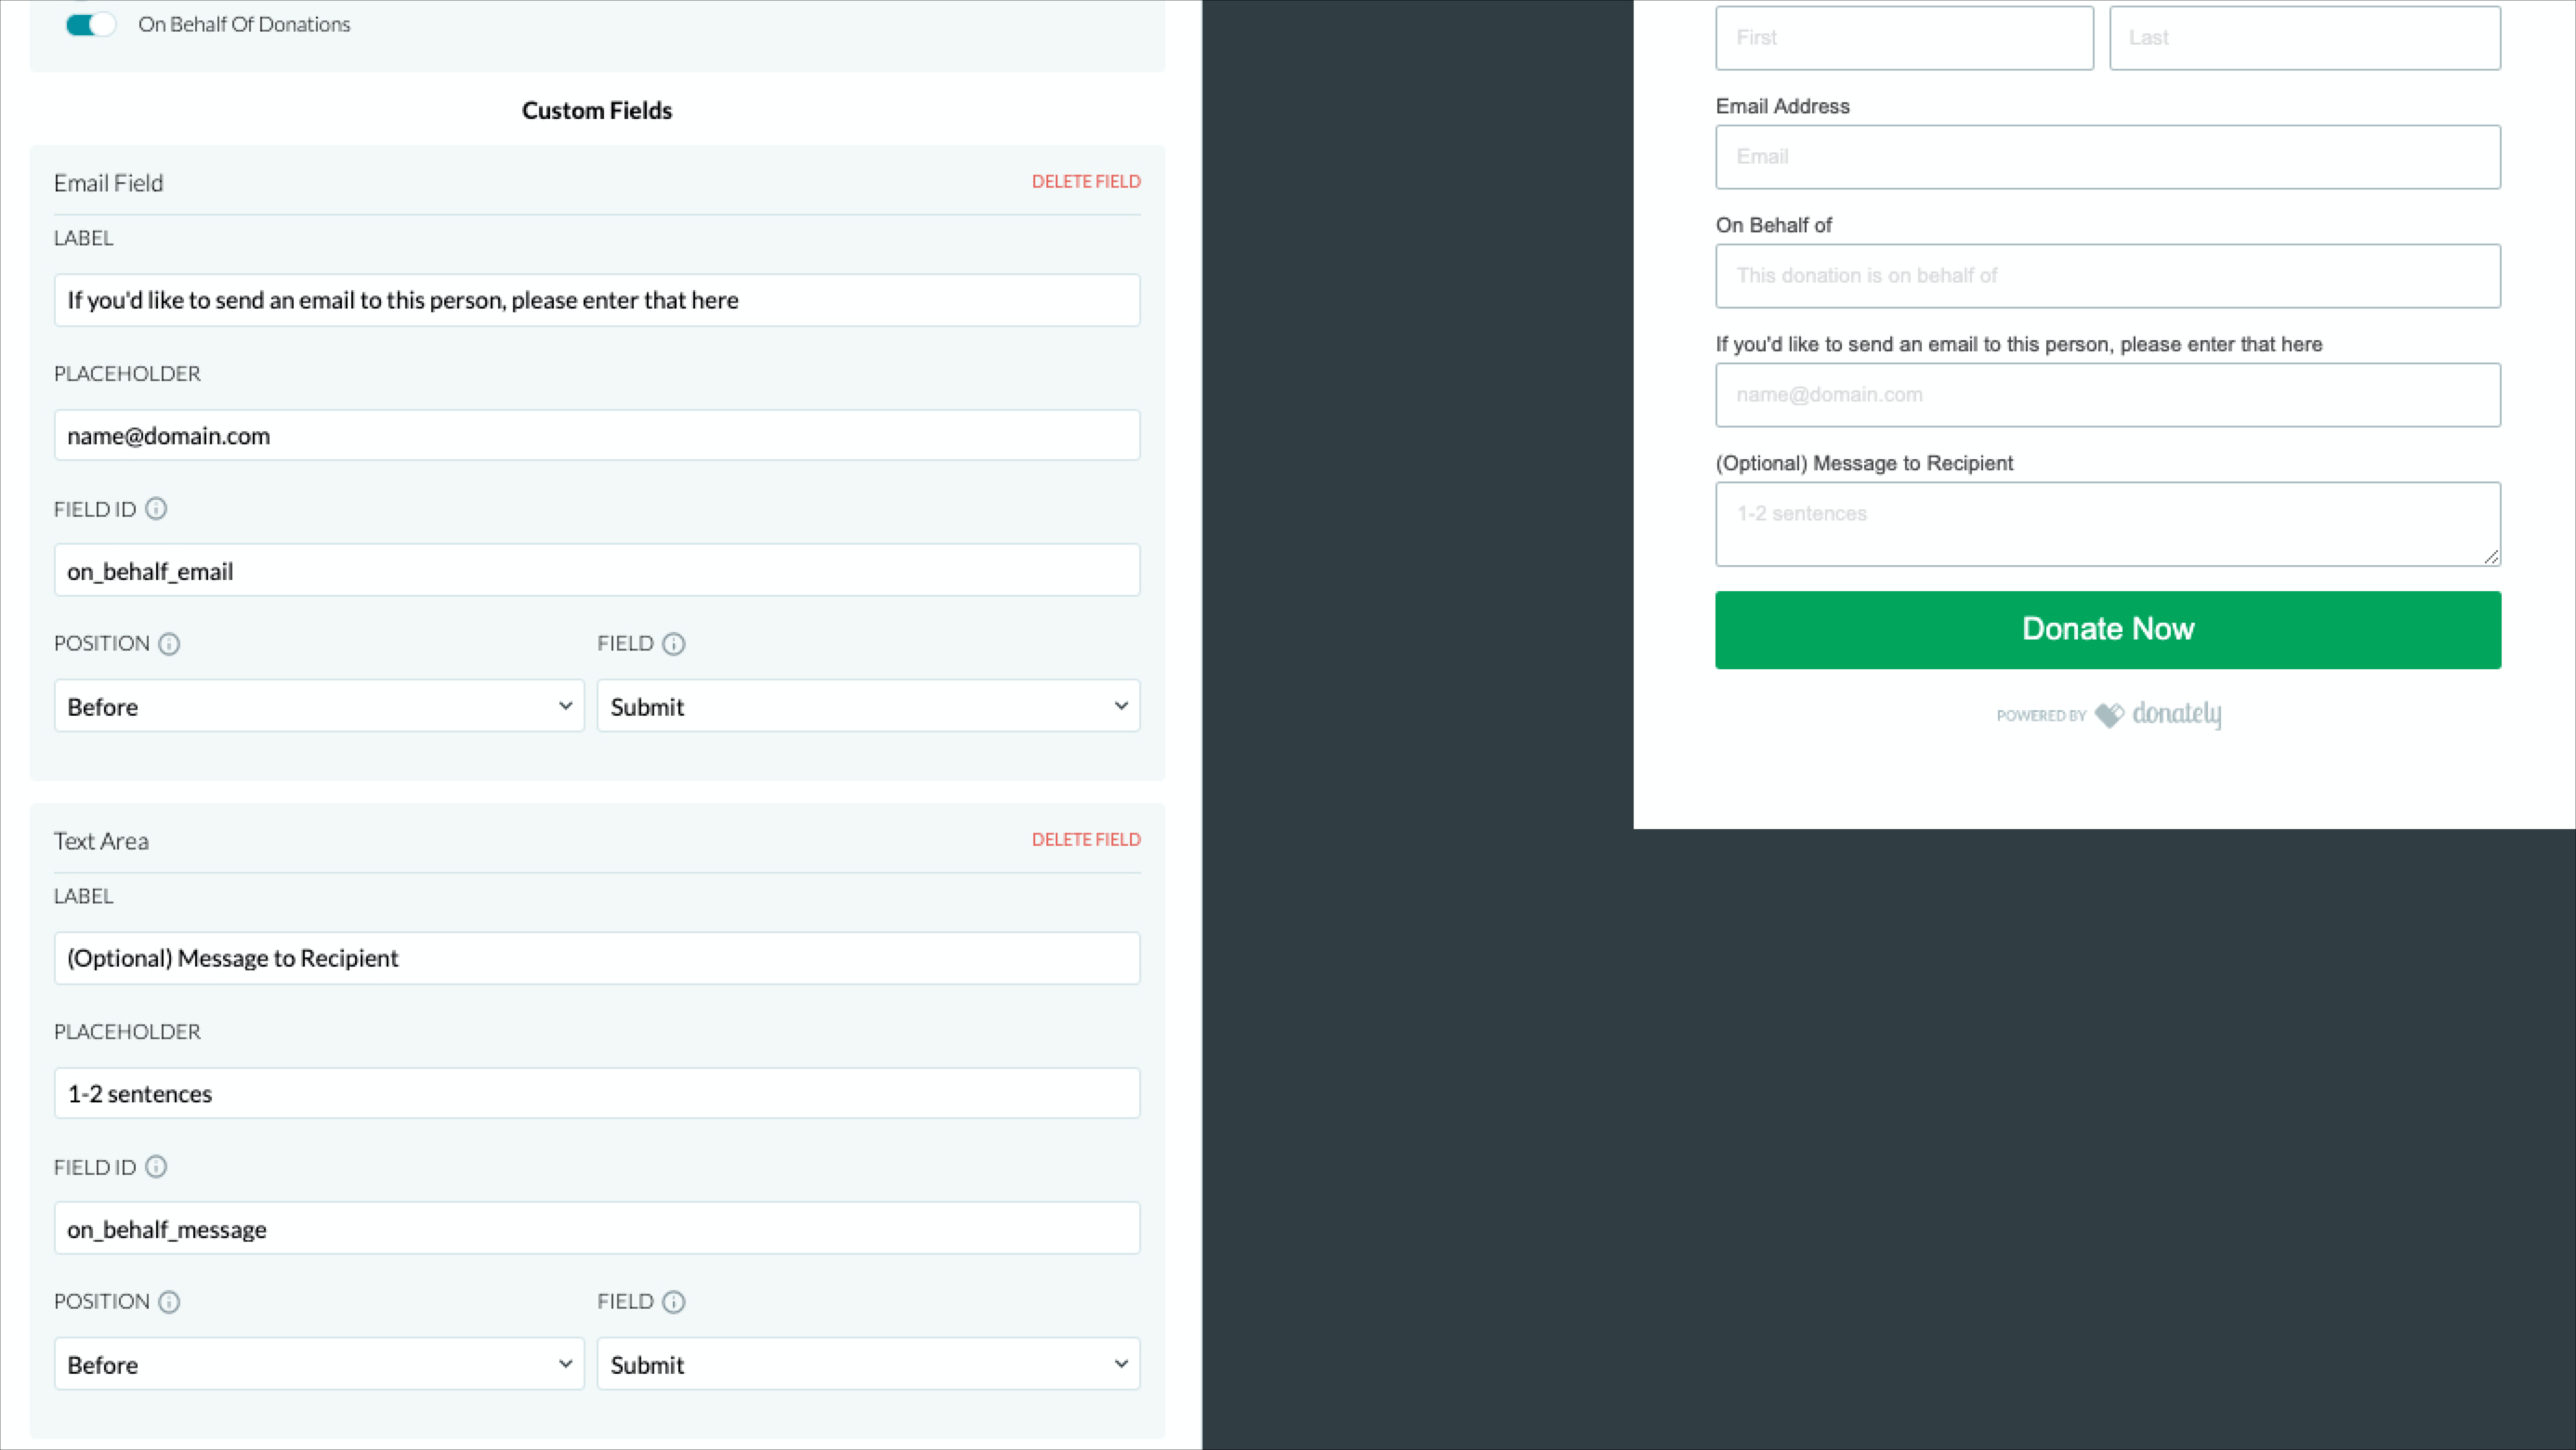
For a full rundown on custom fields, please see this article.
After adding these fields, finished editing your form and select Publish. On the next page, click "View Page" in the top section to open the donation form you just created:

Step 2. Make a Test Donation Through This Form
This step is very important in order to have the correct data template for the Zap you'll be creating in the next few steps. If you have Stripe Test Mode enabled, you can make a test donation. If you do not have that enabled (or are unsure what that means), we would recommend simply making a live, $1 donation. You can always refund yourself later if you'd like.
When making the donation, be sure to enter a value for On Behalf Of Name, On Behalf Of Email, and an On Behalf Of Message.
We recommend using your own email for the On Behalf of Email field in order to send yourself a test in the final steps.
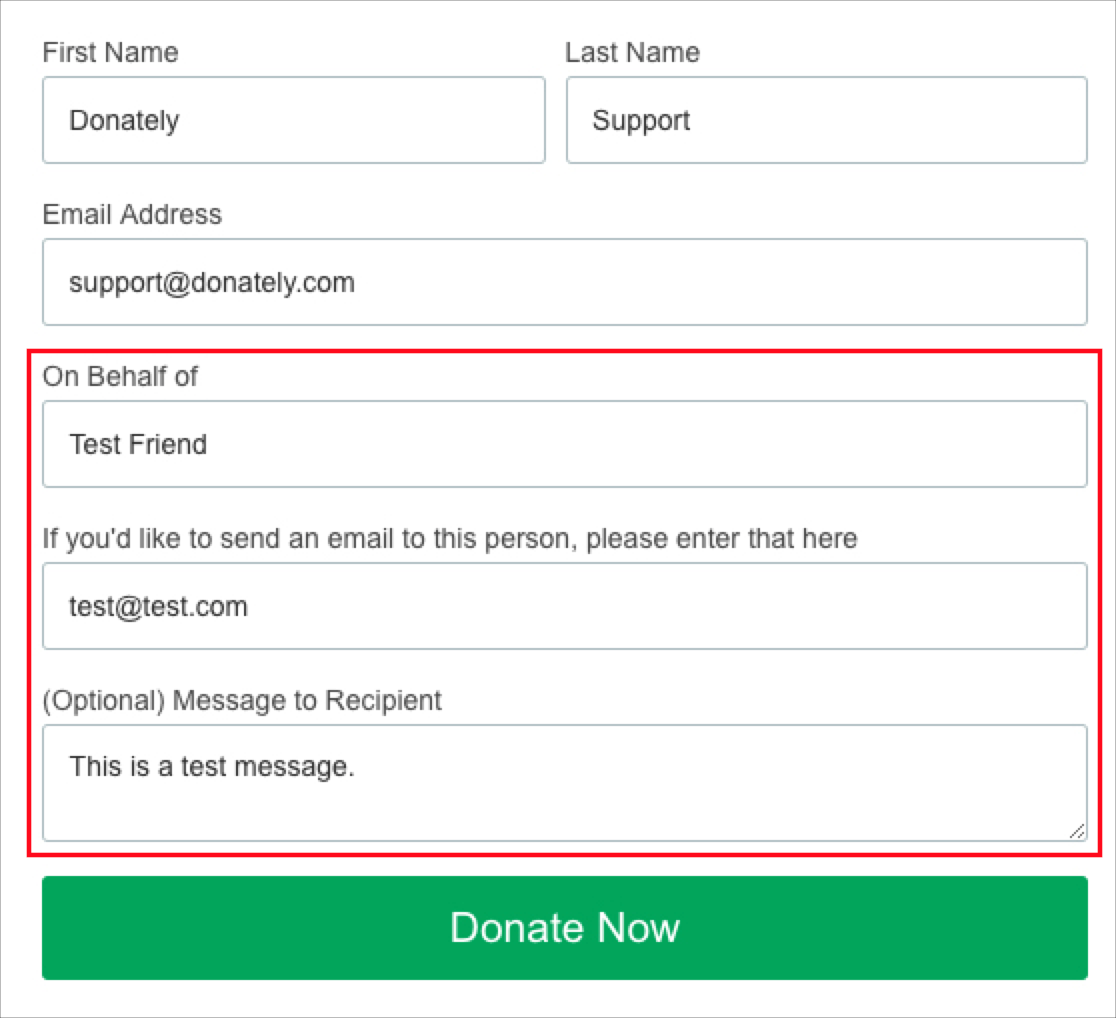
Submit your donation.
You'll need to sign up for a Zapier account if you don't already have one. As mentioned before, you will need a paid Zapier plan to create this Zap.

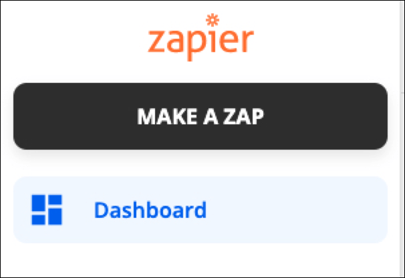
If you're on the newer version of Zapier's dashboard, you may only see the "Make A Zap" from the left-side menu.
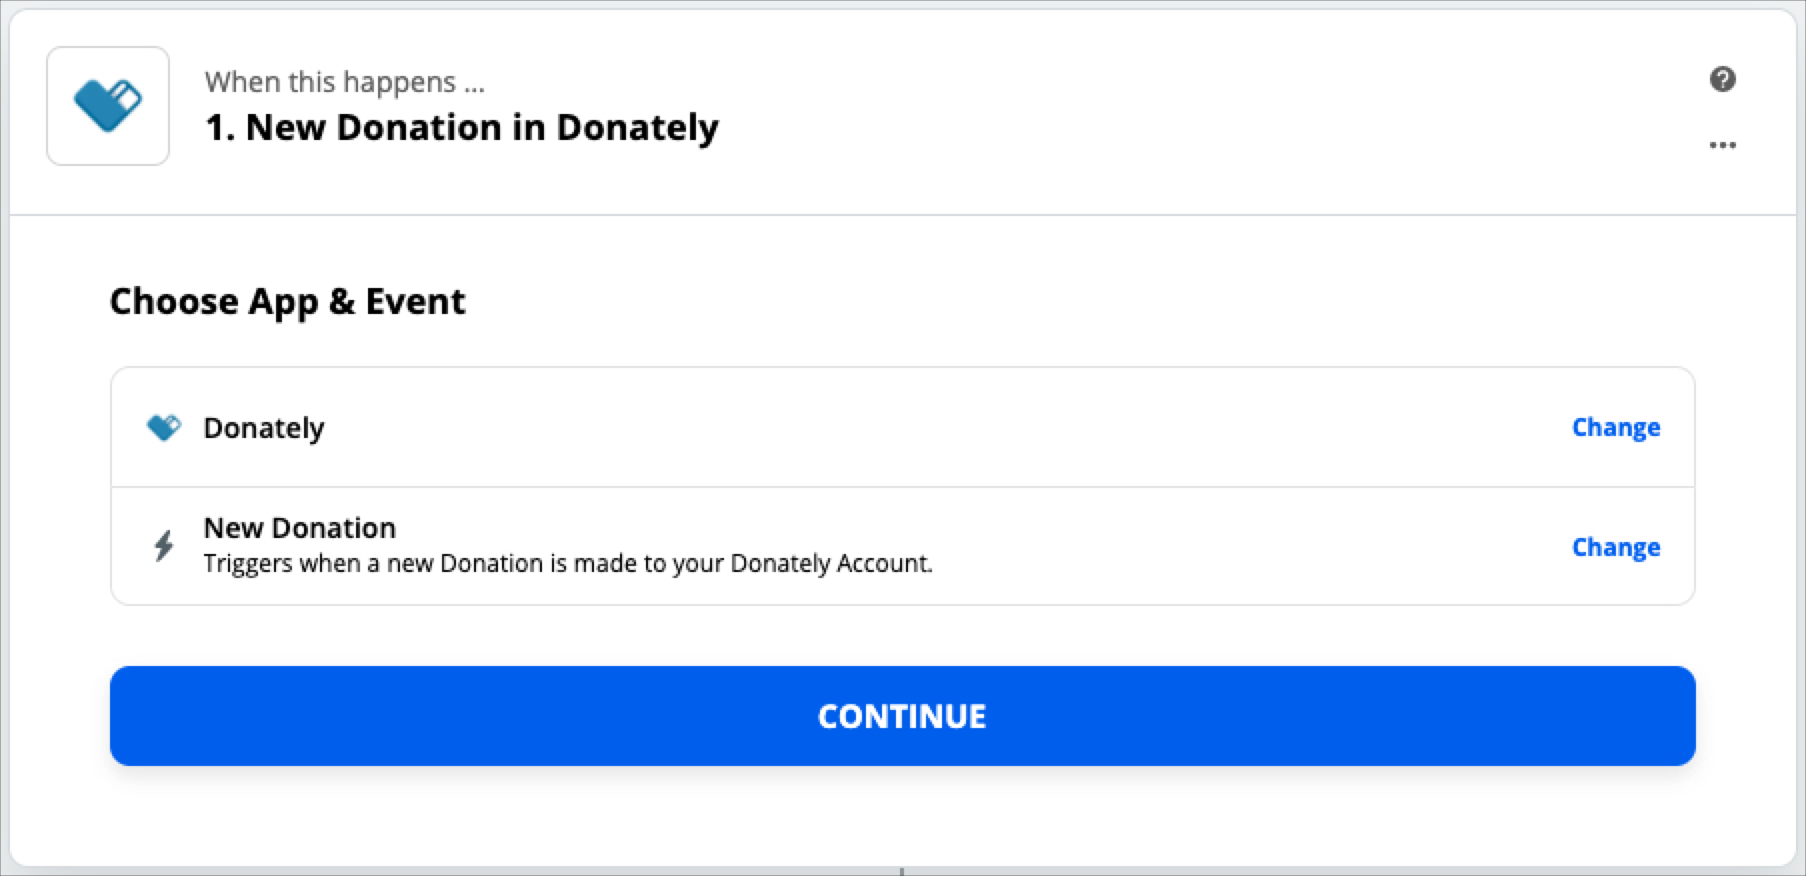
This means that the "Zap" will trigger every time a donation is made. Click "Continue"
Note: You should only have to do this once! If you've already done this, please skip to Step 7.
The next step will trigger a pop-up, asking for information to connect your Donately account to Zapier. See the instructions below on how to find each of these elements.
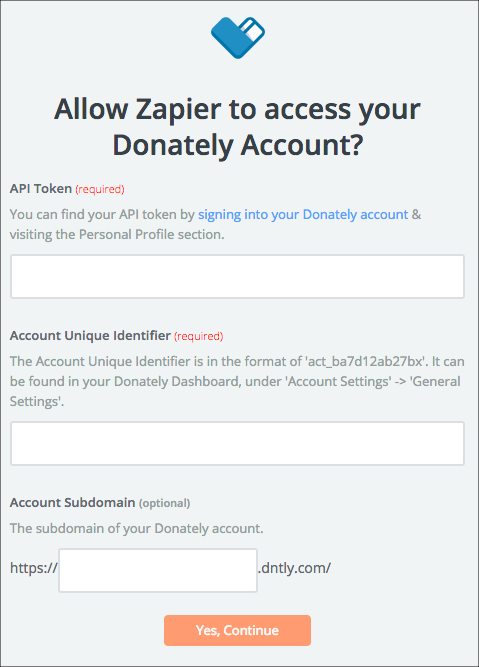
Go directly to this page, or click on "Integrations" along the left-hand menu. Once on the "Integrations" page, click "Donately API". The next screen will have both your Account ID as well as your API token. Simply click "Show API Token" to reveal your token.

Copy and paste both into the appropriate fields in the Zapier pop-up. Note: When you paste in your Account ID, be sure no space is added to the end!
Go directly to this page, or click "Account Settings" from the left-hand menu. Your "Account Subdomain" is your "Account Slug" in the Donately dashboard. This is the second field under the "Account Attributes" section.
Copy and paste the slug into the "Account Subdomain" field in the Zapier pop-up.
After you fill in all of that information, click "Yes Continue."
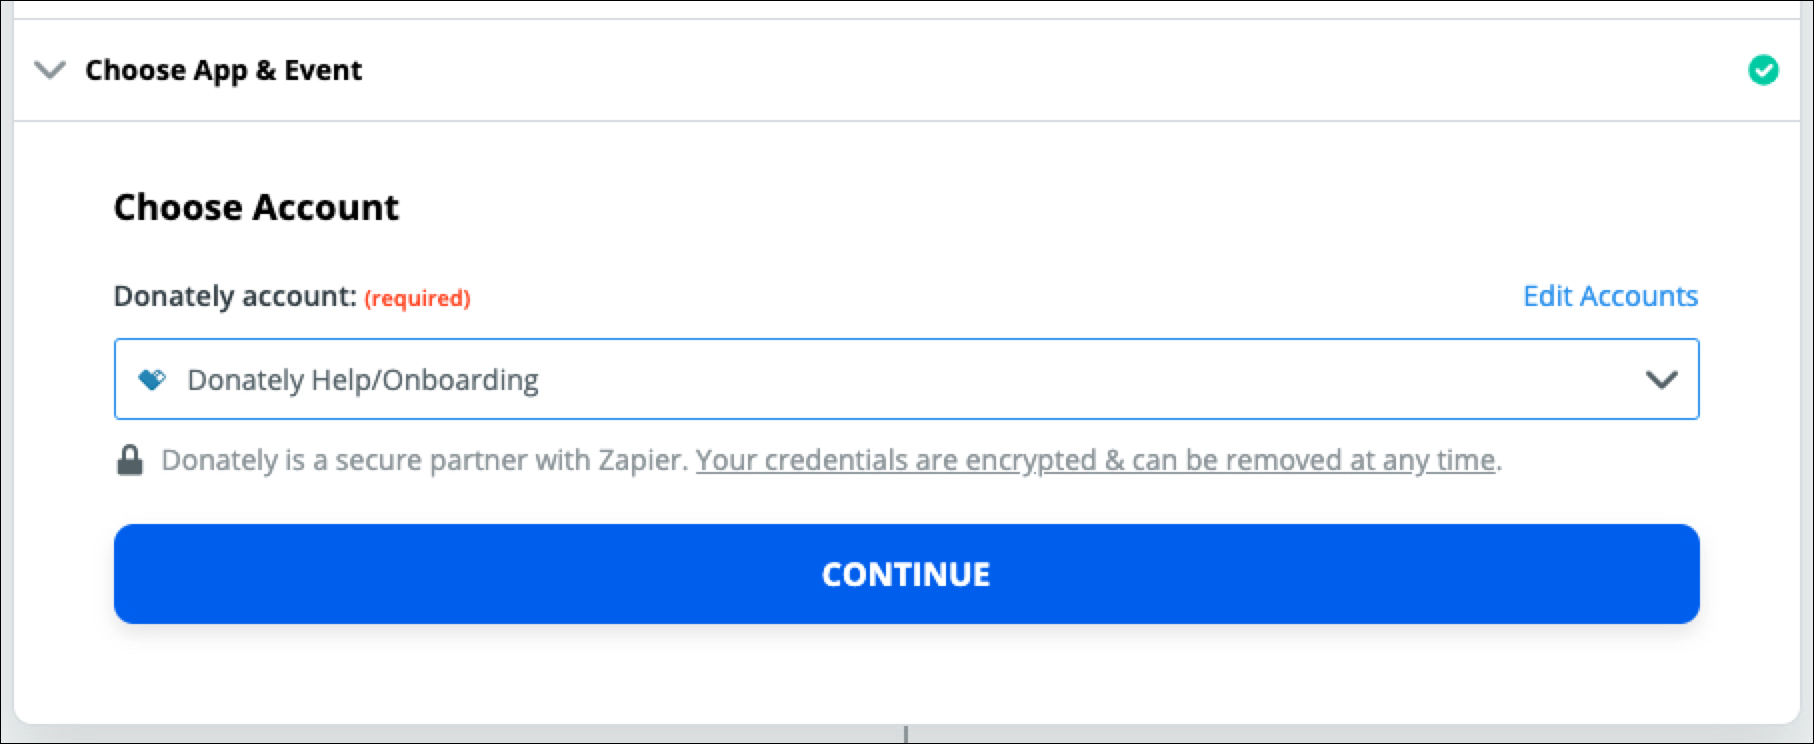
When you're back to Zapier, click "Continue":
On the next page, you'll want to pull in the example donation data you did in Step 2, so that you have context for what you'll be sending in the acknowledgment email. You'll need to click "Test trigger" to pull in donations from your Donately account.
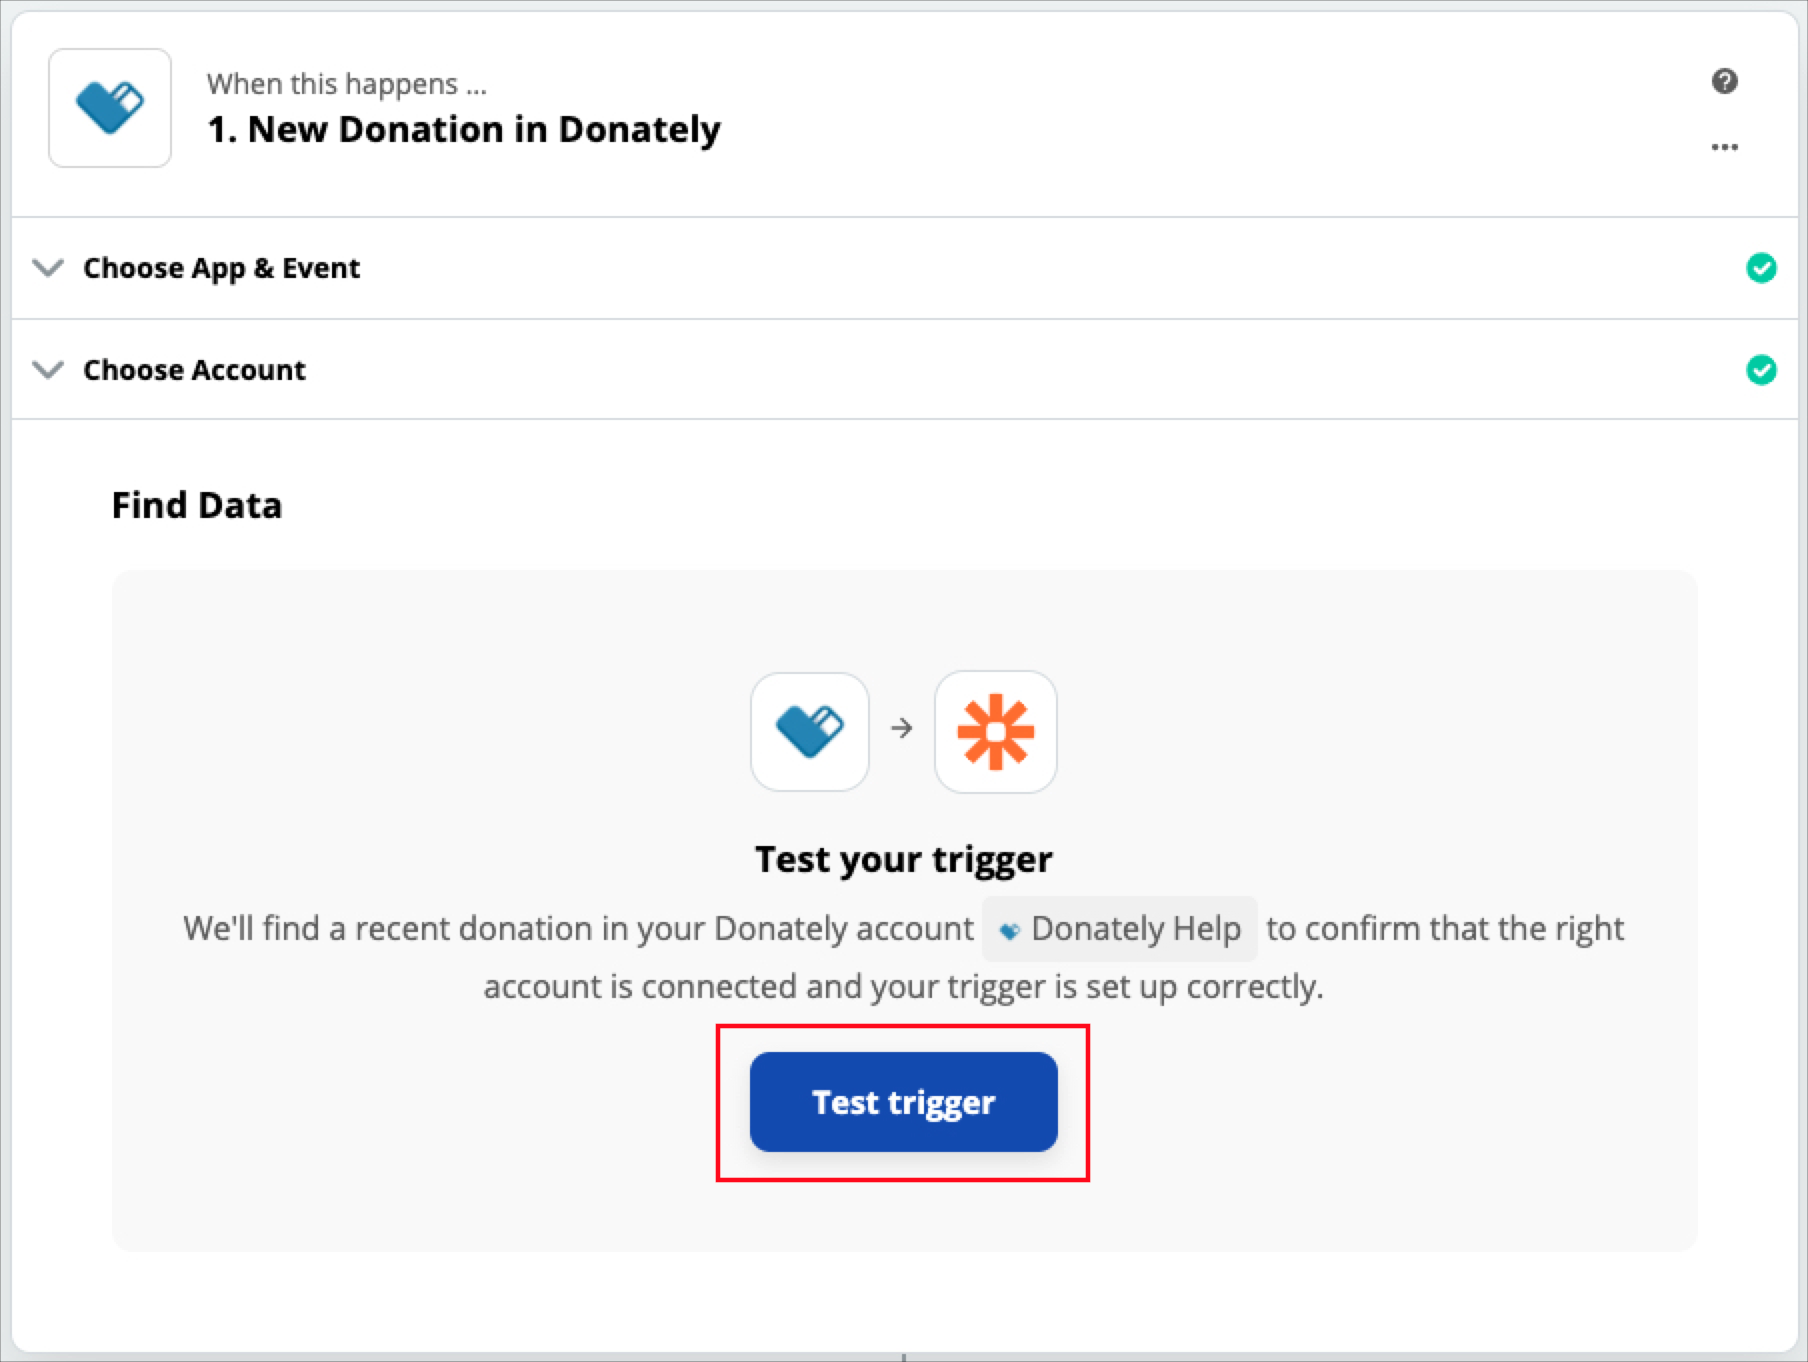
Once donations are pulled in, find the test donation you made in Step 2.
You can verify this by scrolling down on the pulled in data until you see the "Meta Data" section, which should contain the test On Behalf Of Email & Message that you made in your test donation:
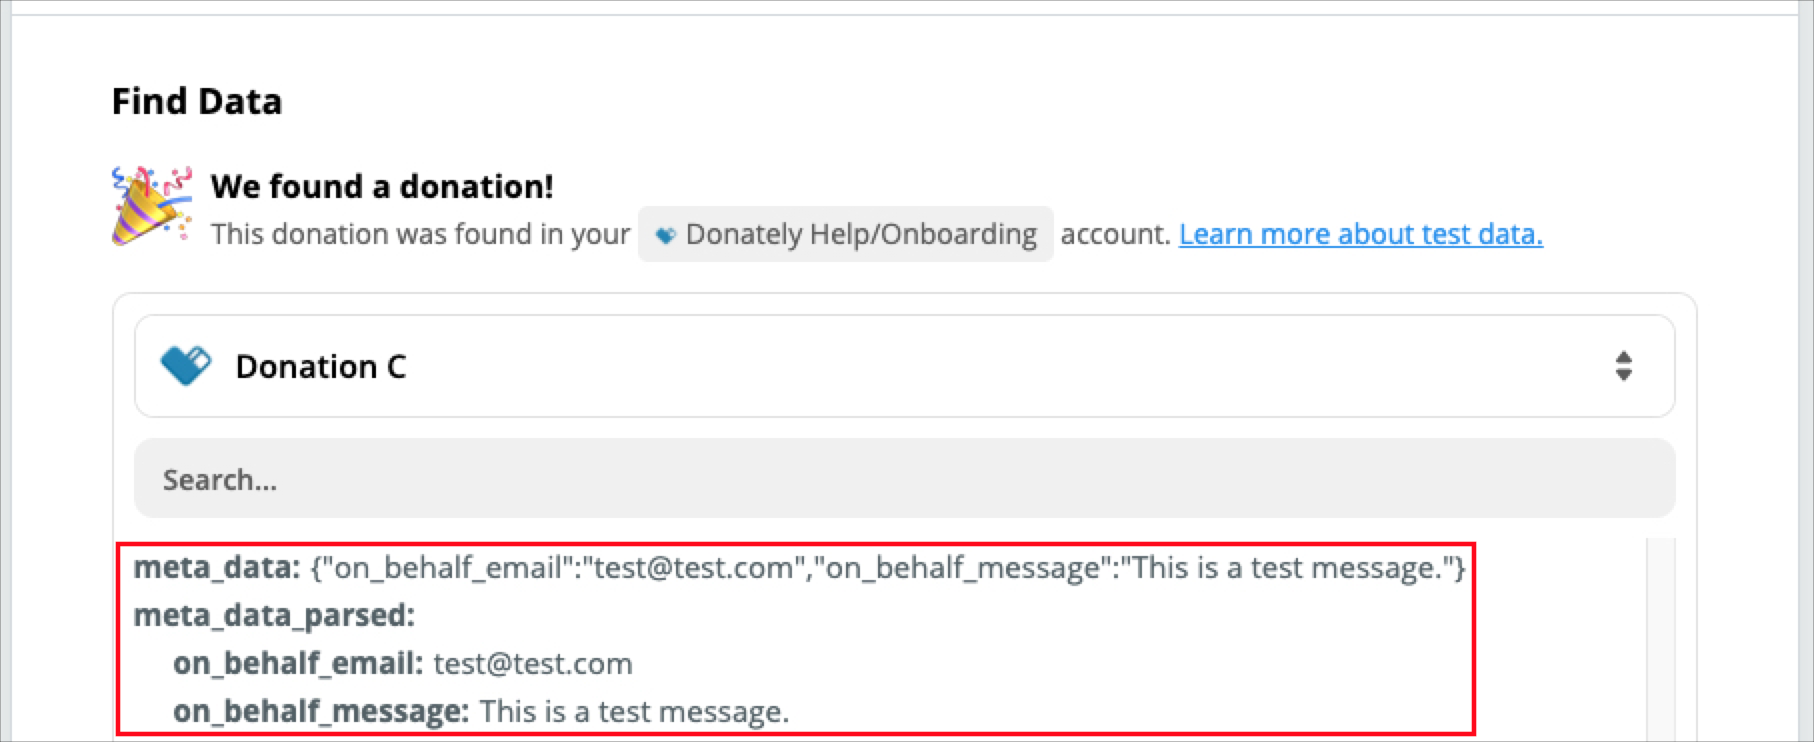
Since the On Behalf Of name field is a standard field, that will be found in another section, but rest assured it is there if you entered it during the test donation.
Once you've found the donation, click "Continue".
Step 8. Set a Filter
Since you'll only want this email to send if the donor fills out an on-behalf-of email, you can optionally set a filter here to only continue this Zap if there is data for this field. While you could technically skip this step and fill the Zap out to fail when that field is not filled in, Zapier may eventually turn this Zap off if it fails too often.
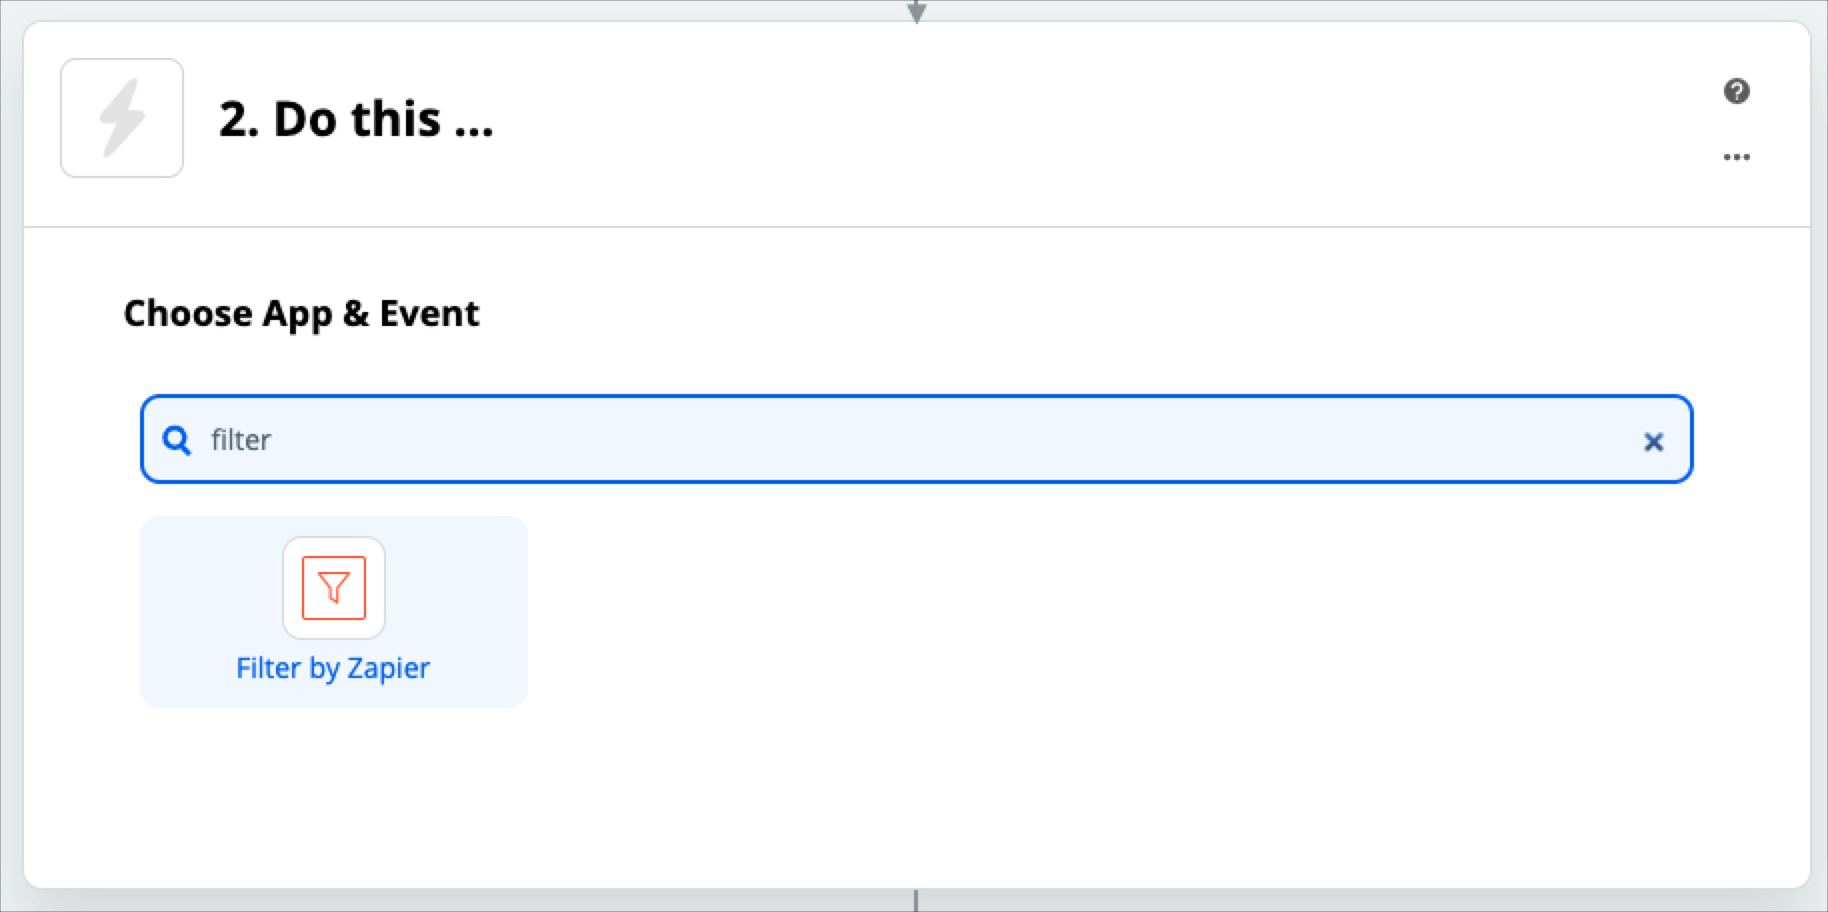
To create the filter, search, or click on the "Filter by Zapier" app:
To create the filter, click on the "Choose Field" field, then search for "On Behalf":
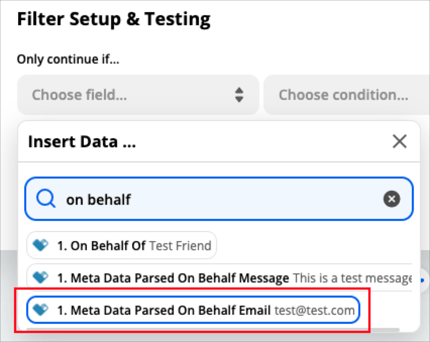
Once the three fields come up, click on the metadata field for which the email is entered. Since you only want this Zap to happen when you have an email to send it to, this is the most important field to filter by.
For the condition, choose "Exists":
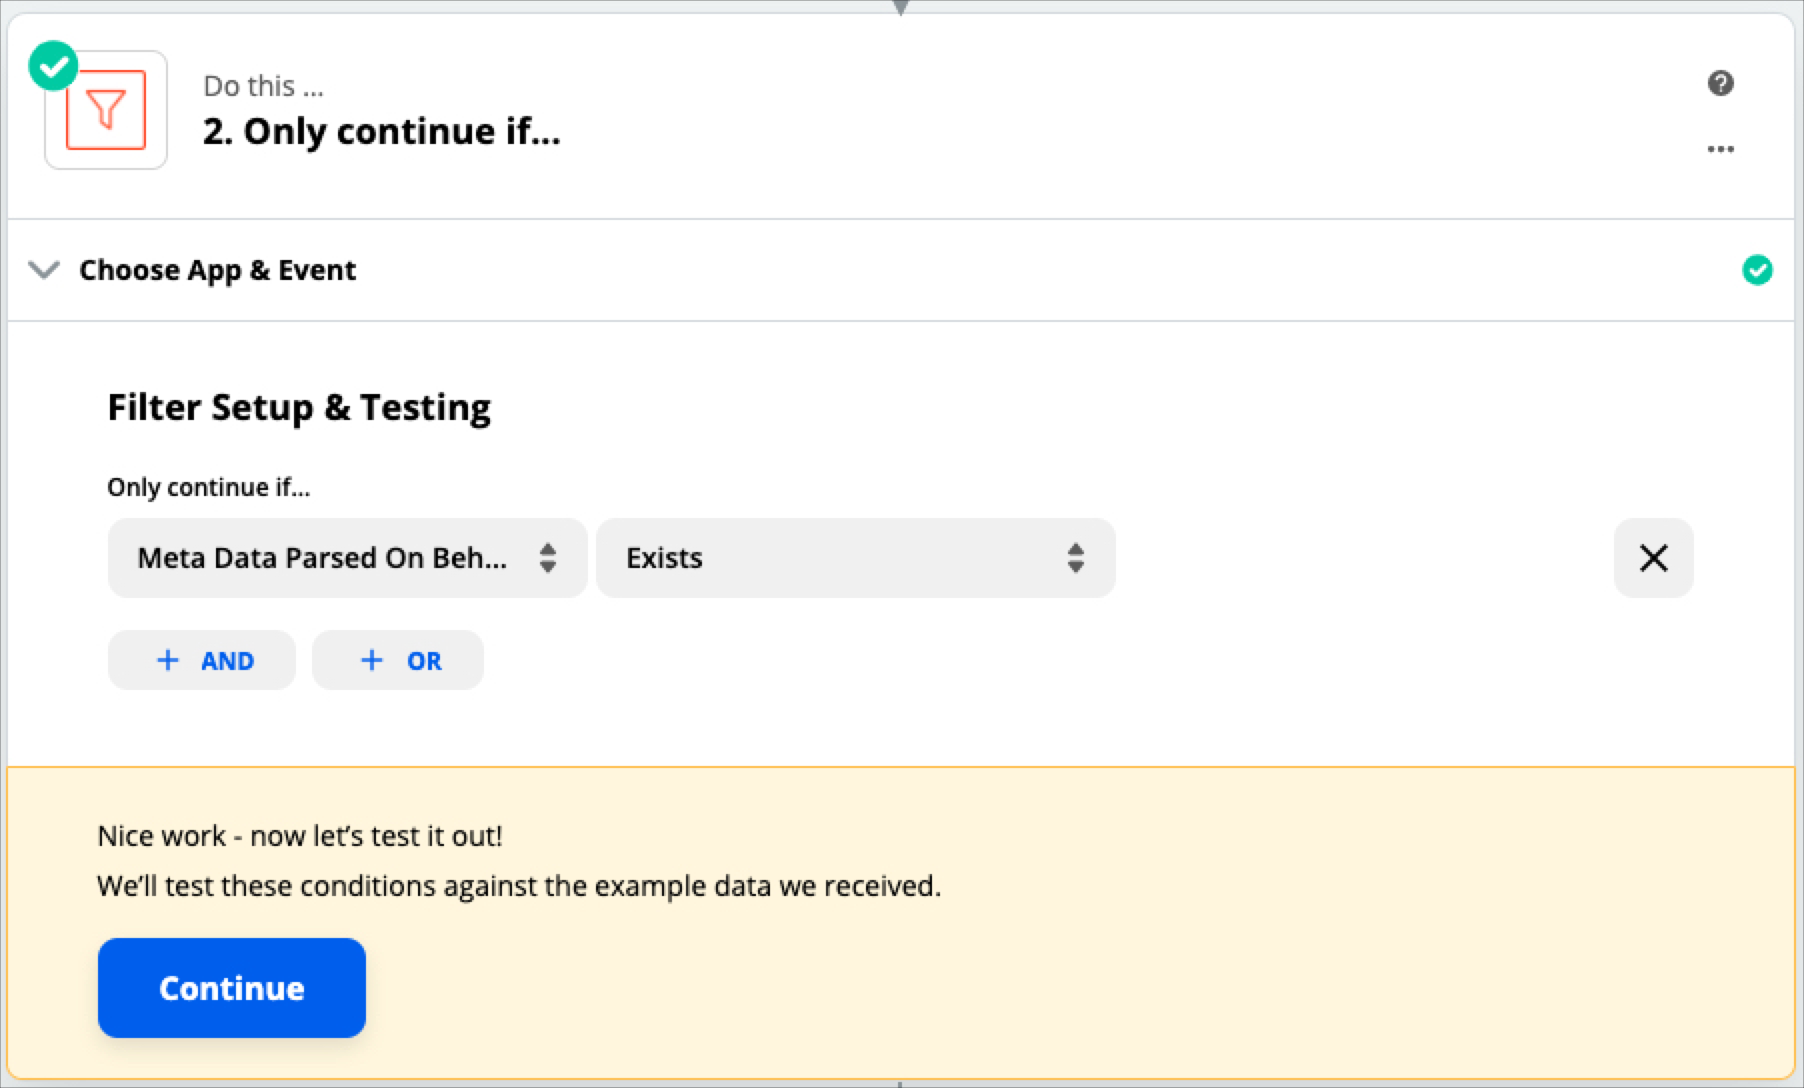
This is now telling Zapier to only continue with this Zap if there is an email entered for an acknowledgment. If there is not an email entered in the custom field you created during Step 1, this Zap will stop and not proceed.
Click "Continue", and a test will run determining if this example Zap would continue. As long as you pulled in the test donation from Step 1 with an email, you should see the screen below:
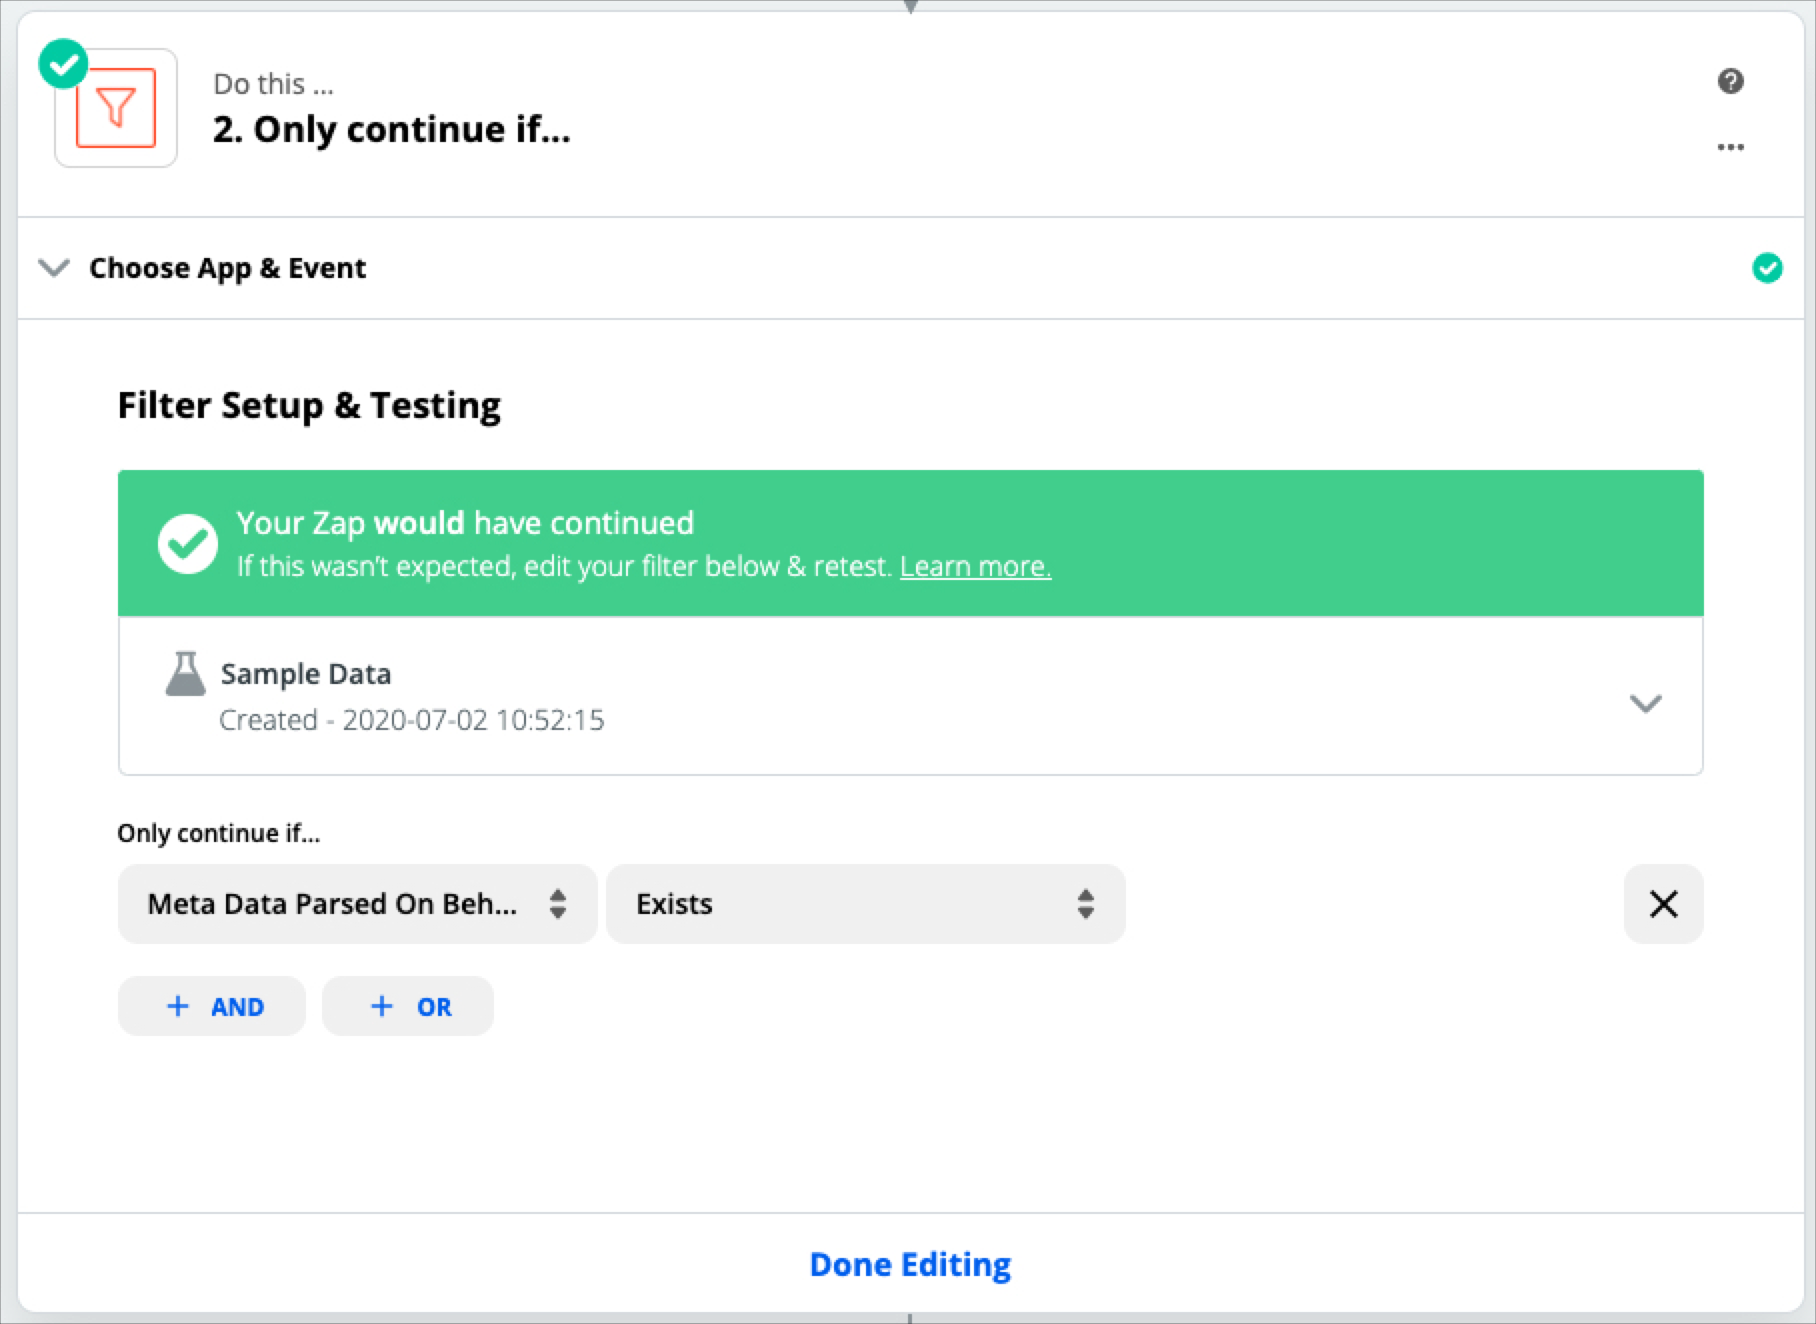
Click "Done Editing"
Step 9. Choose Your Email App
This step is basically the same regardless of which provider you use to send these acknowledgment emails.
To add an email step, click on the little + icon below the filter step of the Zap:

For this example, we'll be using Zapier's built-in email tool. You could also use something like SendGrid or Mandrill.
Note: Since this is a transactional email that needs to be triggered at the time of the donation, MailChimp likely would not be a good solution here.
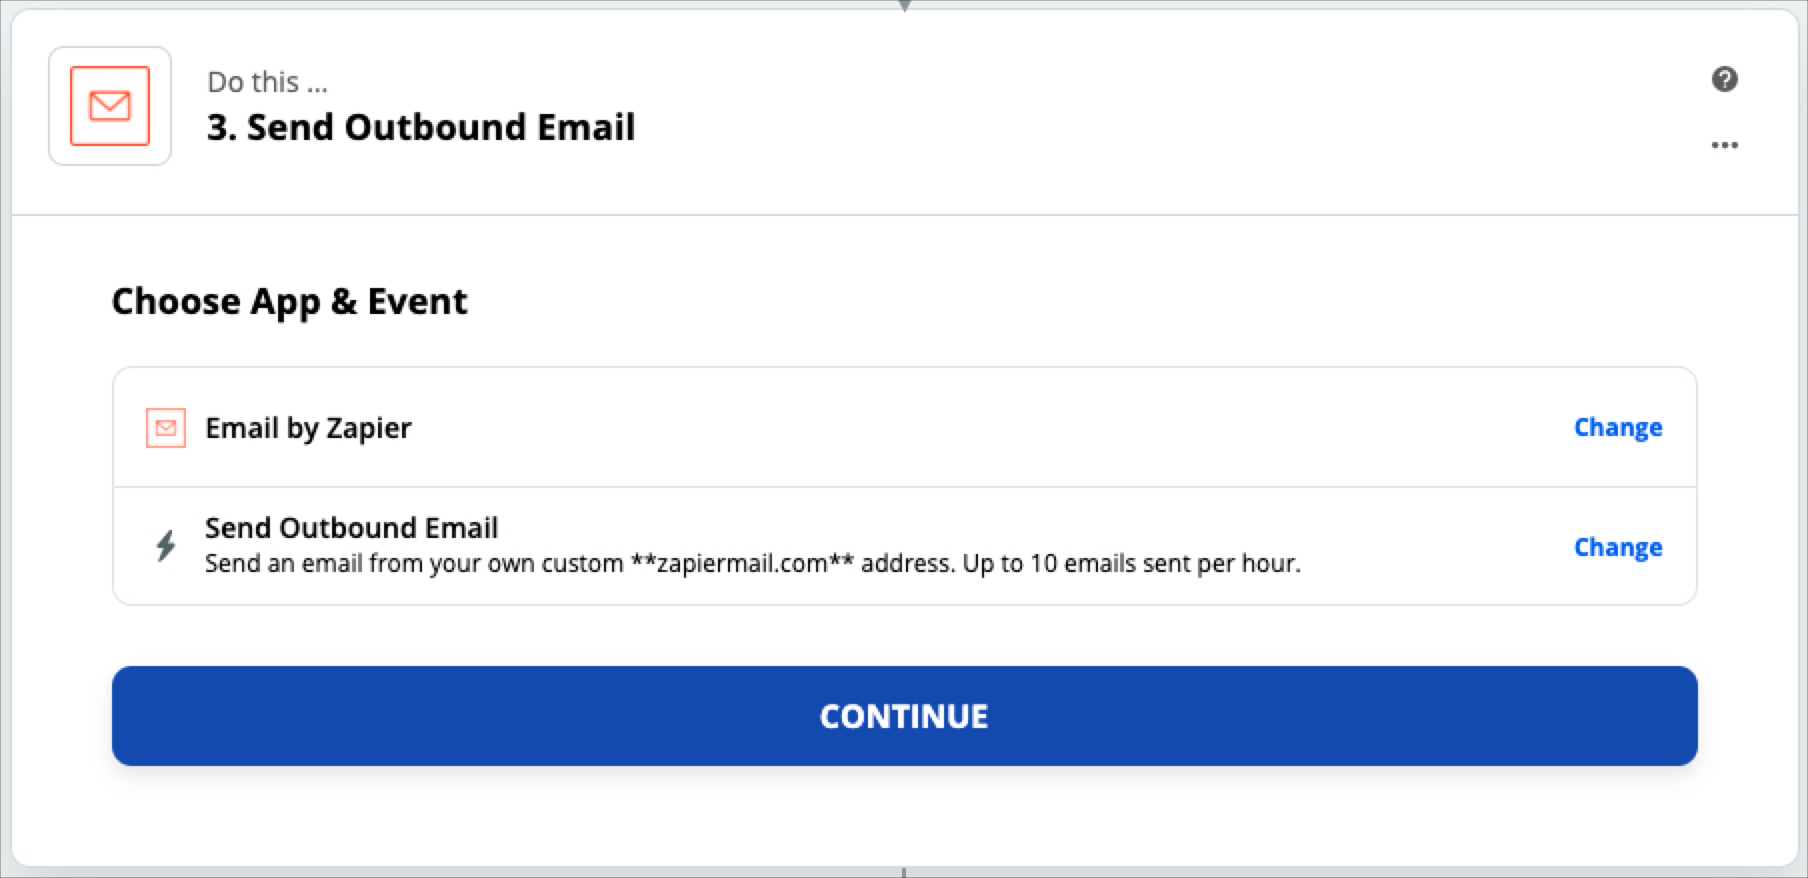
Click "Continue"
Step 10. Create Your Email
To add content to your email, you can either enter it yourself, or click into each field to pull find dynamic values from the donation data.
For the "To" field, click on the field, which brings up a prompt. In the prompt, search for "On Behalf", and search for the "On Behalf Email" metadata field from the test donation. This is the same field we're using for the filter as well.
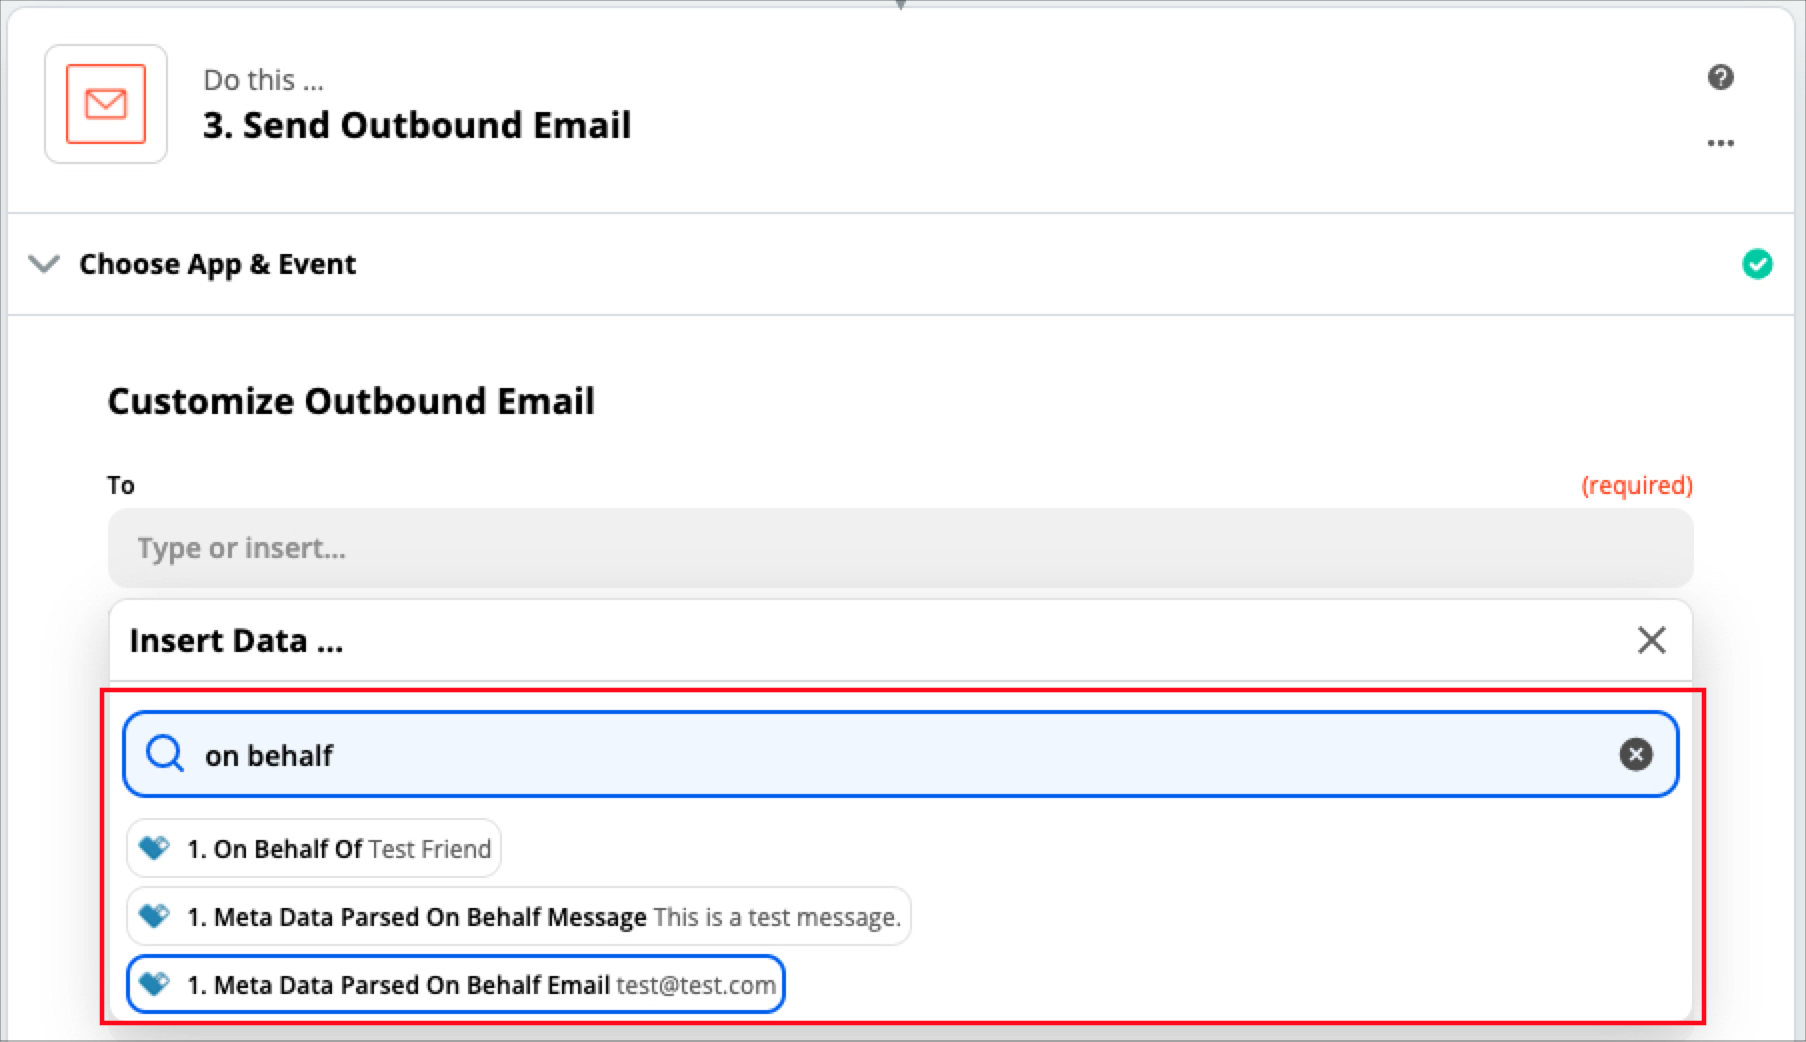
Click on the field, and now each time a donation is made, it will find the email that the donor entered to which you'll be sending the acknowledgment.
Technically, the "To" field is the only required field for the Zapier Email App. However, you'll definitely want to add a Subject Line and Body Copy. YOu could also opt to send a copy of this acknowledgment email to the original donor if you'd like.
If you want to add dynamic variables from the donation into your email copy, such as the on behalf of message, donation amount, donor's name, or anything else, simply click into the body field and the prompt will come up.

For this example, here is what we entered:
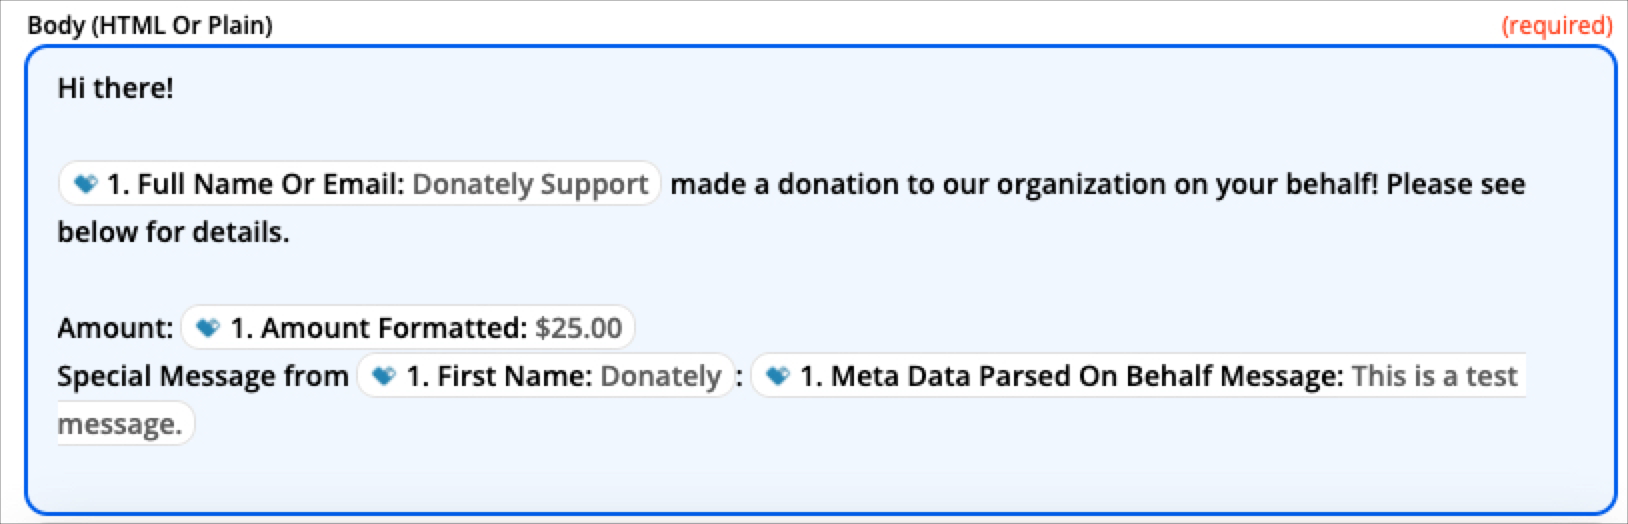
Once you have the body entered, fill out any other details about the email that you'd like. If you'd like to send the original donor a copy of this email, select their email in either the CC or BCC field.
Click "Continue" once satisfied.
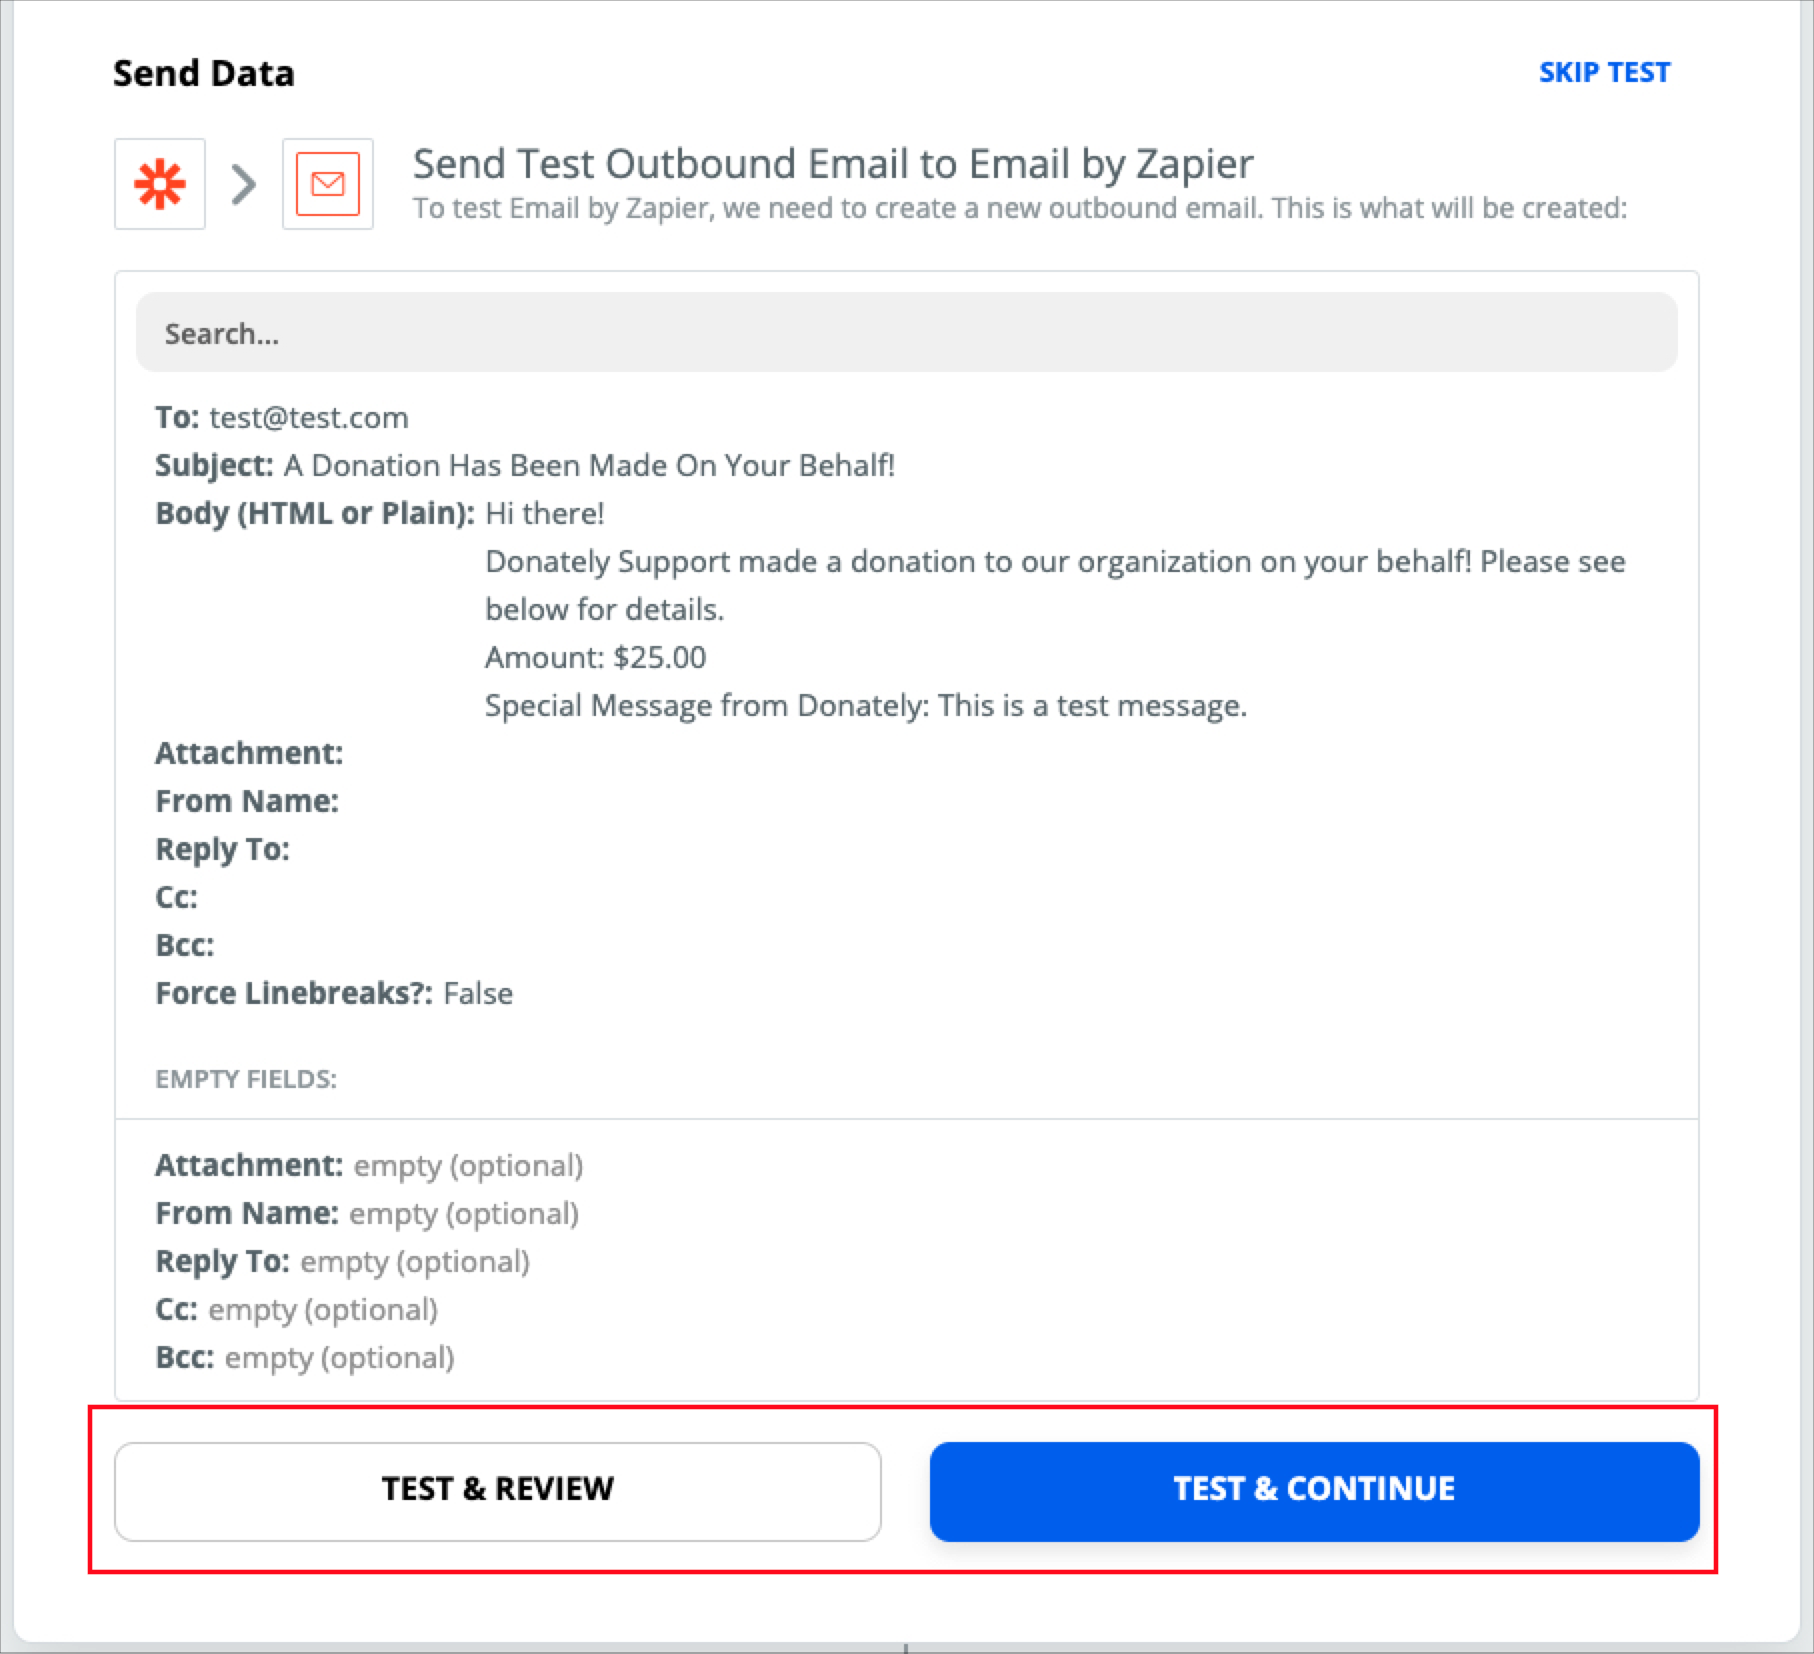
Step 11. Test Your Email
On the next step, we recommend testing your email. Clicking on "Test & Review" will give you a chance to easily make edits after the test, however even if you click "Test & Continue", you can still make edits later.
Note, clicking "Test" here will send an actual email to anyone listed in the Zap. This includes the email in the "To" field and any in the CC or BCC fields.
As we recommended, you should have put your own email in here when creating the test donation.
If the test was successful, you'll see this page:
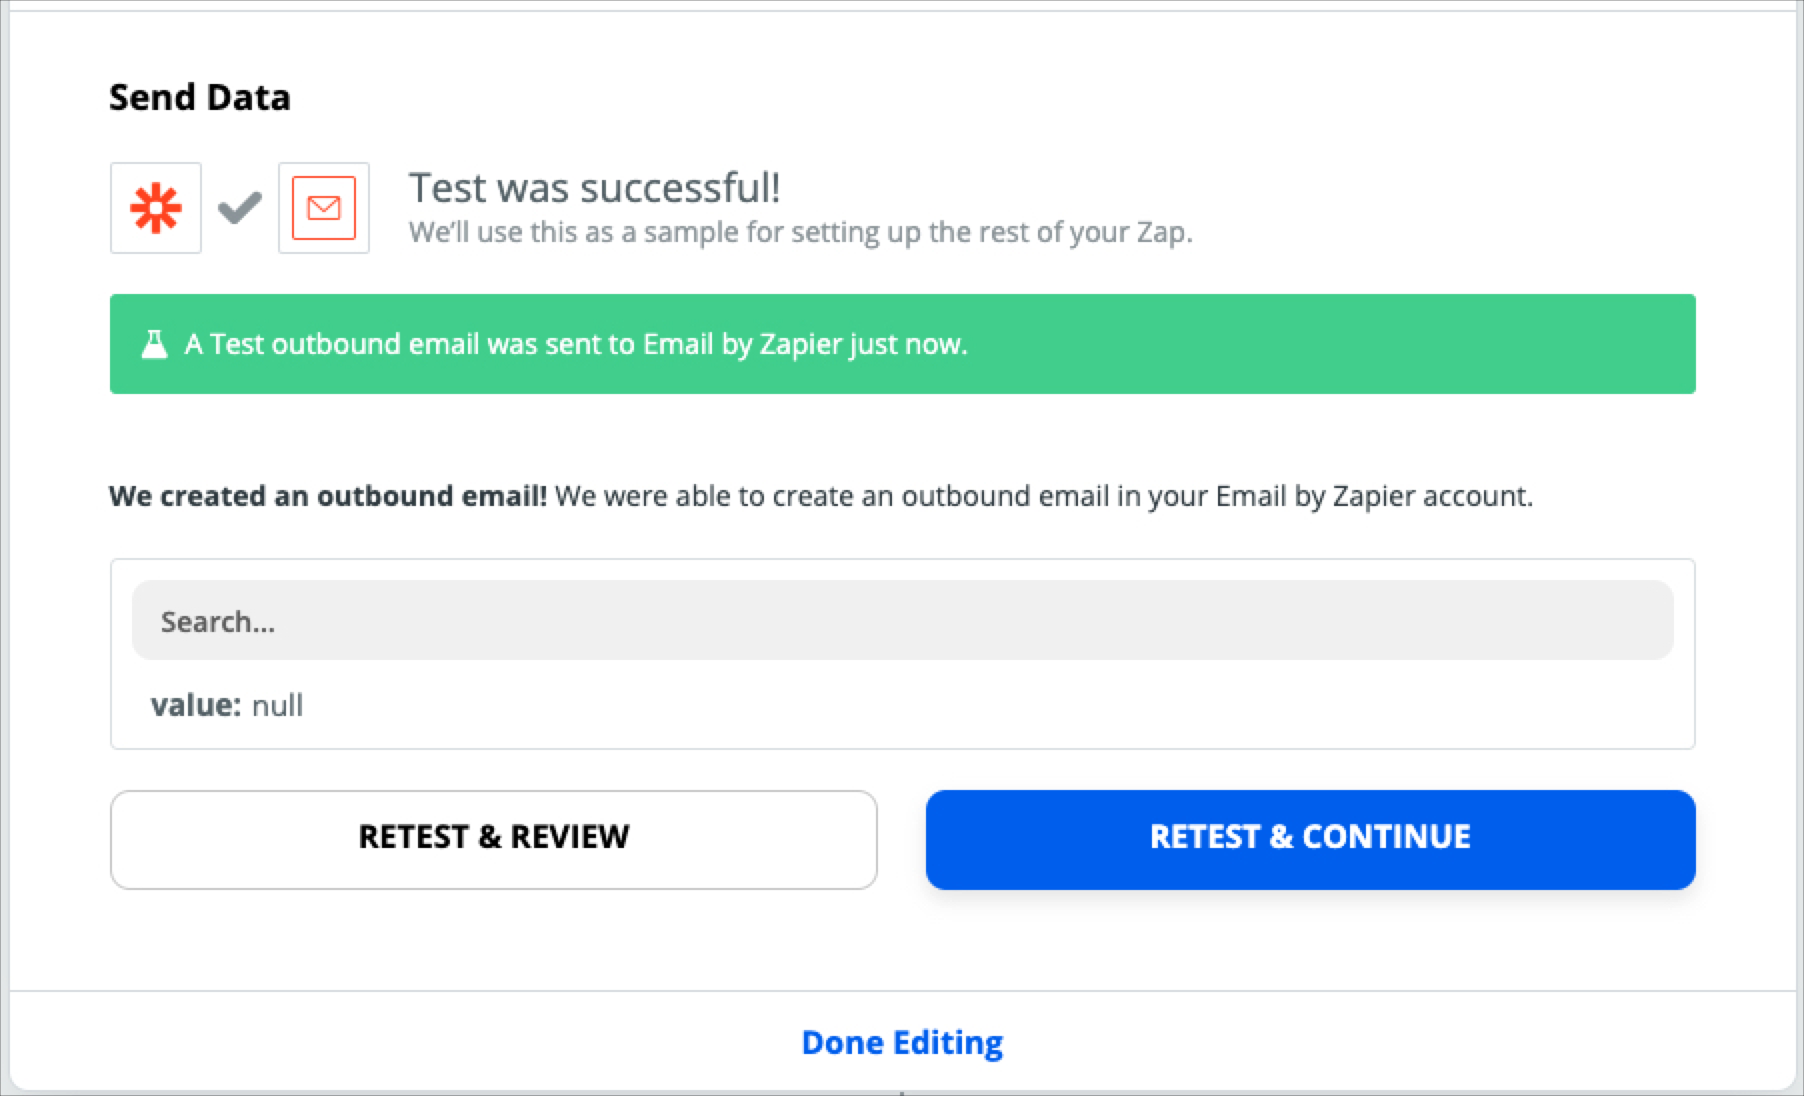
Once you look at the email that was delivered to your inbox, you can either make edits (for this guide, return to Step 10) or click "Done Editing" if you're satisfied.
Finally, at the bottom of the page, turn your Zap on!
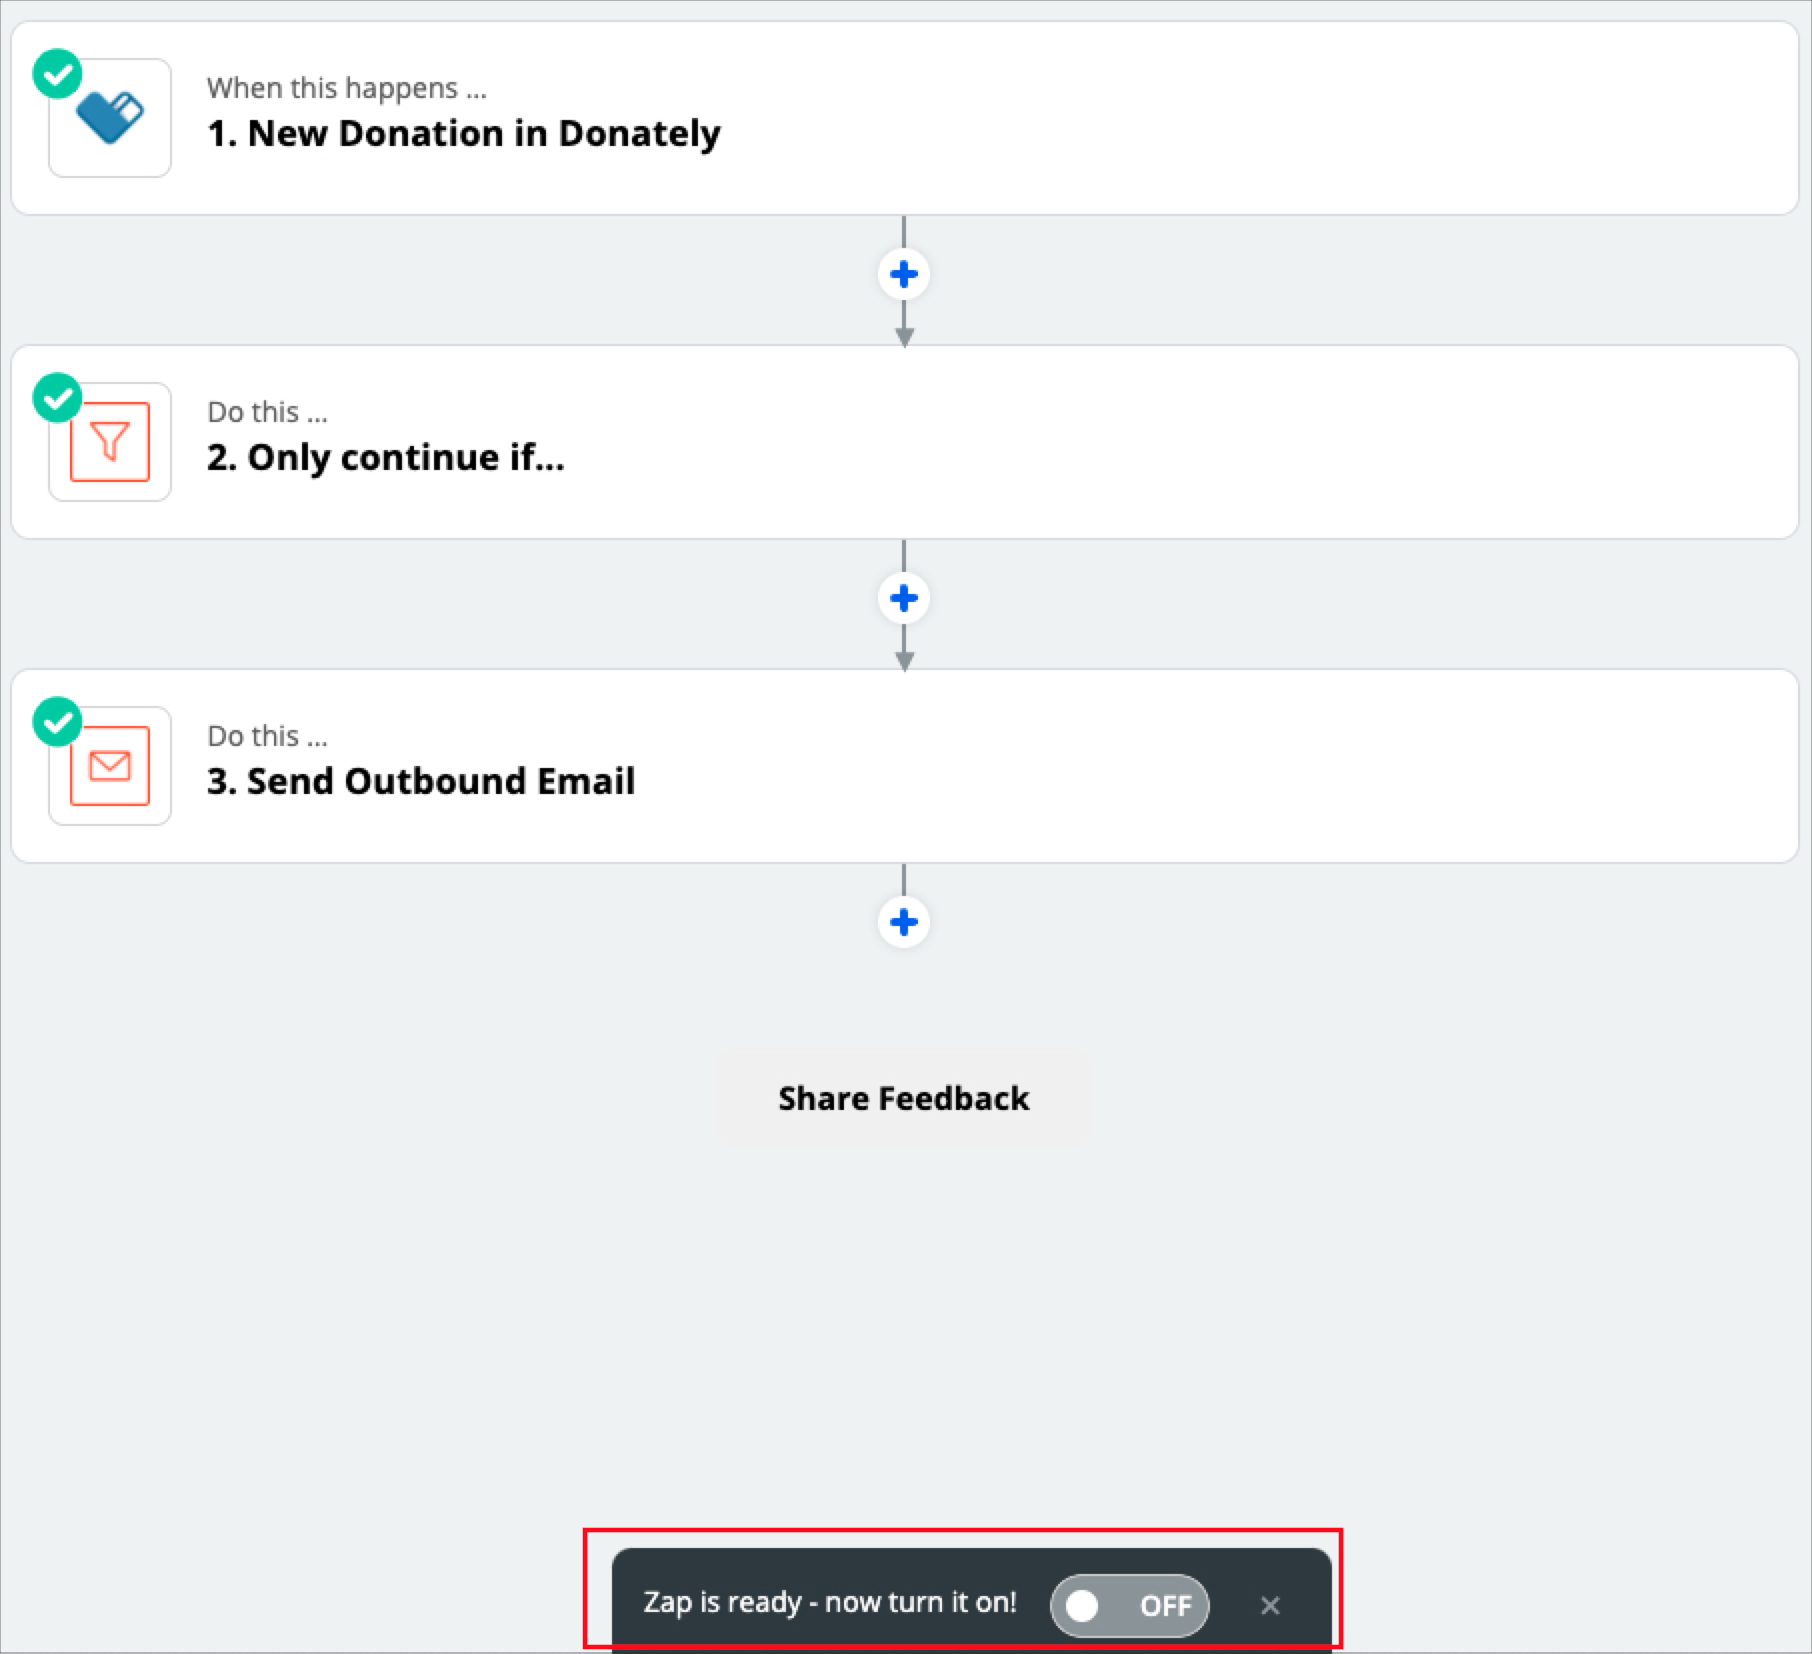
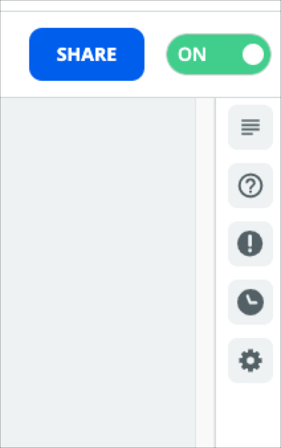
Once the Zap is on, you'll see a bright green "ON" in the top right-hand corner.
From this point forward, anyone who fills in an "On Behalf Of" email in the custom field you created will be sent an acknowledgment email by Zapier automatically!