Donately's Form Builder has been updated since this article. To access newer Form Builder tutorials, click here.
Donately comes with the ability to add many fields to your form without any coding, but if you'd like to add custom fields, follow this guide.
Inputs to any custom fields will show in the Donately dashboard as meta-data. This is viewable when clicking into the donation detail from the Donations page.
Additionally, you can view inputs to custom fields by exporting data. When you export donation data, the custom field values will be in the right-most column(s).
Step 1. Navigate to the Forms page
From any page, click on "Forms" from the left-side menu (or, by clicking this link.)
Step 2. Create a new form, or edit an existing form
You can add a custom field to an existing form, or add a custom field to a new form. Just note, if you are editing an already embedded form on an external site, you will need to replace the entire script tag of the form with the new one you are going to create.
This should be the first step in the form builder.
Below the "Additional Fields" section, you'll see the "Add a Custom Field" button. Clicking on that will bring a menu of custom field types you can add.
Here are the key entries you may be making, depending on the field type:
Label - This is the text that is placed above the field, giving a description of the field.
Placeholder - This is the text that is shown inside a text-field, providing direction.
Field ID - This is the ID that is sent to the database. This is what the data will show when you view a donation, or export. We recommend making this descriptive, so you know what the data corresponds to. For example, if you have an "Employer" text field, make the ID "employer", so it's easy to identify.
Position & Field - This is where the field will be placed within the form. Note: If you are building custom fields that will be back-to-back in a specific order, you will want to create them in reverse order of where you want them to be placed. That is, for example, if you want a dropdown to live above a text field, build the text-field first then the dropdown, making sure to make the "After/Before" and "Position" the same.
Value (Checkbox only) - For most fields, the value will be the input. That is, it will be what the donor enters in a text field. For checkboxes, you'll want to set this to "true" (it's set like this by default).
IDs & Options (Dropdowns only) - These are described in further detail in the "Checkbox" section.
Text (Section Heading only) - If you have a section heading, or a block of text in the form, this is what will show on the form. More details in the "Section Heading" section below.
Click below for a break down of each custom field type:
Custom Field Type 1: Text Field
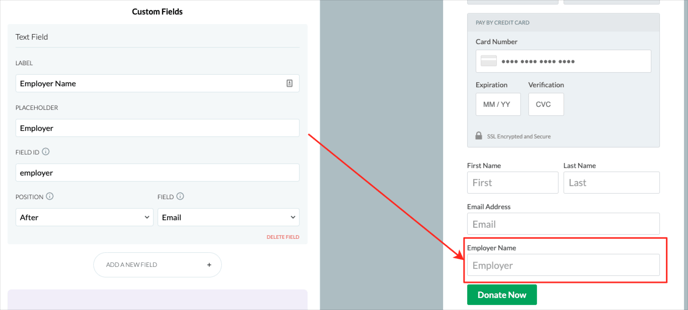
A text field is a simple, single-line text entry field. This is useful for adding things such as "employer" or "nickname".
You'll need to input:
- Label - Text shown above the field ("Employer Name" in the example above)
- Placeholder - The text shown inside the field before the donor enters their response ("Employer" in the example above)
- Field ID - This the value sent to the database so you can easily identify the selection. ("employer" in the example above)
- Position - Where the field will be placed within the form ("After Email" in the example above)
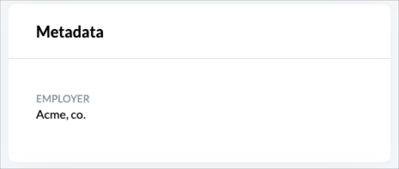
If the donor entered "Acme, co." in this field, this is what you'll see on the donation detail page:
Custom Field Type 2: Text Area
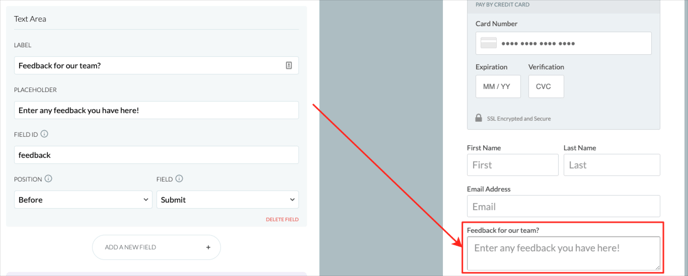
Text areas are just larger text boxes, which can be used for comments, or longer inscriptions.
You'll need to input:
- Label - Text shown above the field ("Feedback for our team?" in the example above)
- Placeholder - The text shown inside the field before the donor enters their response ("Enter any feedback you have here!" in the example above)
- Field ID - This the value sent to the database so you can easily identify the selection. ("feedback" in the example above)
- Position - Where the field will be placed within the form ("Before Submit" in the example above)
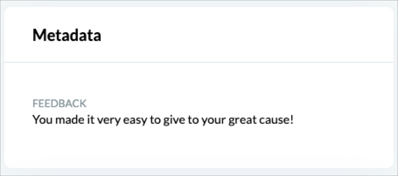
If the donor entered "You made it very easy to give to your great cause" in this field, this is what you'll see on the donation detail page:
Custom Field Type 3: Email Field
Email fields are useful if you're collecting a second email for the donation, such as for a secondary contact.
You'll need to input:
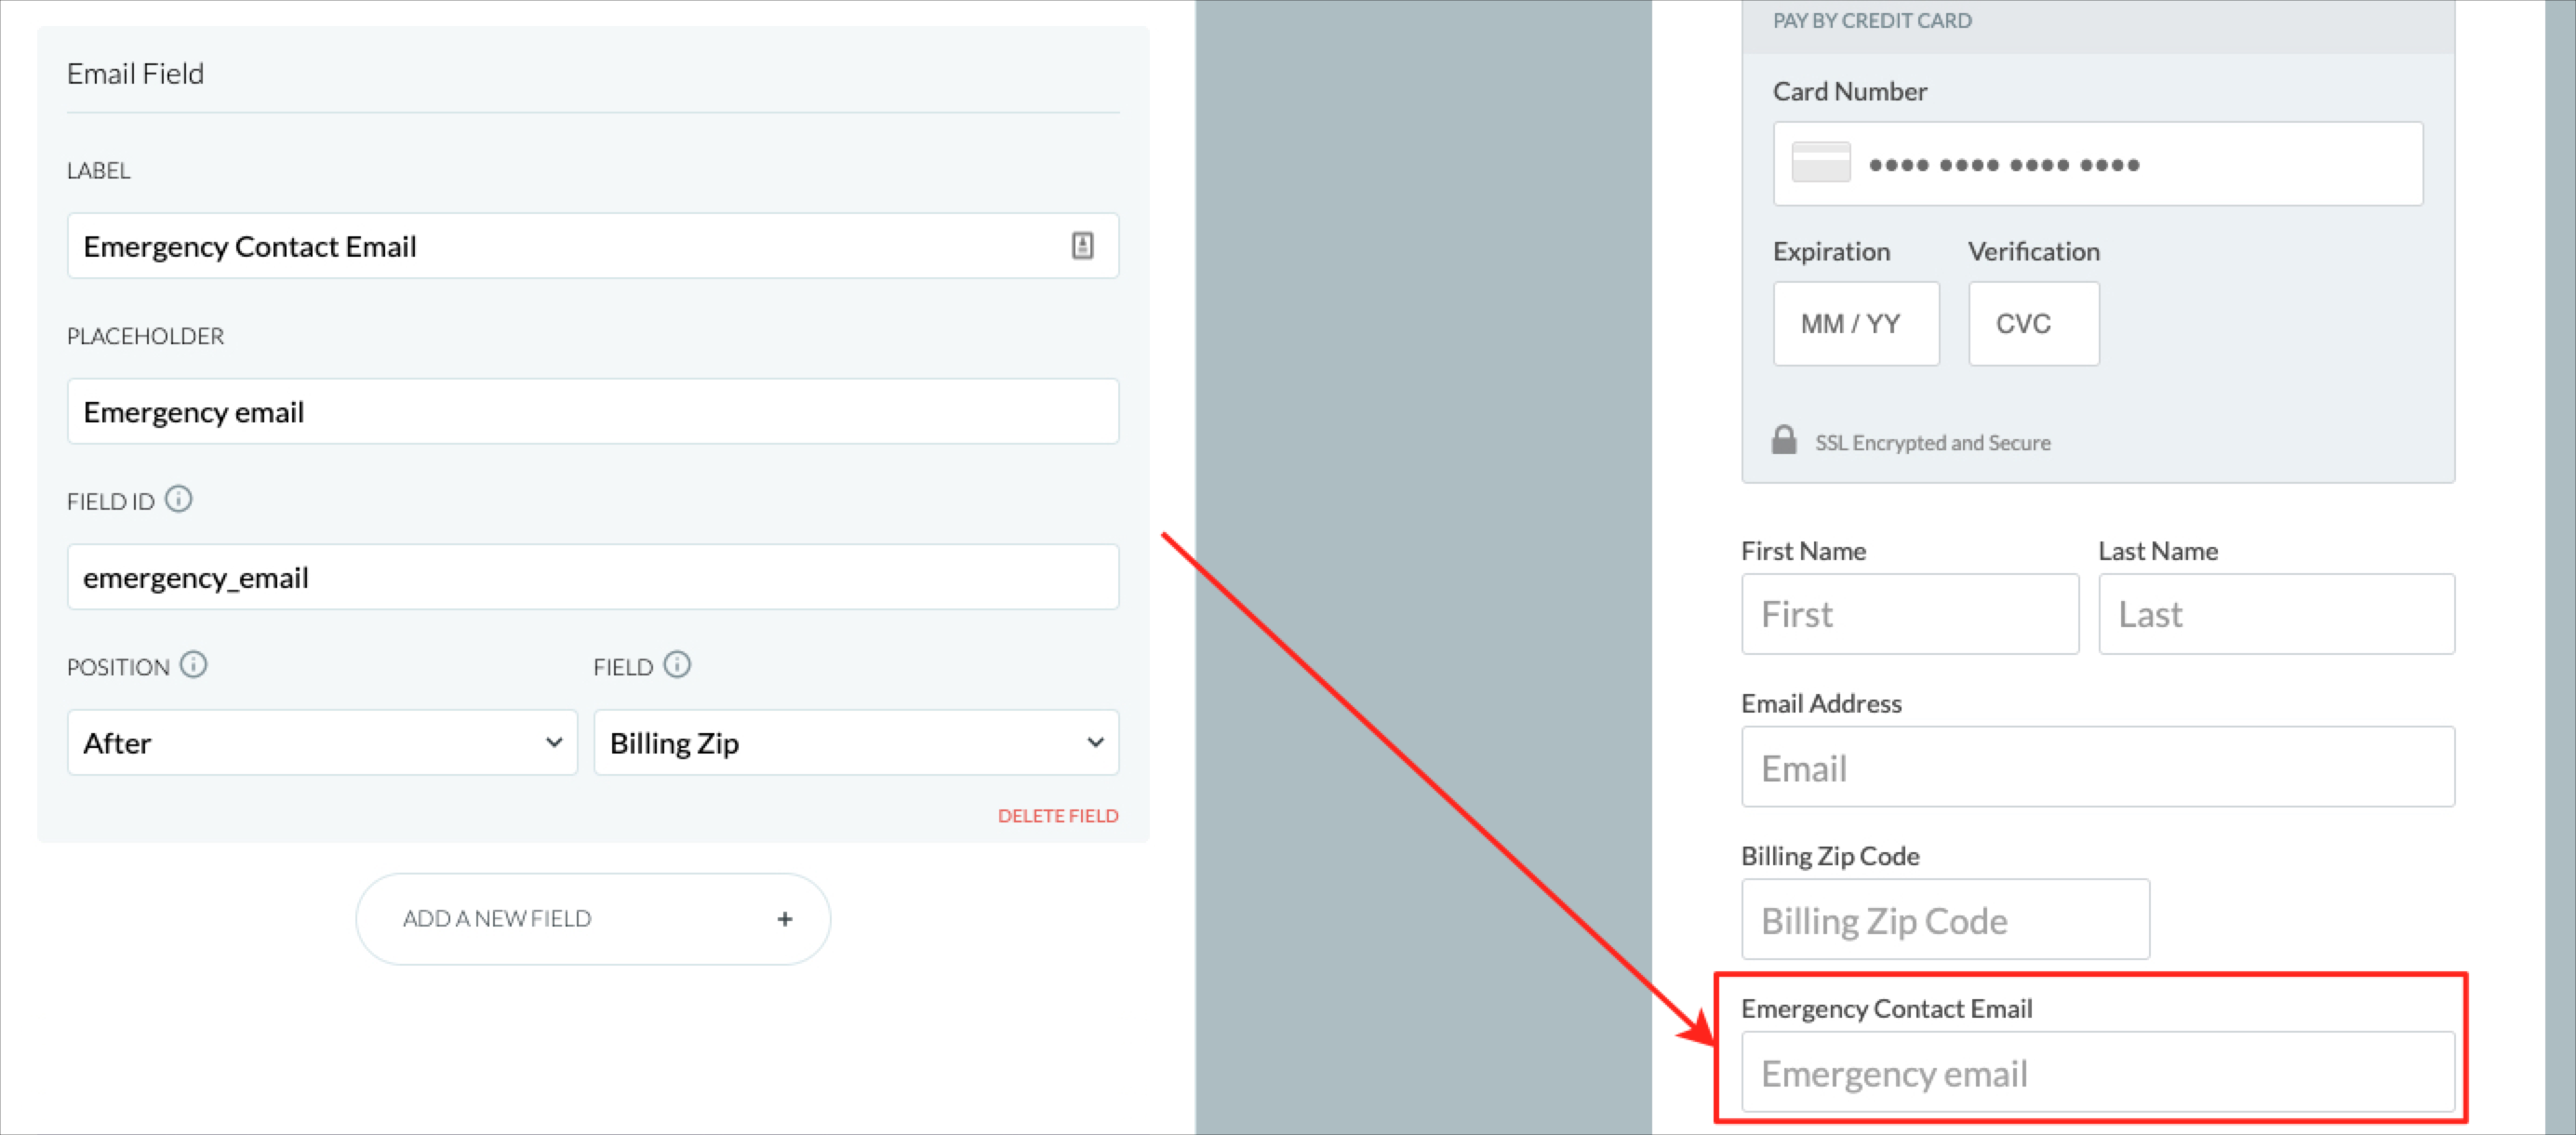
- Label - Text shown above the field ("Emergency Contact Email" in the example above)
- Placeholder - The text shown inside the field before the donor enters their response ("Emergency email" in the example above)
- Field ID - This the value sent to the database so you can easily identify the selection. ("emergency_email" in the example above)
- Position - Where the field will be placed within the form ("After Billing Zip" in the example above)
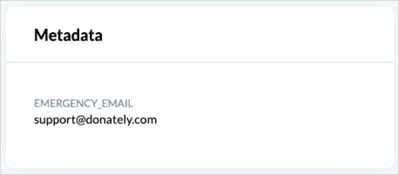
If the donor entered "support@donately.com" in this field, this is what you'll see on the donation detail page:
Custom Field Type 4: Checkbox
Checkboxes are great when asking donors to opt-in to something, such as a newsletter, or agreeing to terms and conditions.
You'll need to input:
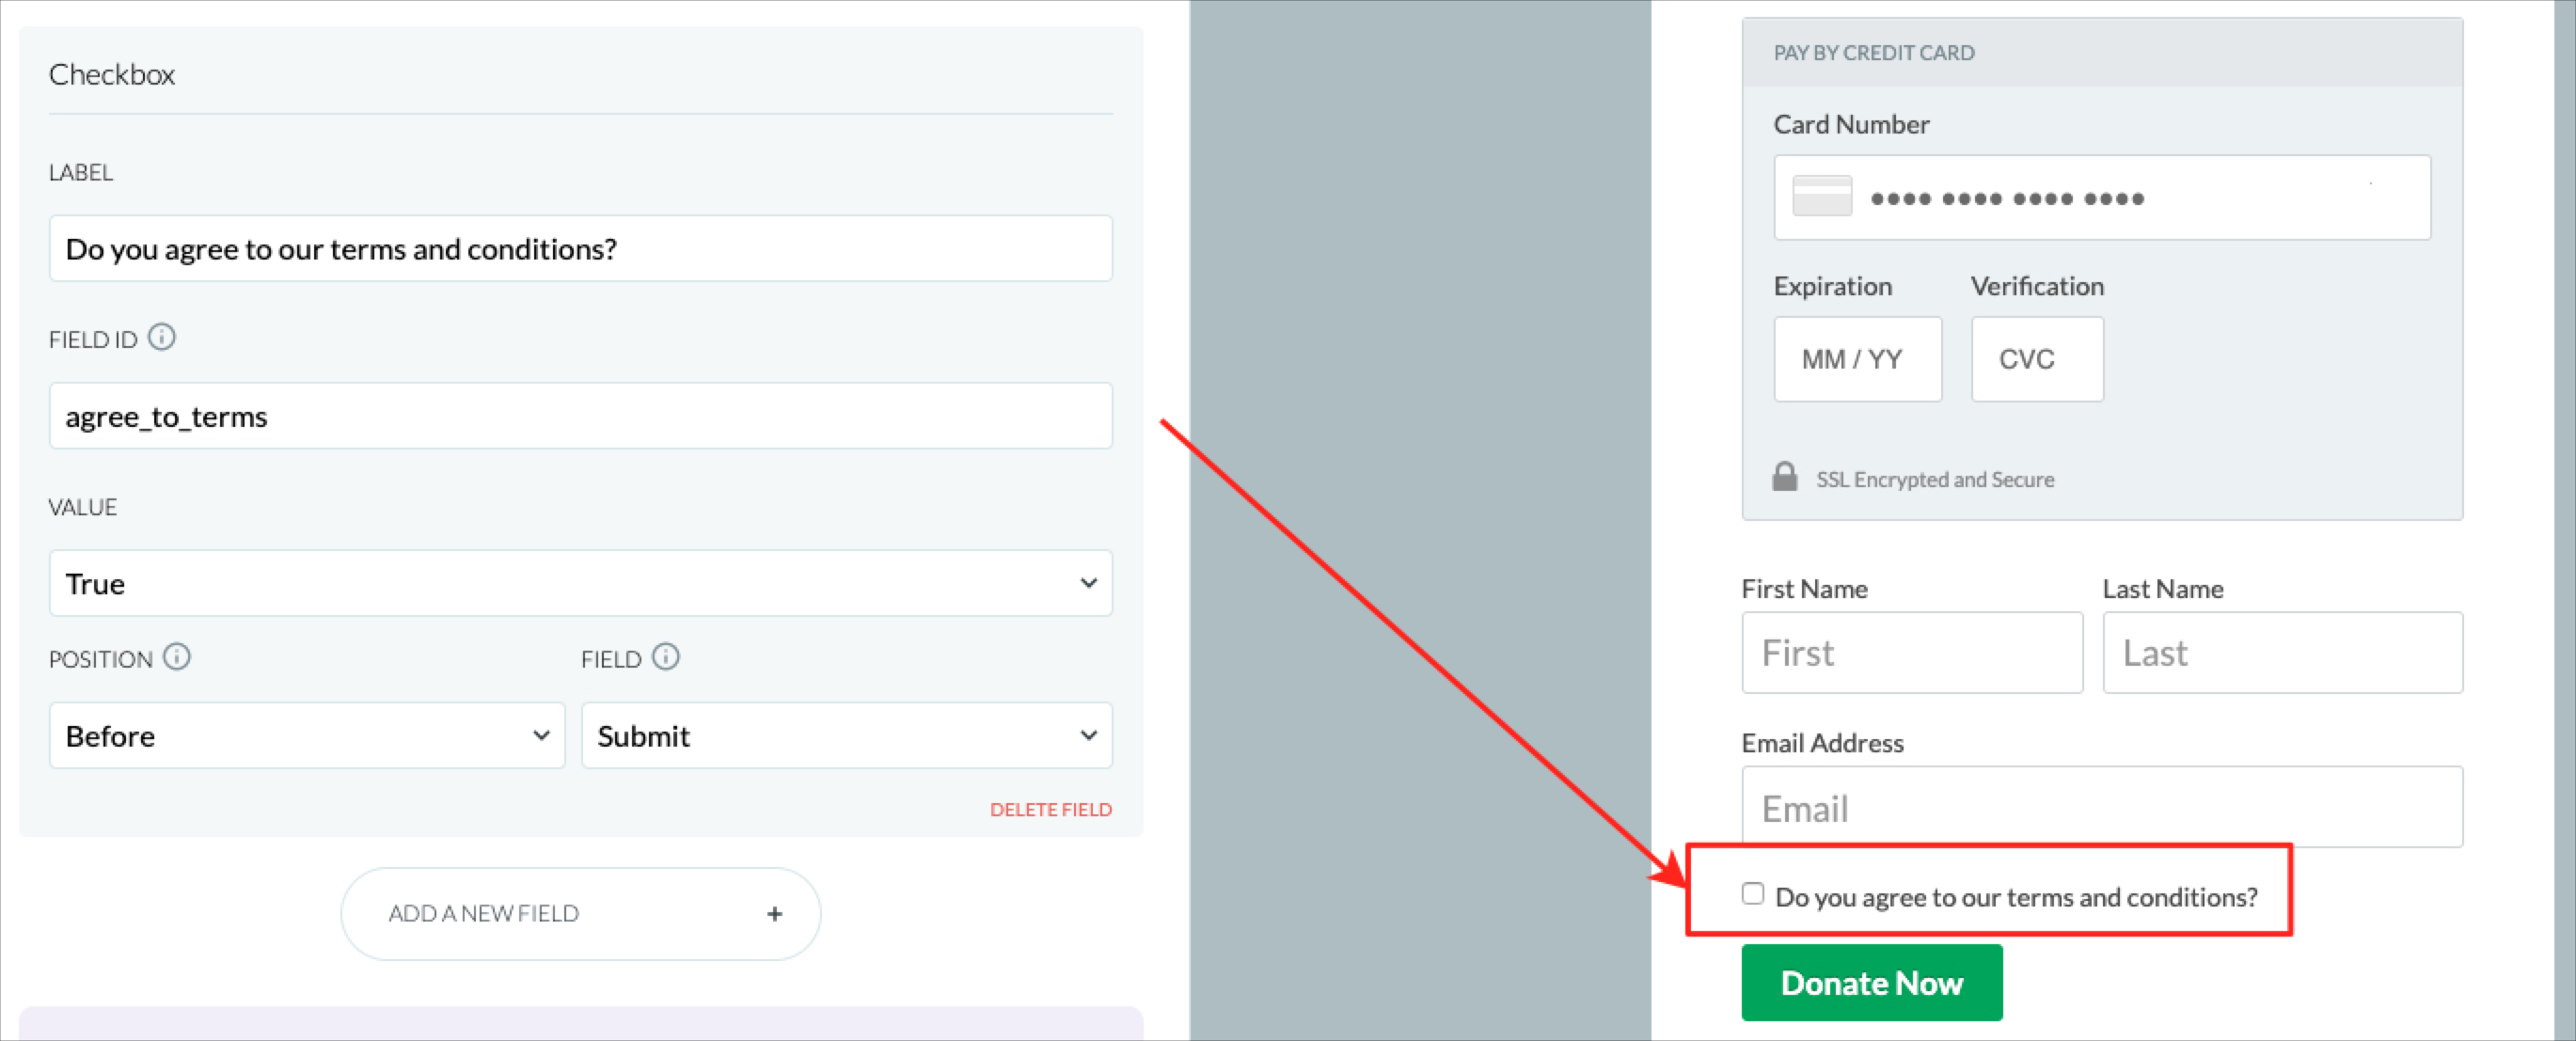
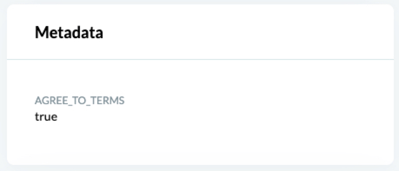
- Label - Text shown above the field ("Do you agree to our terms and conditions?" in the example above)
- Field ID - This the value sent to the database so you can easily identify the selection. ("agree_to_terms" in the example above)
- Value - This is the value when the checkbox is selected. We recommend leaving this as "True" always for checkbox fields.
- Position - Where the field will be placed within the form ("Before Submit" in the example above)
If the donor selects that checkbox, this is what you'll see on the donation detail page:
Custom Field Type 5: Dropdown
Dropdown fields are great for lists of data for which the donor can only select one.
You'll need to input:
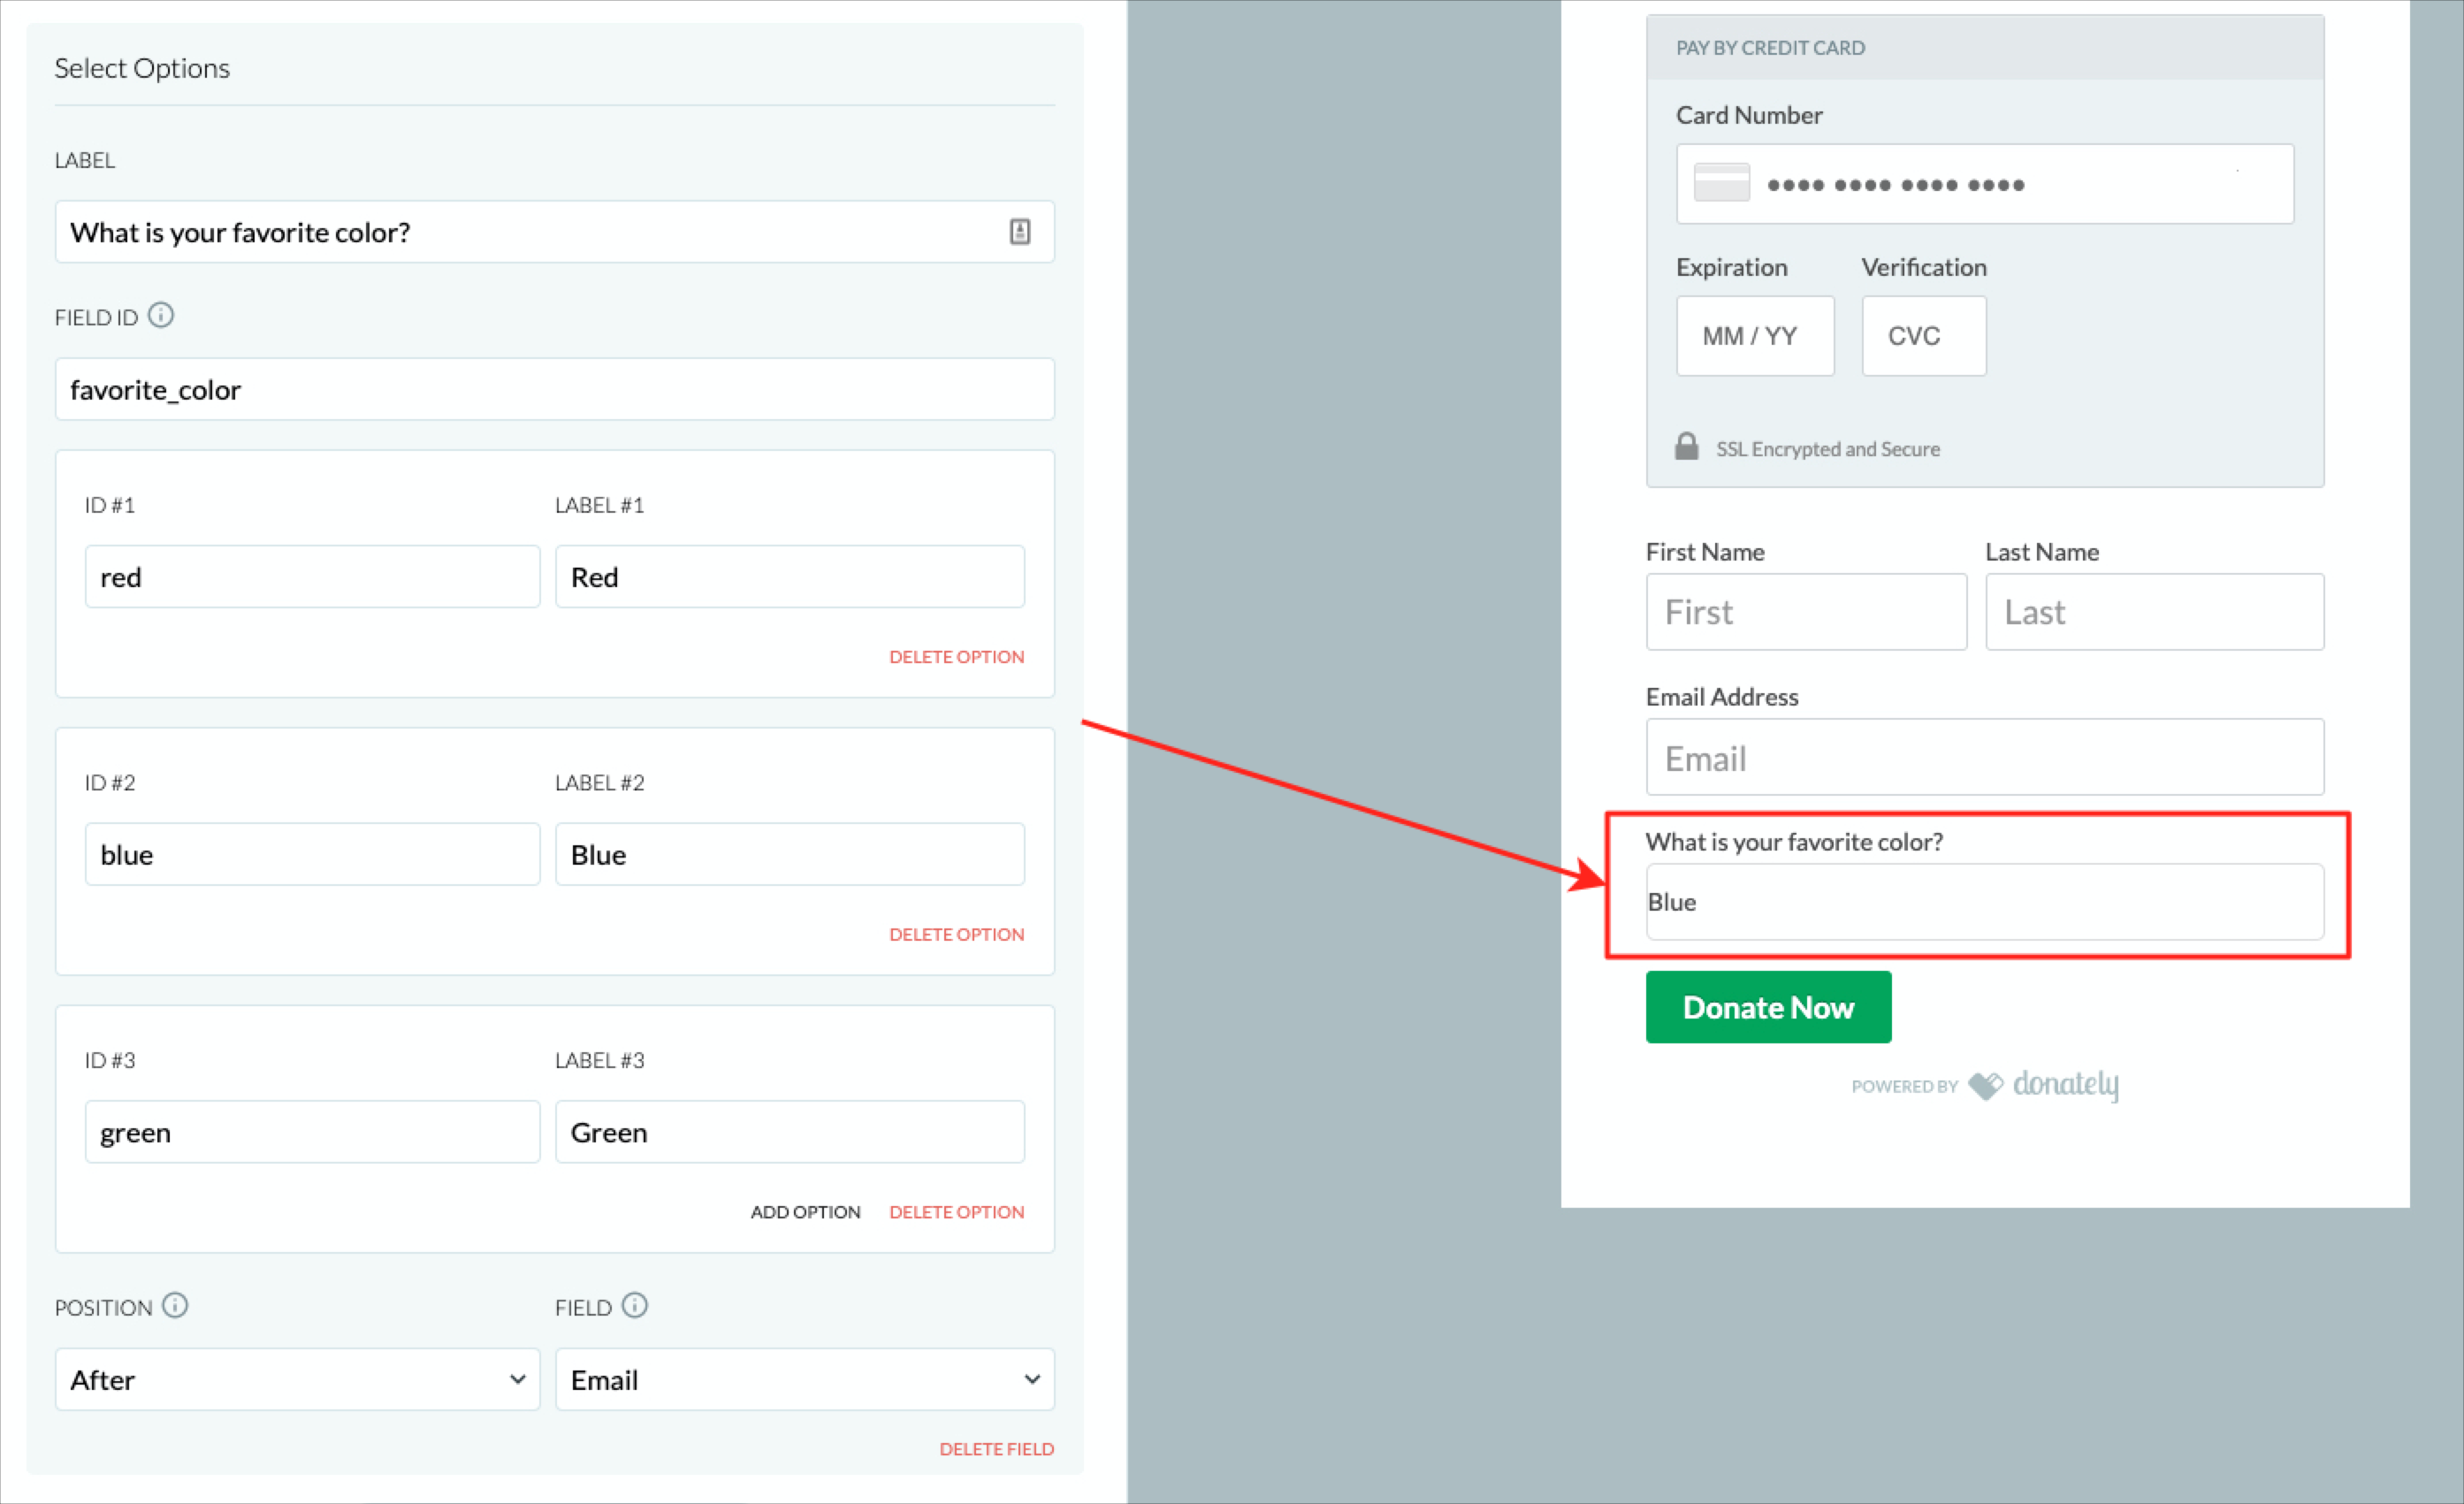
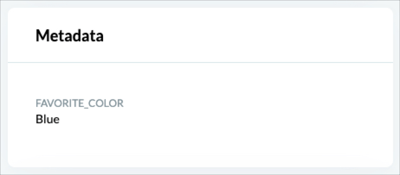
- Label - Text shown above the field ("What is your favorite color?" in the example above)
- Field ID - This the value sent to the database so you can easily identify the selection. ("favorite_color" in the example above)
- ID (#1, 2, 3 etc) - This is the value when a selection is made and what is sent to the database.
- Label (#1, 2, 3 etc) - This is what the donor sees in the dropdown. (Red, Blue, Green in the example above)
- Position - Where the field will be placed within the form (After Email in the example above)
If the donor selects "Blue" above, this is what you'll see on the donation detail page:
Custom Field Type 6: Section Heading
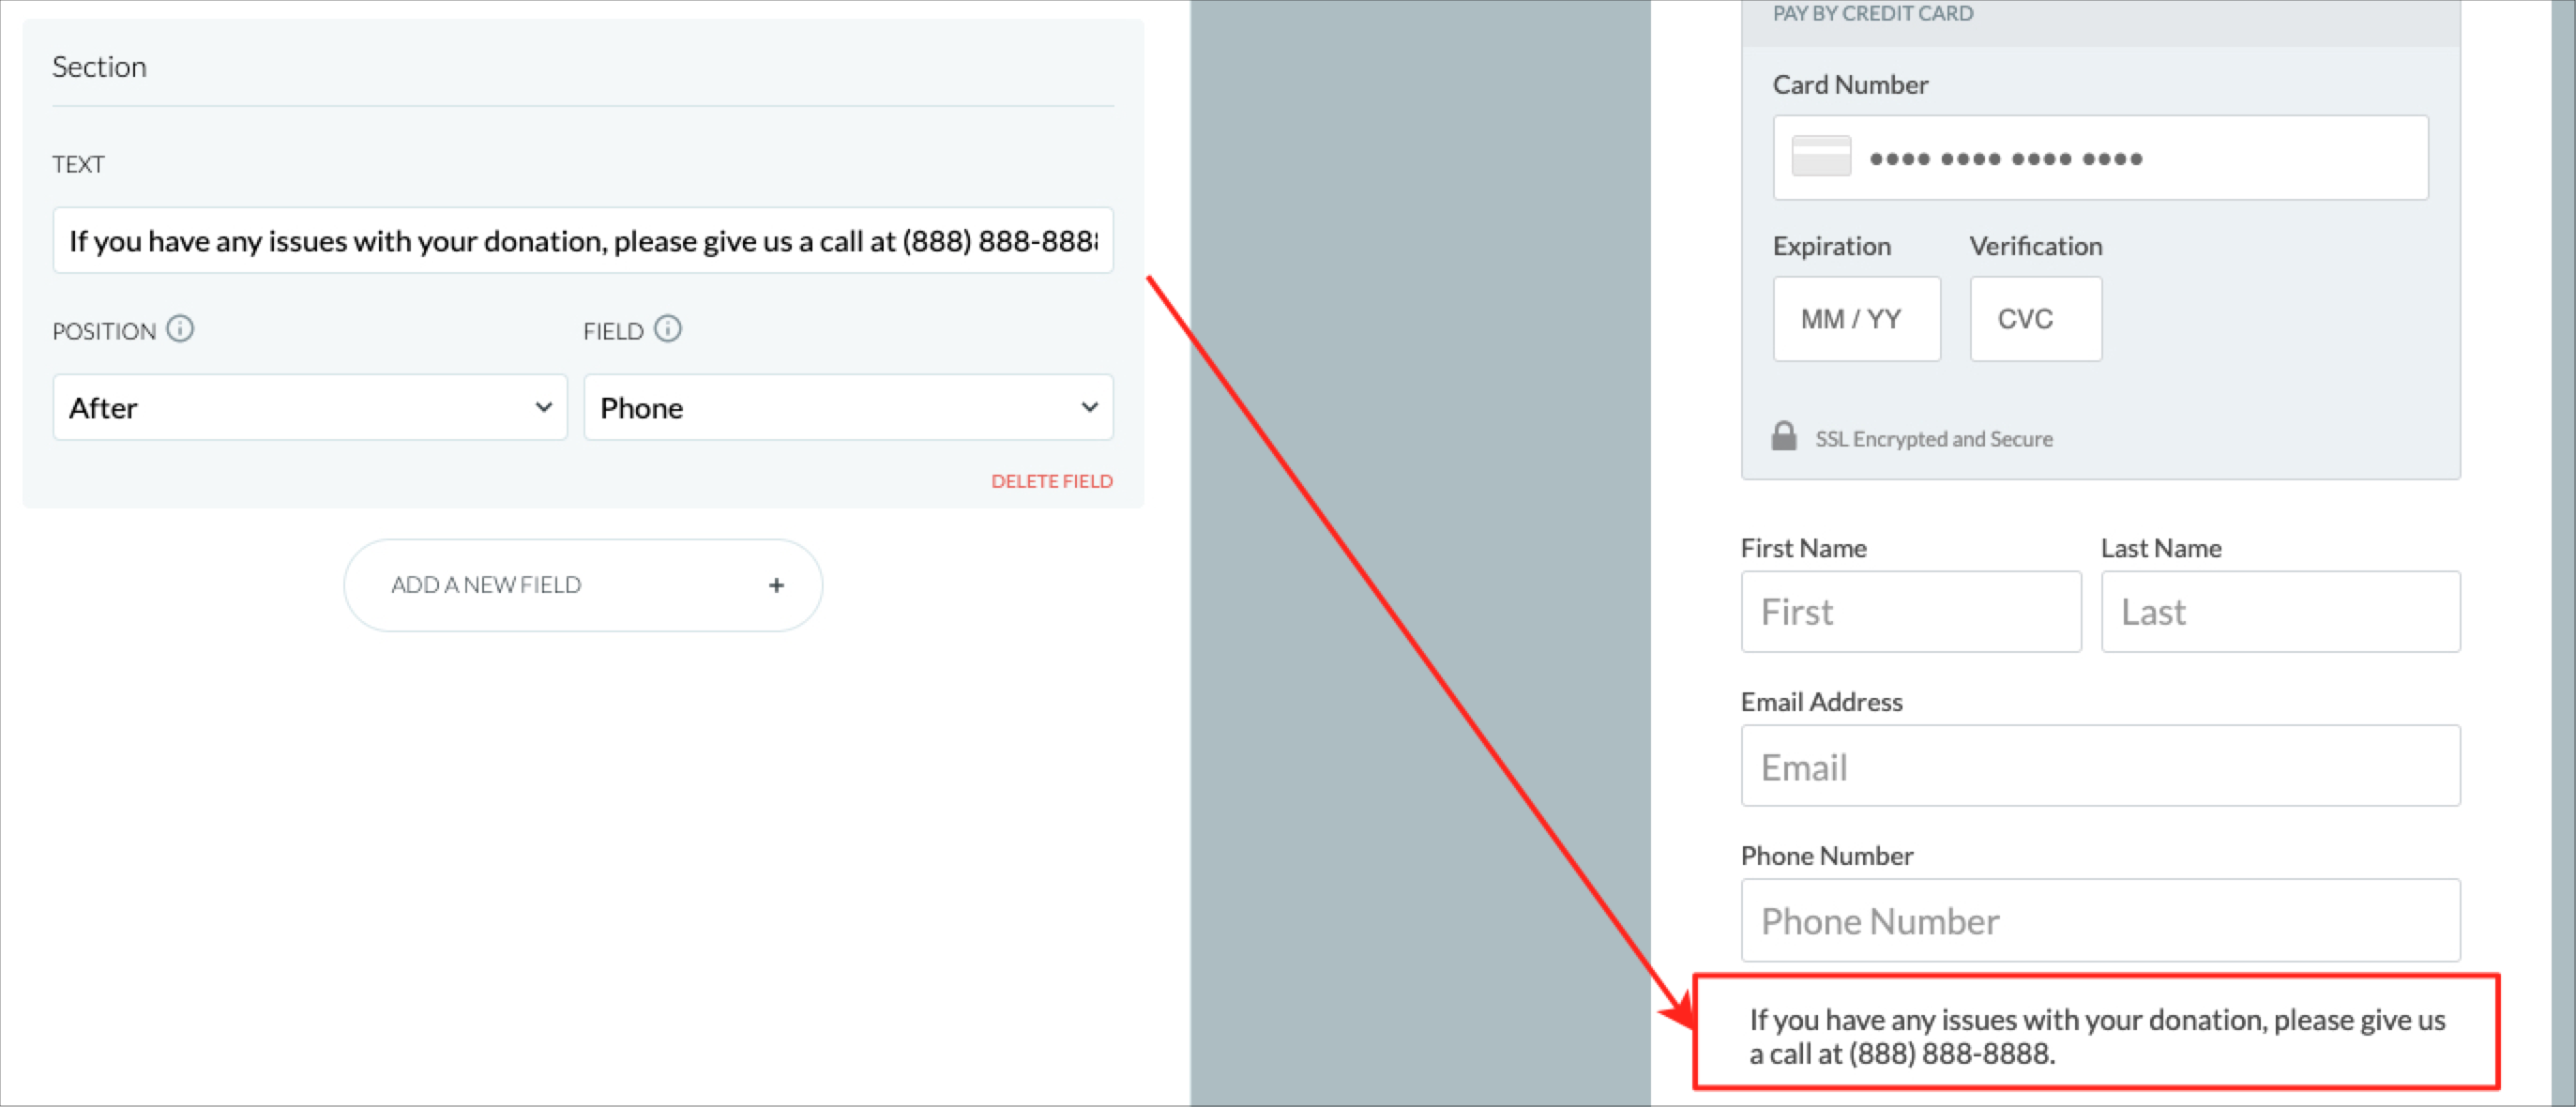
Section Heads are just blocks of text within the field that require no input. These are great to give directions for certain elements of the form or simply add a little message.
You'll need to input:
- Text - This is the message you will add to your form ("If you have any issues with your donation, please give us a call at (888) 888-8888." in the example above)
- Position - Where the field will be placed within the form (After Phone in the example above)
Since the Section Heading does not have a value or input, no data will be sent to the dashboard.
Custom Field Type 6: Hidden FieldHidden fields are ways to add information to the form without requiring a donor's input. A good example is if you are A/B testing forms, and want to know the form that each donation was made through.
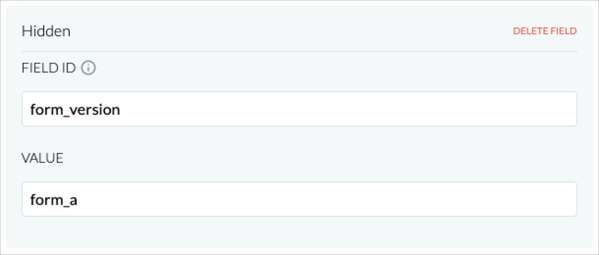
You'll need to input:
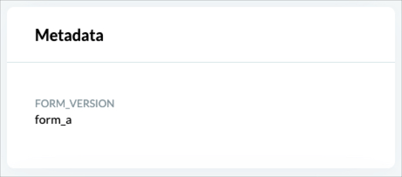
- Field ID - This the value sent to the database so you can easily identify the selection. ("form_version" in the example above)
- Value - This is the value that will always be sent with a hidden field. ("form_a" in the example above)
On each donation through this form, this is what you'll see on the donation detail page: