Connecting Donately to HubSpot is a great way to send donation data into a dedicated CRM. We have a native integration that connects to HubSpot but we also have a partnership with a third-party site called Zapier to make complex connections easy to use. This support article gives information on how to connect to HubSpot using Zapier.
The example we'll be using here is creating a Sales Receipt when new donations occur. You could also use Zapier to create new Customers, Invoices, or Products. It's important to note that every instance of data flowing between Donately and Salesforce through Zapier is called a "Zap".
Zapier does have a free tier, however, depending on your usage, you may need a premium subscription. For more information on this, please visit Zapier's pricing screen. Note that Zapier does offer a nonprofit discount. Please see this page for more details.
You'll need to sign up for a Zapier account if you don't already have one. Signing up is very quick, and you can always start on the free plan and upgrade as needed.

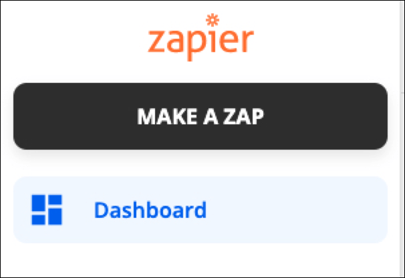
If you're on the newer version of Zapier's dashboard, you may have to click on "Make A Zap" from the left-side menu.
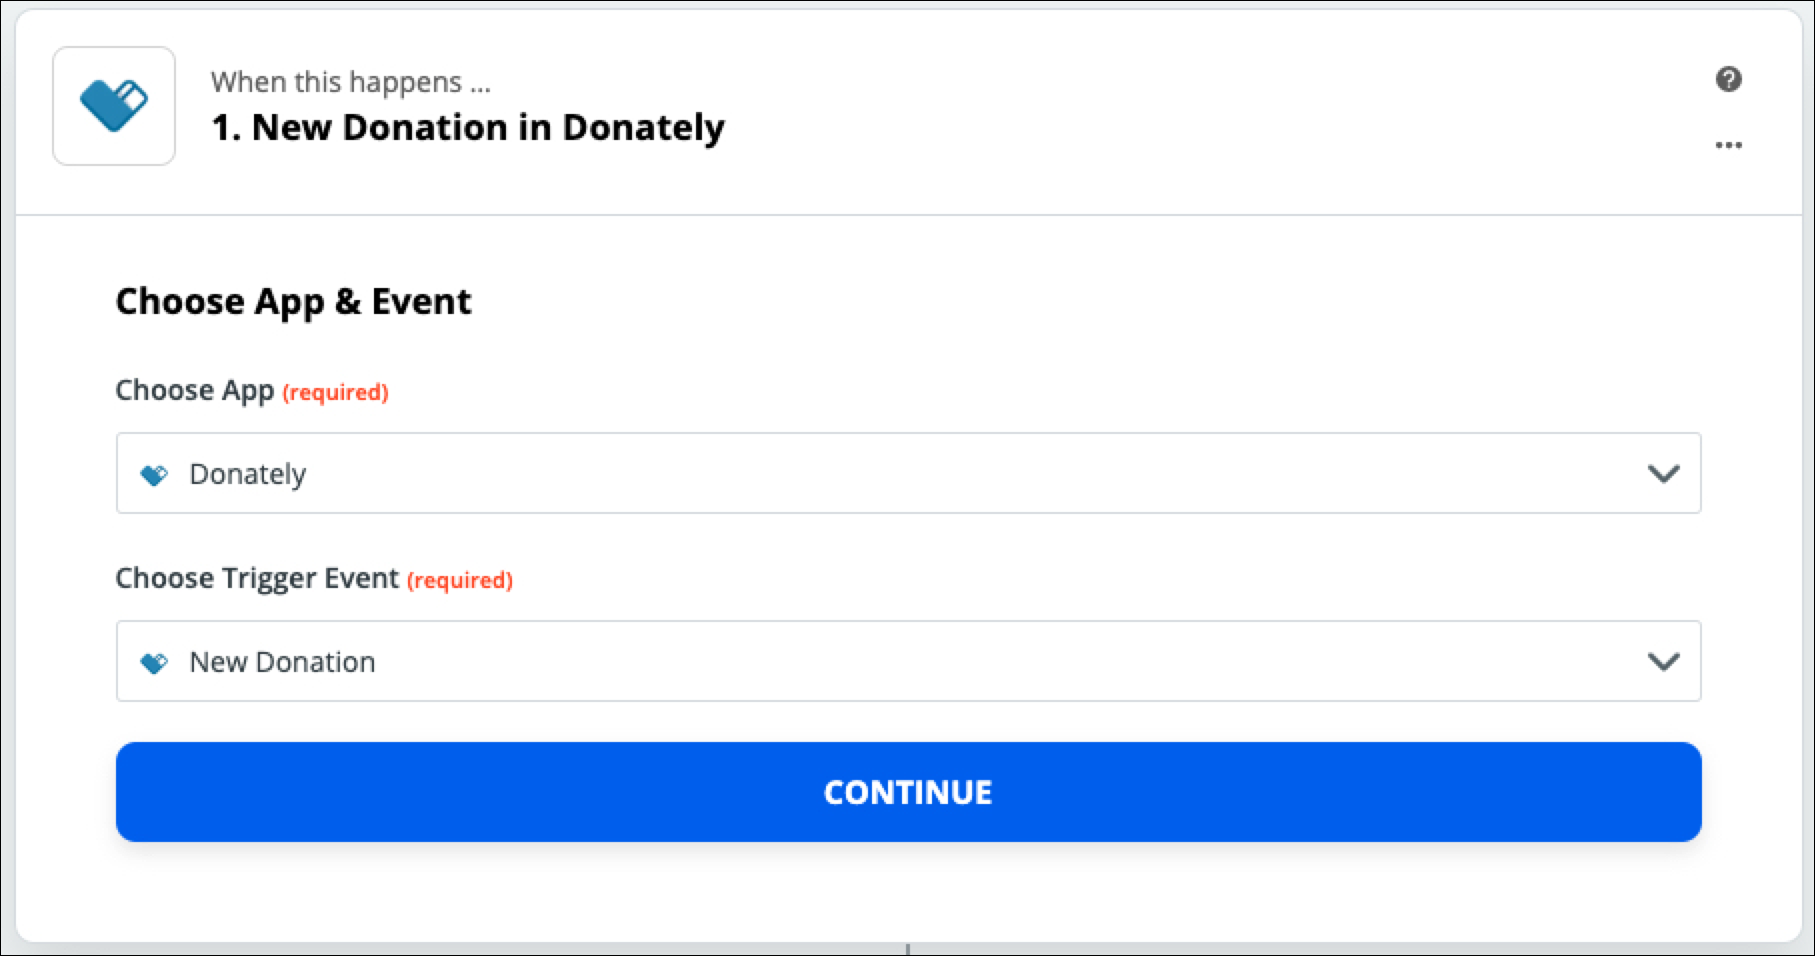
This means that the "Zap" will trigger every time a donation is made. Click "Save + Continue"
Note: You should only have to do this once! If you've already done this, please skip to Step 6.
The next step will trigger a pop-up, asking for information to connect your Donately account to Zapier. See the instructions below on how to find each of these elements.
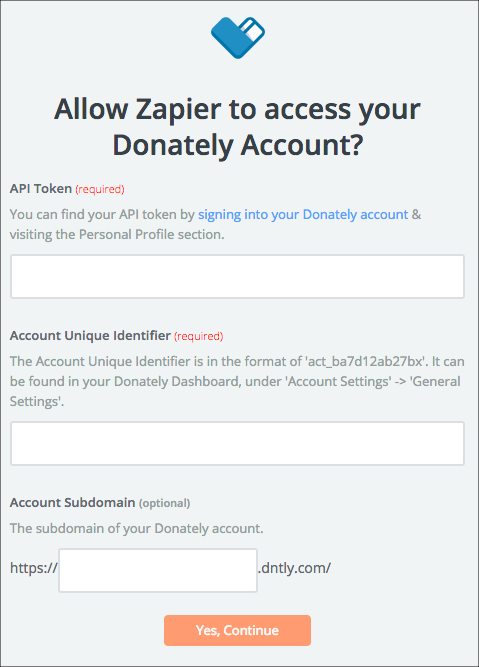
Go directly to this page, or click on "Integrations" along the left-hand menu. Once on the "Integrations" page, click "Donately API". The next screen will have both your Account ID as well as your API token. Simply click "Show API Token" to reveal your token.

Copy and paste both into the appropriate fields in the Zapier pop-up. Note: When you paste in your Account ID, be sure no space is added to the end!
Go directly to this page, or click "Account Settings" from the left-hand menu. Your "Account Subdomain" is your "Account Slug" in the Donately dashboard. This is the second field under the "Account Attributes" section.
Copy and paste the slug into the "Account Subdomain" field in the Zapier pop-up.
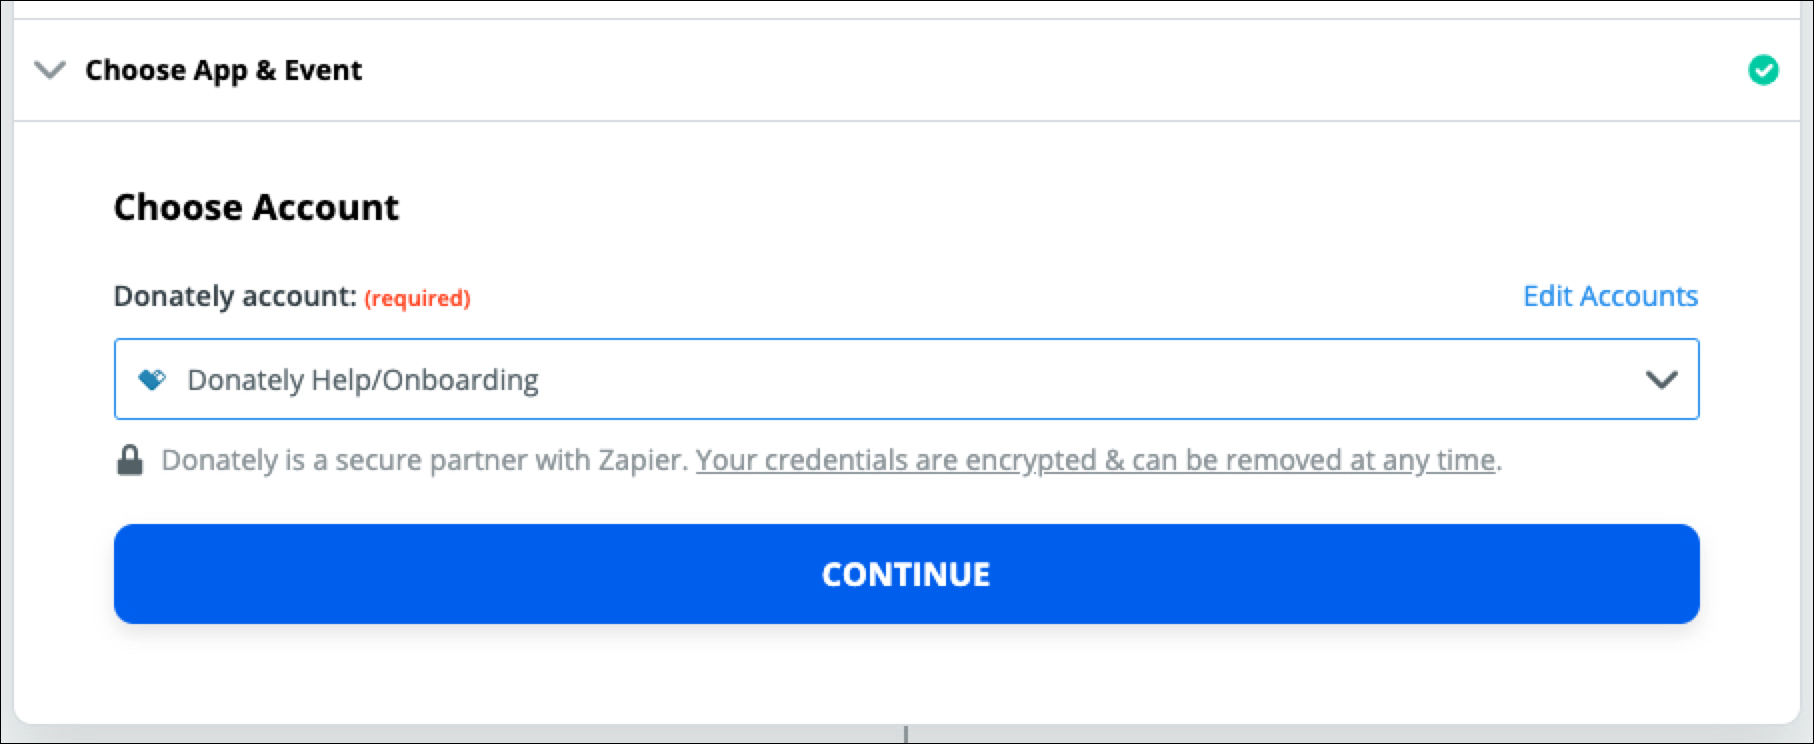
After you fill in all of that information, click "Yes Continue." When you're back to Zapier, click "Continue":
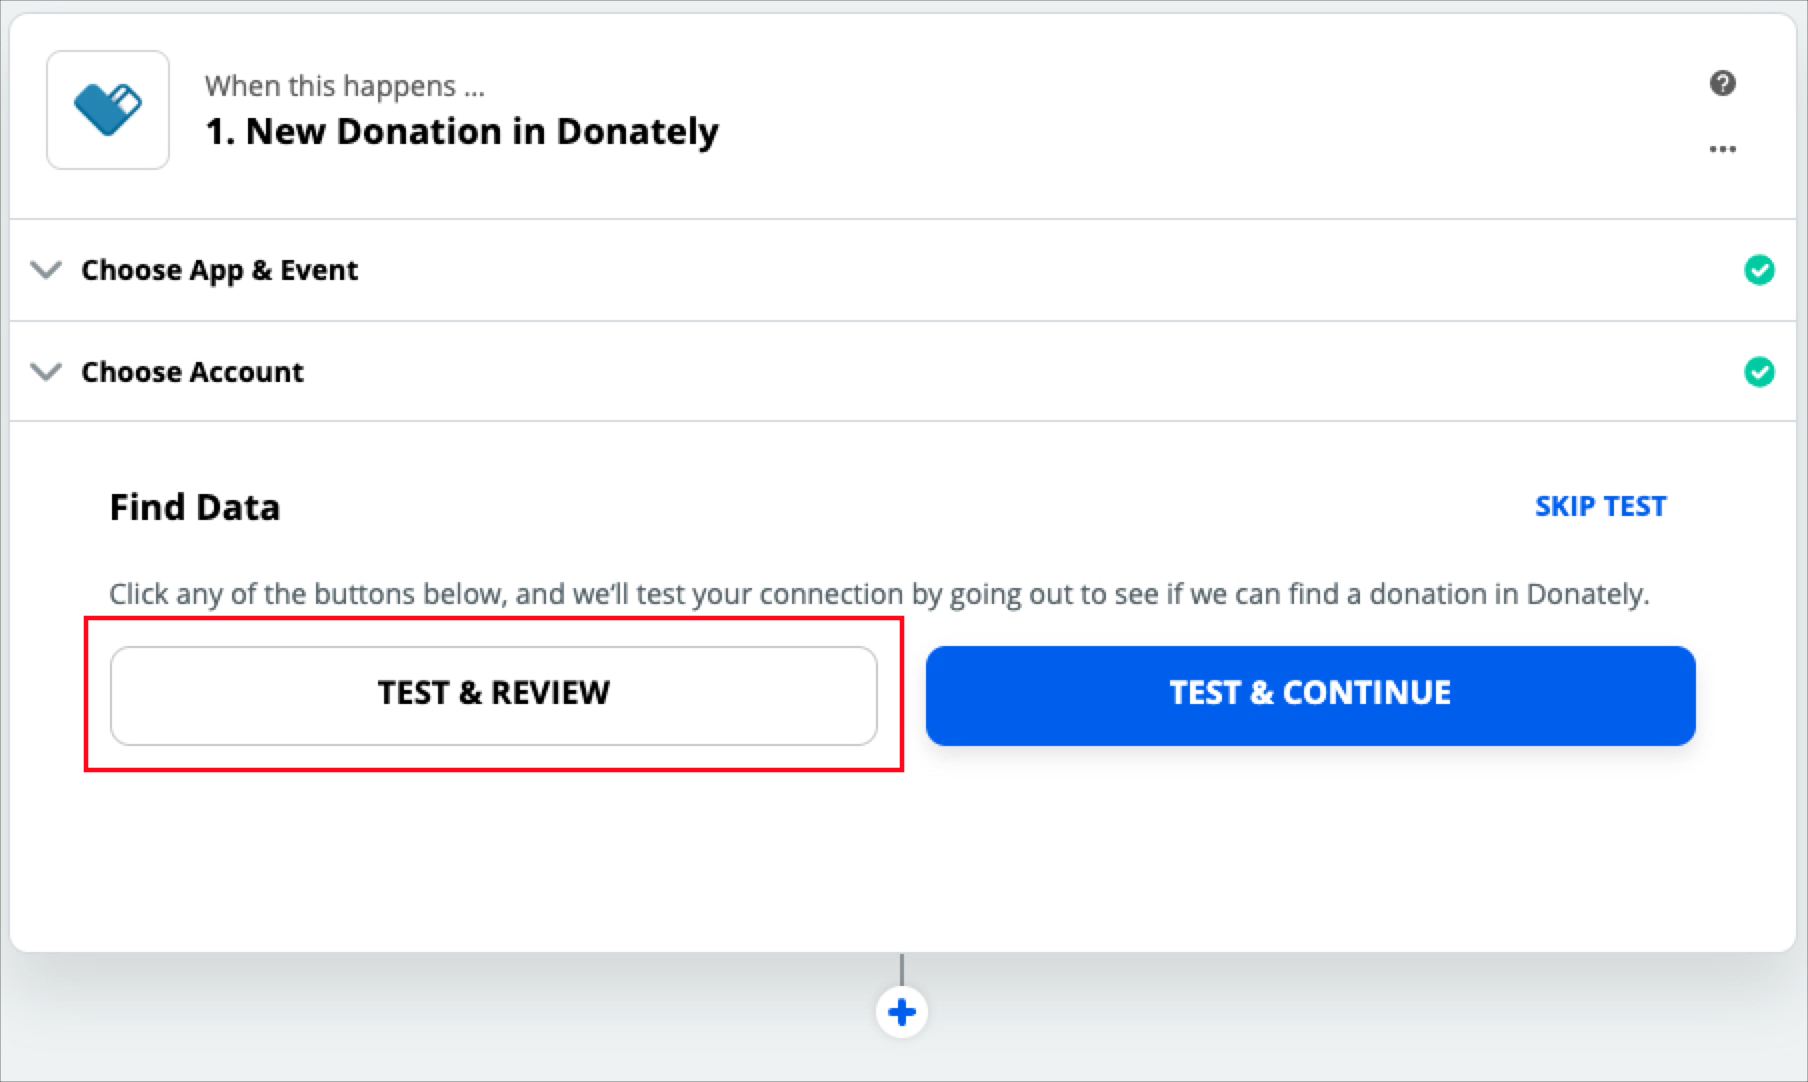
On the next page, you'll want to pull in example donation data, so that you have context for where you'll send data into HubSpot. We recommend clicking "Test & Review" to pull in donations from your Donately account.
If you do not have any donations yet, you can create a cash/check donation. Once you have one, click "Test & Review".
On the next screen, select the donation you'd like to use as your example:
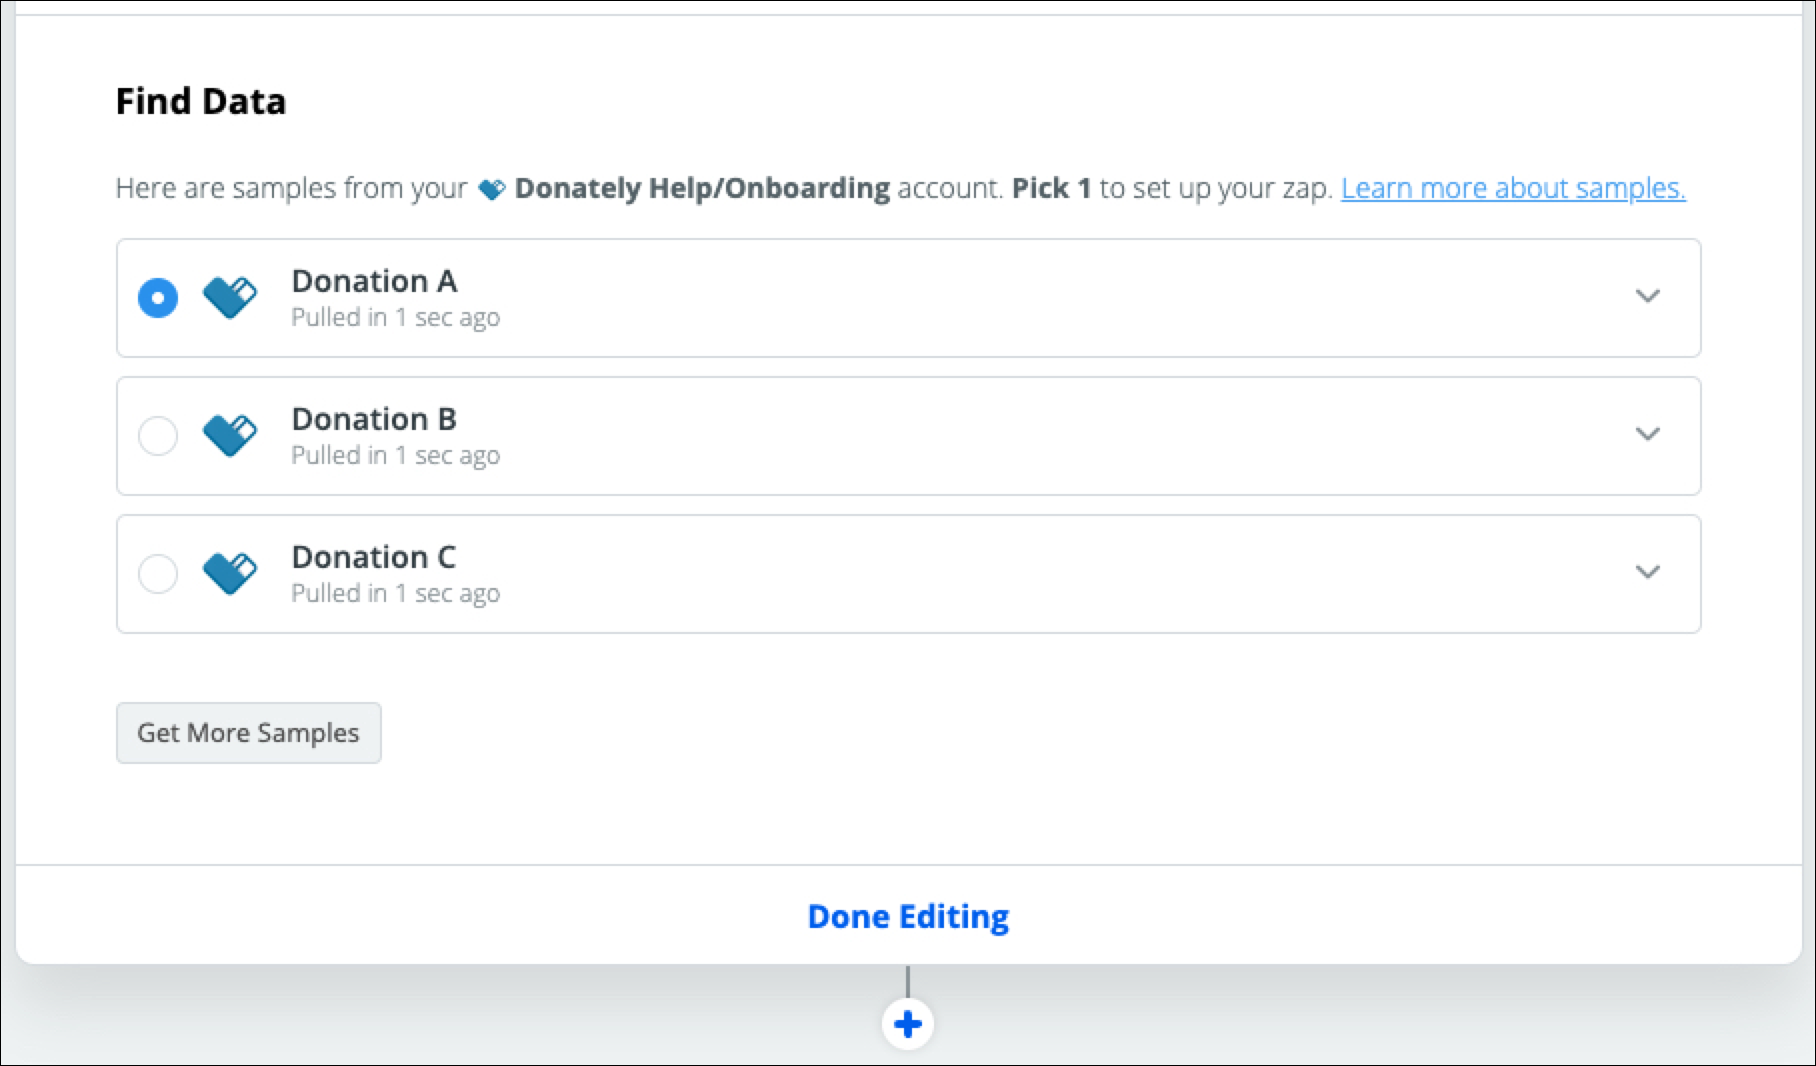
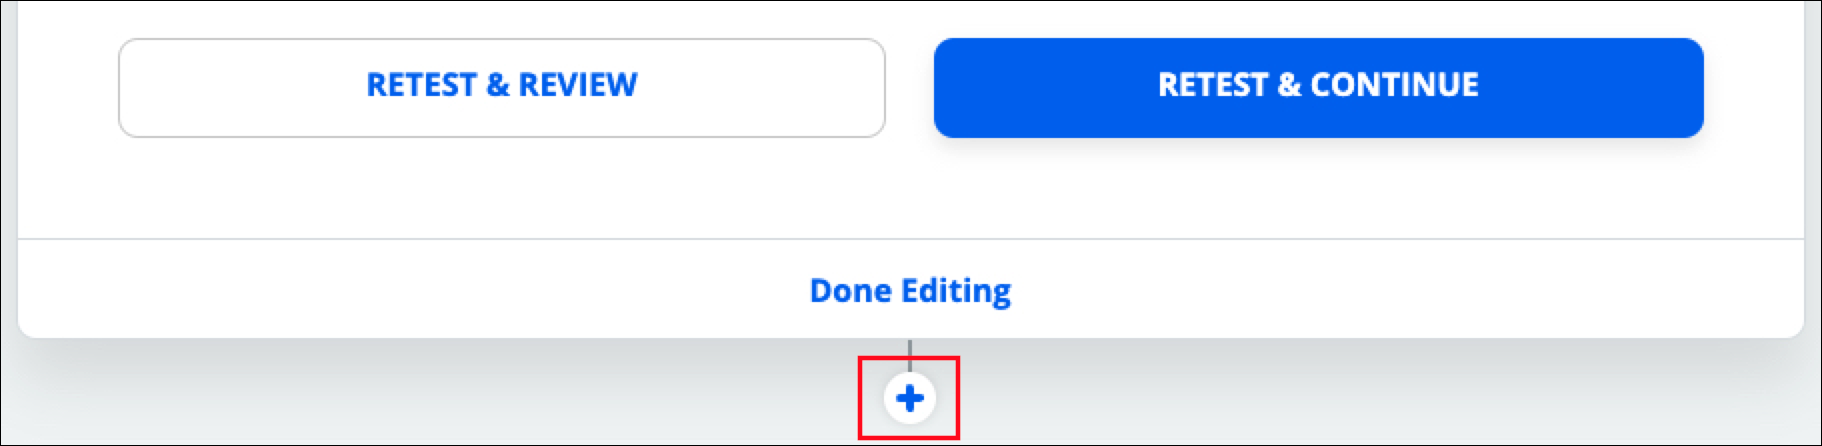
Click "Done Editing" to move on to the next step. You may need to click the little "+" button to bring up your choice of apps.
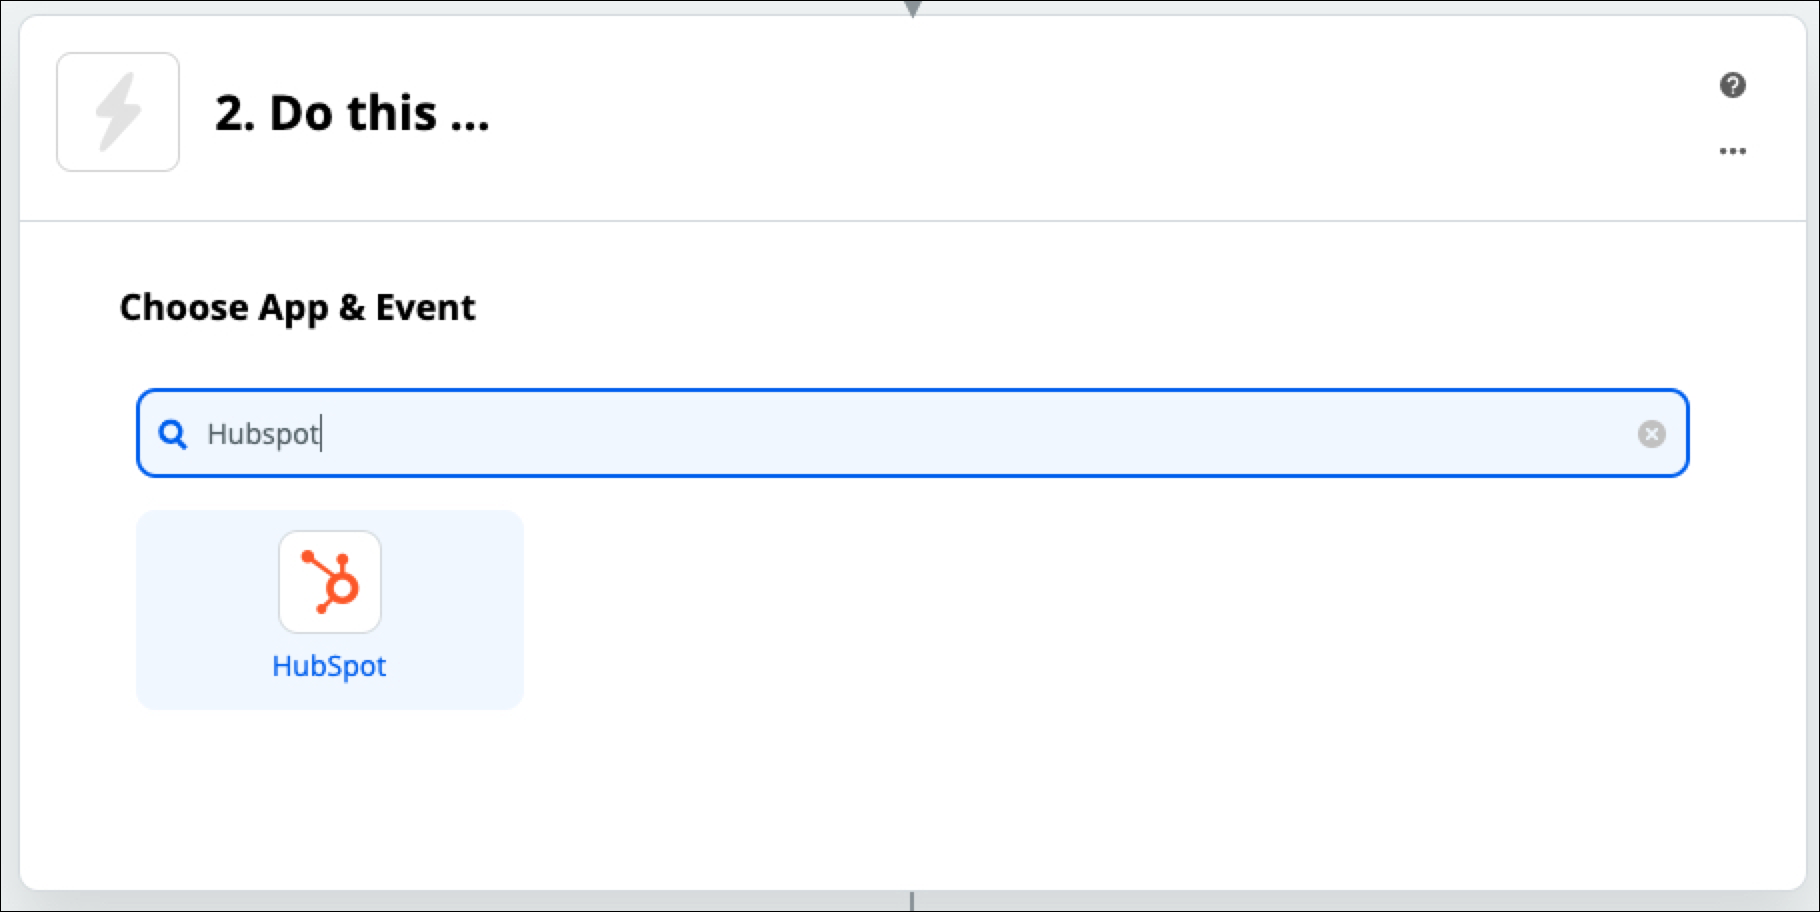
Step 5. Search for "HubSpot"
In the "Choose App" bar, search for HubSpot, or select it from the list below.
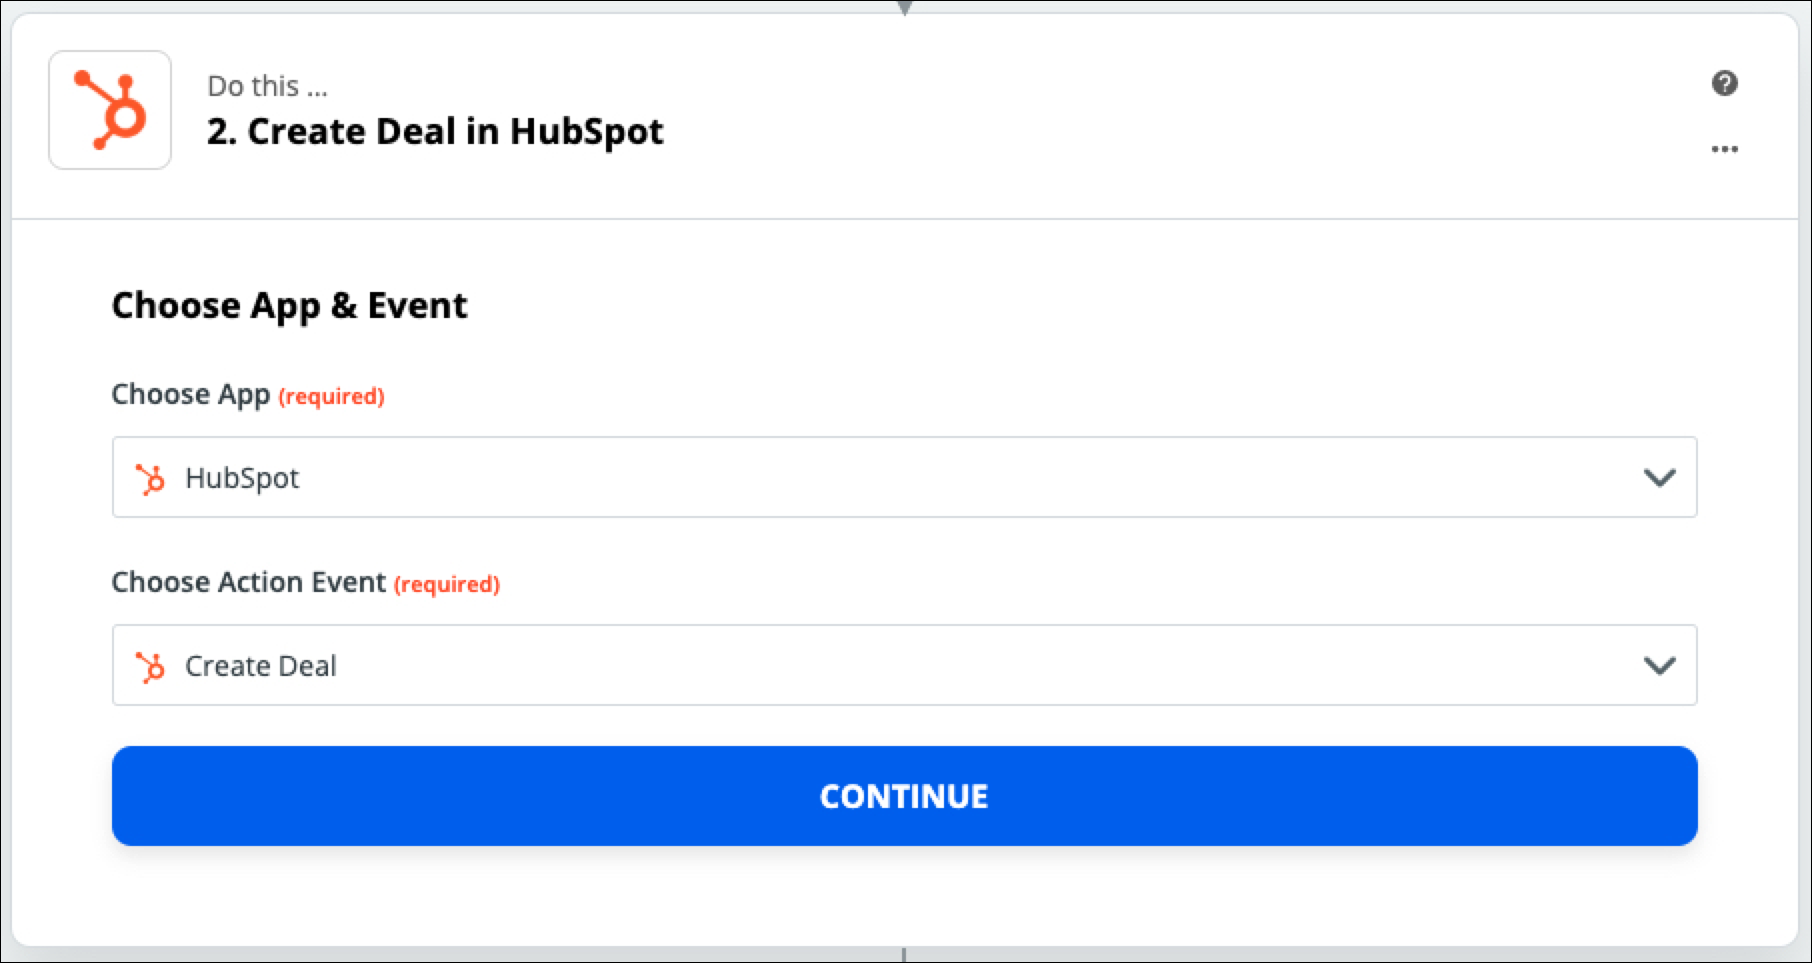
In this example, we'll be creating a new deal for each donation. As an optional step, we'll be creating/updating a contact, then adding that contact to that deal in order to link the two records together.
Step 7. Sign in to HubSpot
Clicking on the "Sign in to HubSpot" button will open a pop-up with instructions on how to connect your HubSpot account with Zapier.
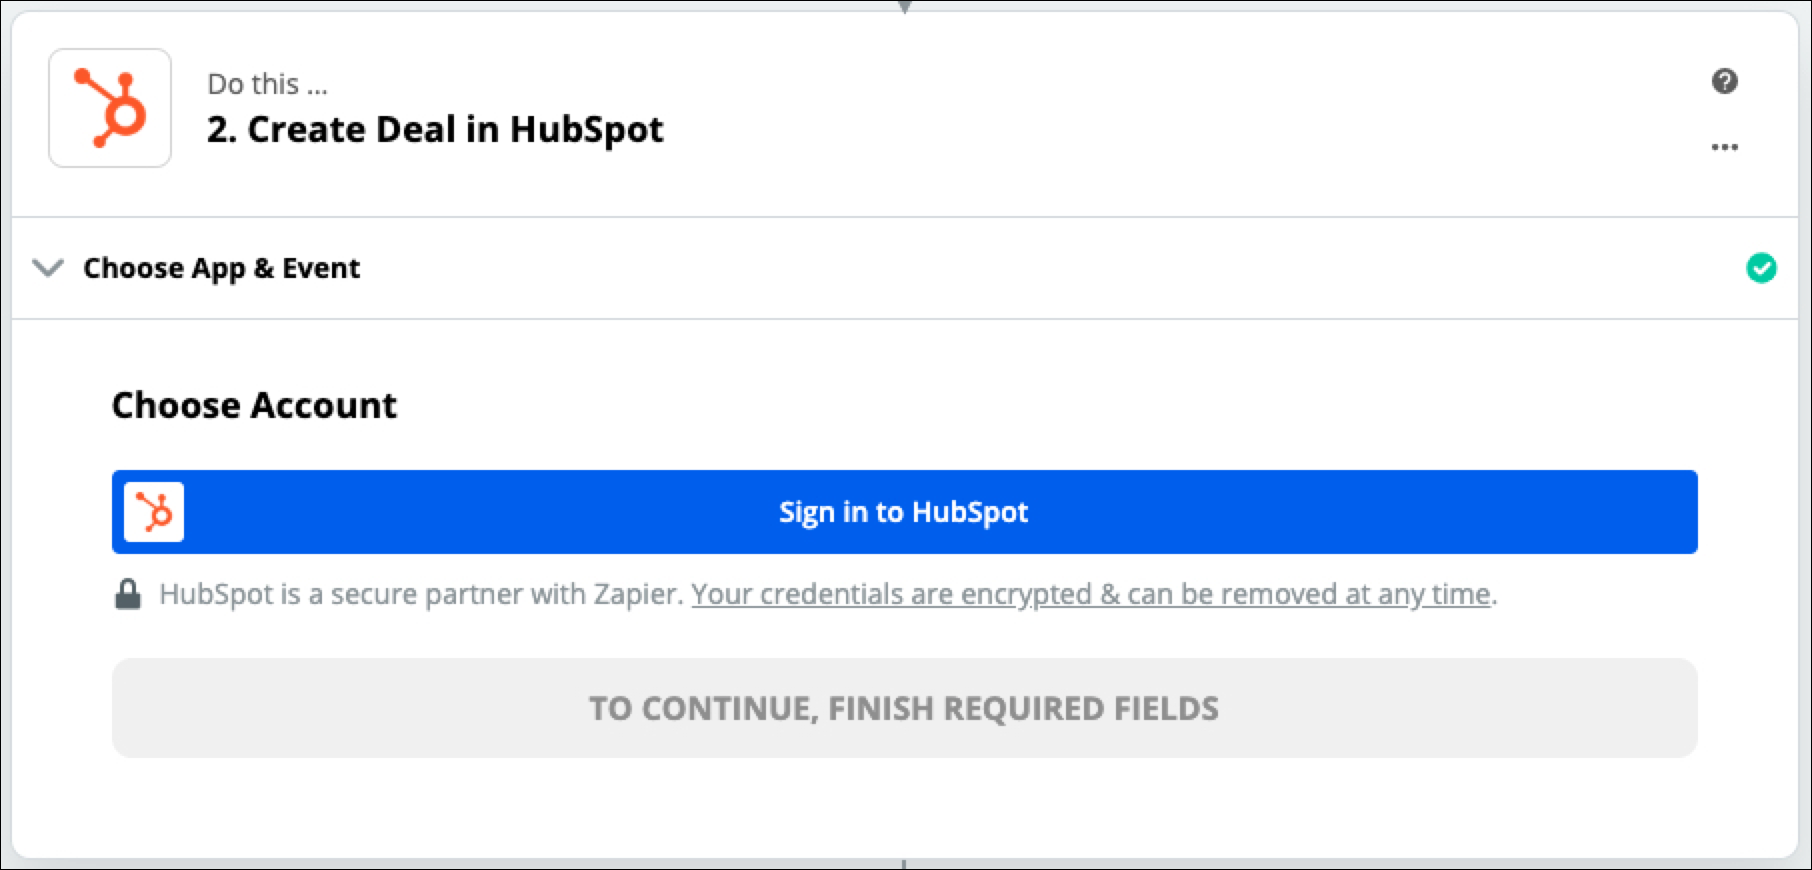
If you are already signed into Zapier, it's as simple as selecting your desired account from the list.
Step 8. Map Your Data & Test
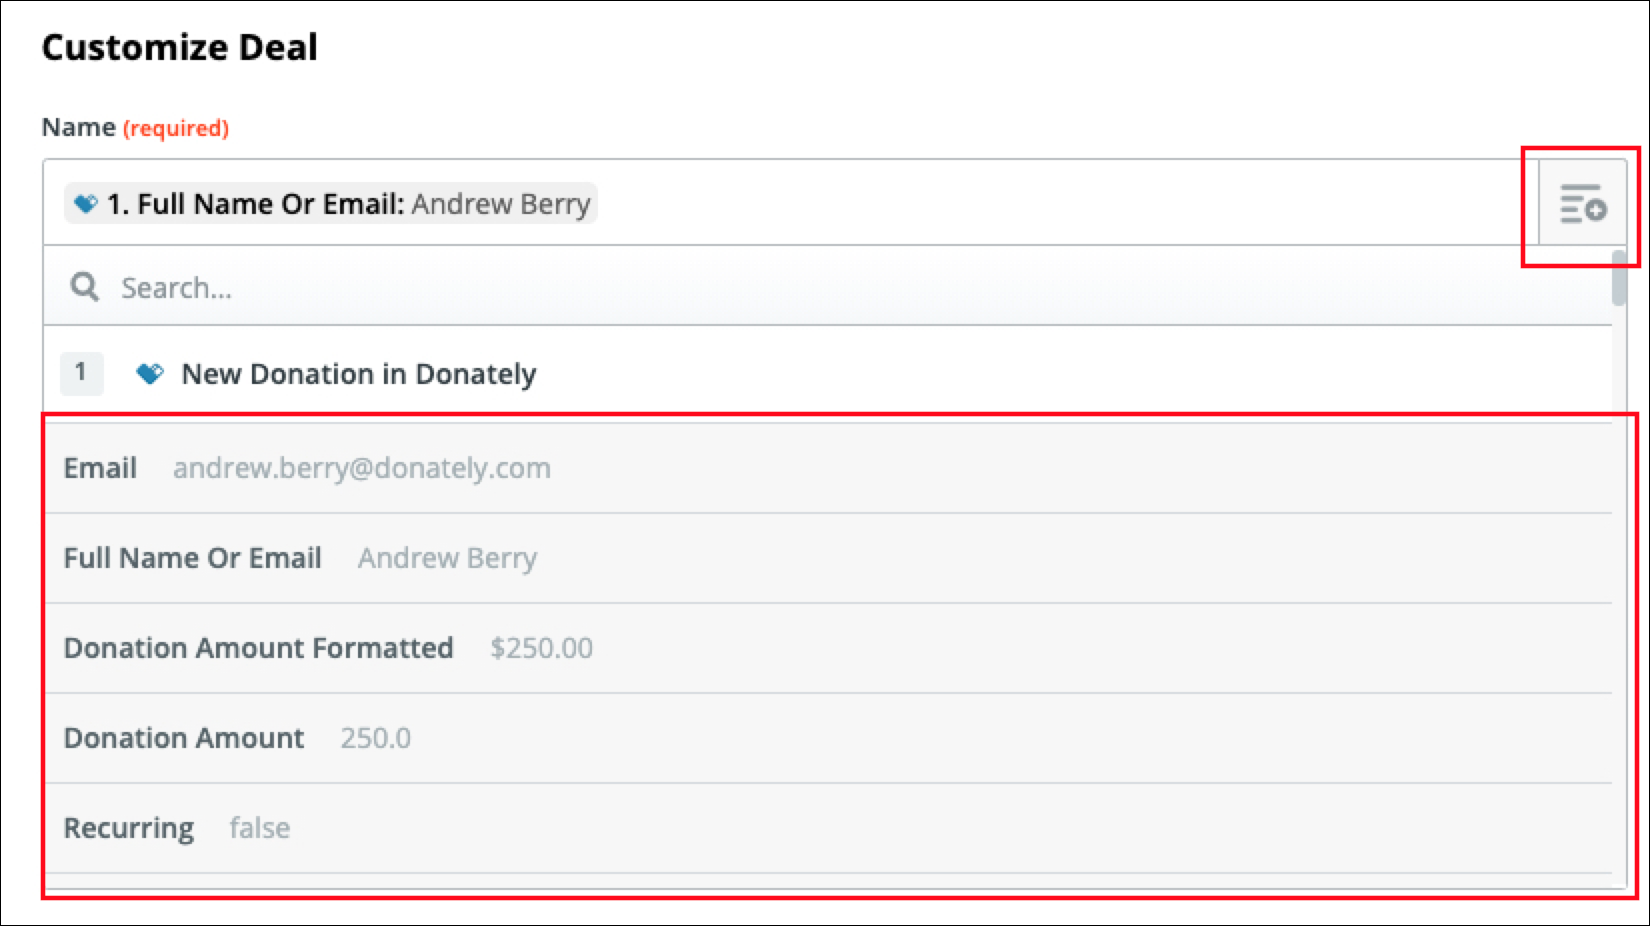
In this step, you'll be mapping your data to flow from Donately into HubSpot. You can choose the exact donation data from your example in Step 5 to match it up with any field in HubSpot.
Note, if you have custom fields in HubSpot, you'll first want to scroll to the bottom of this step and click "Refresh Fields". This will bring in any custom fields or properties you've defined.
In this example, we're using the donor's full name as the name of the deal. You can get this data by clicking on the list and plus-sign button on the right-side of any field. Then, simply choose the piece of data you'd like to map.
In addition, we're using the following:
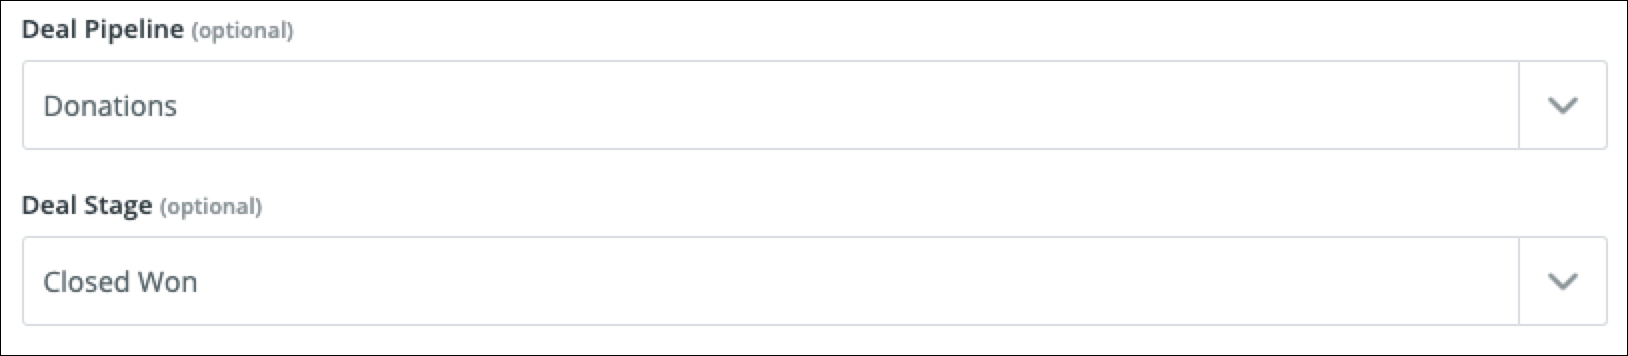
- Deal Pipeline: We made a pipeline named "Donations" in HubSpot
- Deal Stage: We'll be using the Closed Won stage for each donation.
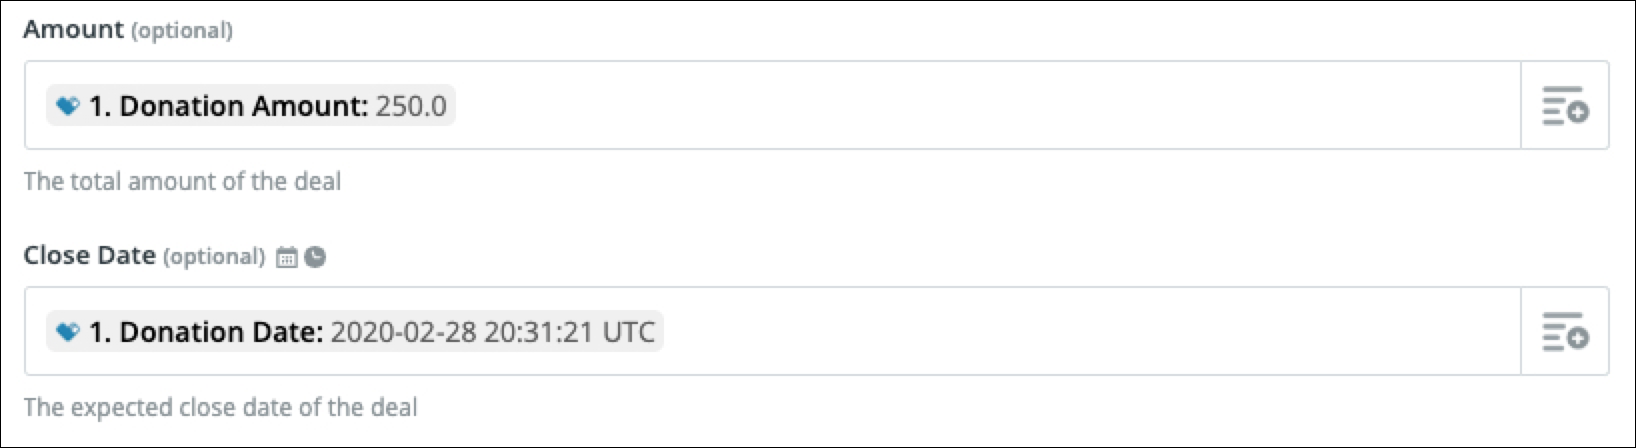
- Amount
Note, you'll want to use the "Donation Amount" field, not the "Donation Amount Formatted" field. HubSpot does not allow for dollar signs in their number fields.
- Close Date, using "Donation Date" from the Donately data
Once you have the data from Donately mapped the way you'd like, click "Continue".
On the next screen, you have the choice if you'd like to test this data flow before setting it live.
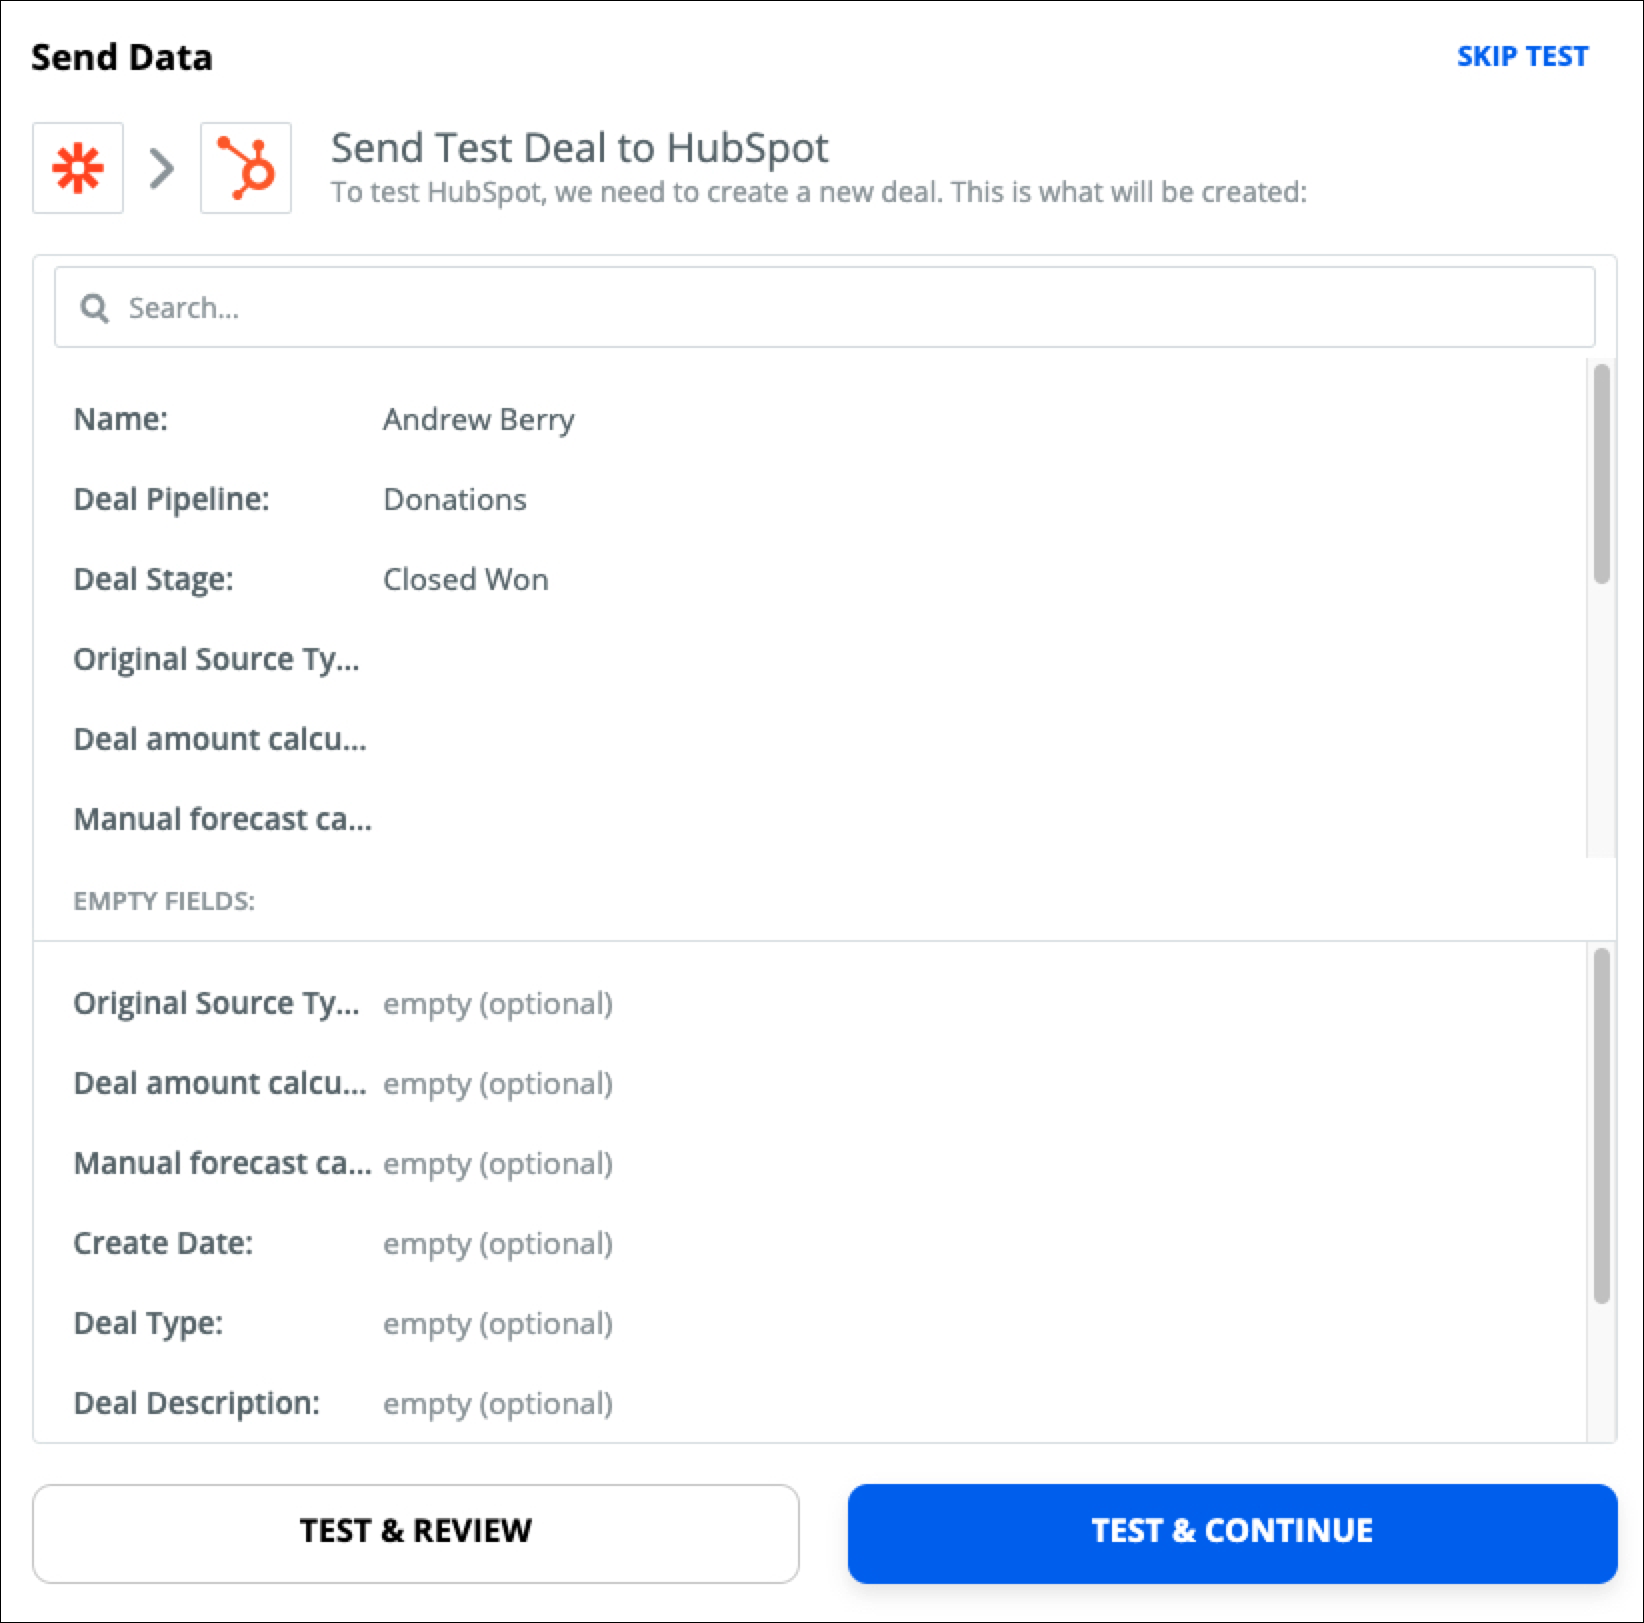
We highly recommend testing, as it will give you a preview of what will happen after each donation. This can be vital to correct small mistakes before data starts flowing into your system and becomes harder to fix. Please note that testing will send this example into your HubSpot account.
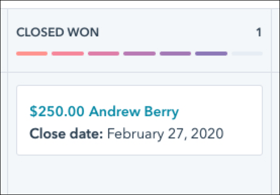
Back in HubSpot, you should see this deal in your pipeline:
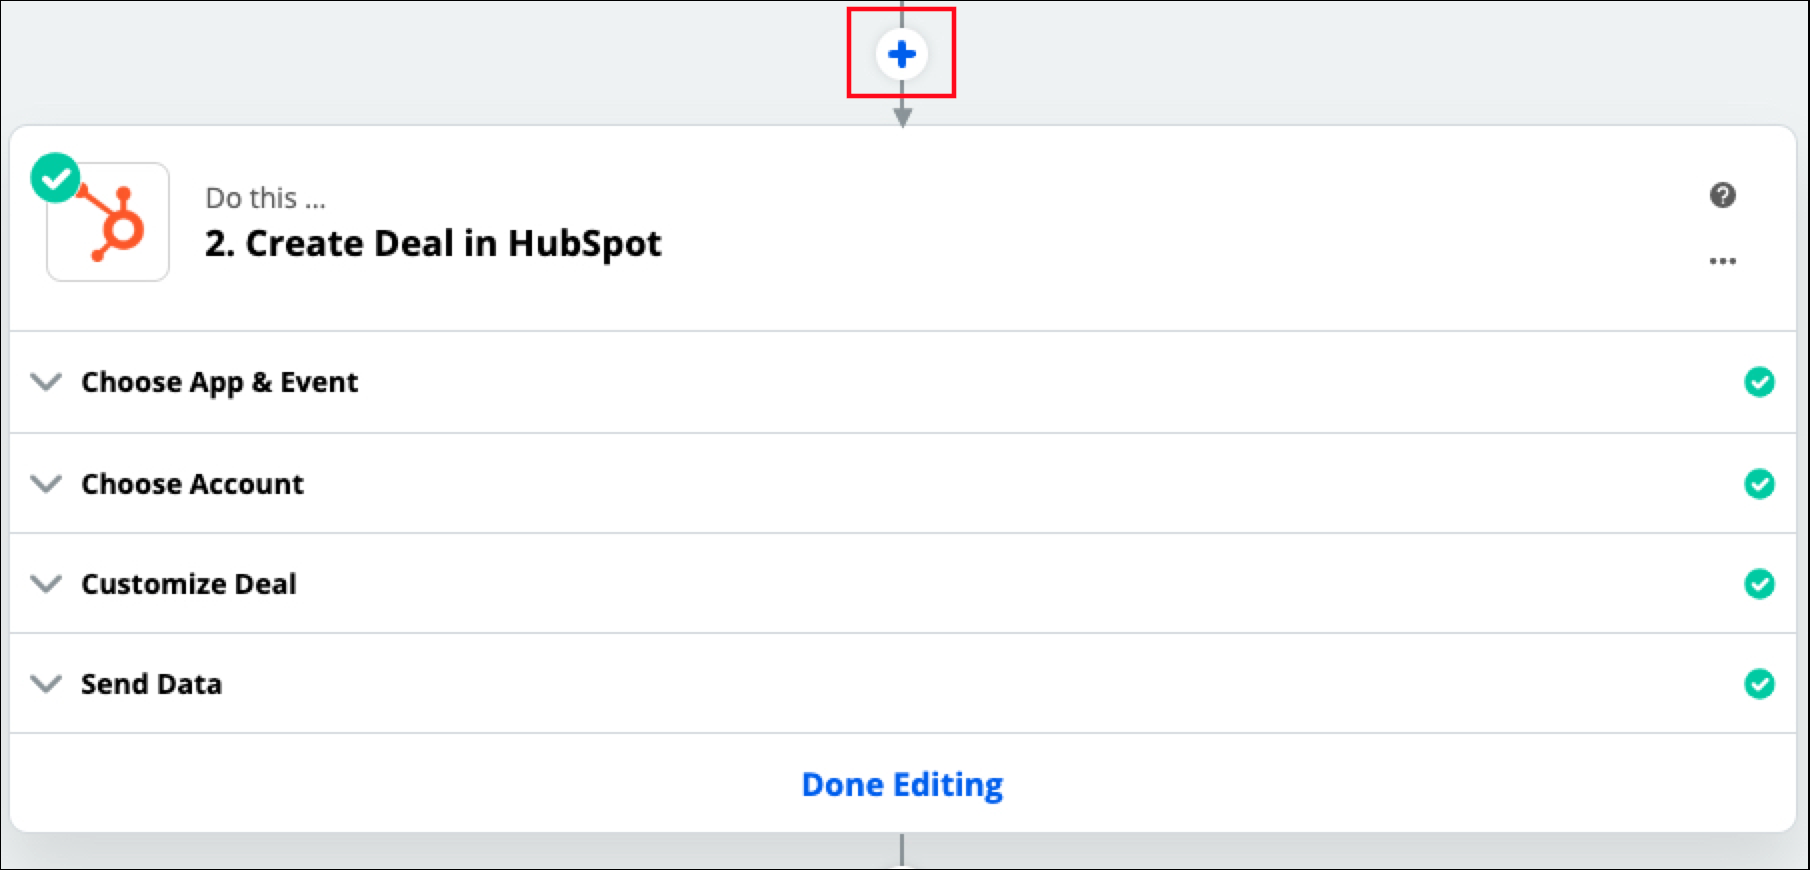
If you don't need to create & attach a contact to this deal, you are done! Simply click "Done Editing" and then turn your Zap on. From this point forward, any donation received via Donately will be sent in this way directly to HubSpot.
If you'd like to also create & attach a Contact to this deal, follow the extra step below.
Note, in order to do a 3-step Zap, you'll need to be on a premium plan with Zapier. For more information on their pricing, please visit Zapier's pricing screen. Don't forget that Zapier offers a nonprofit discount! Please see this page for more details.
Step 9a (Optional). Create "Create or Update Contact" StepTo set this up properly, you'll need to add a step both before and after the Deal we created in Step 9. The purpose is so that we can create a contact, then attach it to the deal so you have cross-record linking.
The first thing is to click on the plus sign above the step you just created.
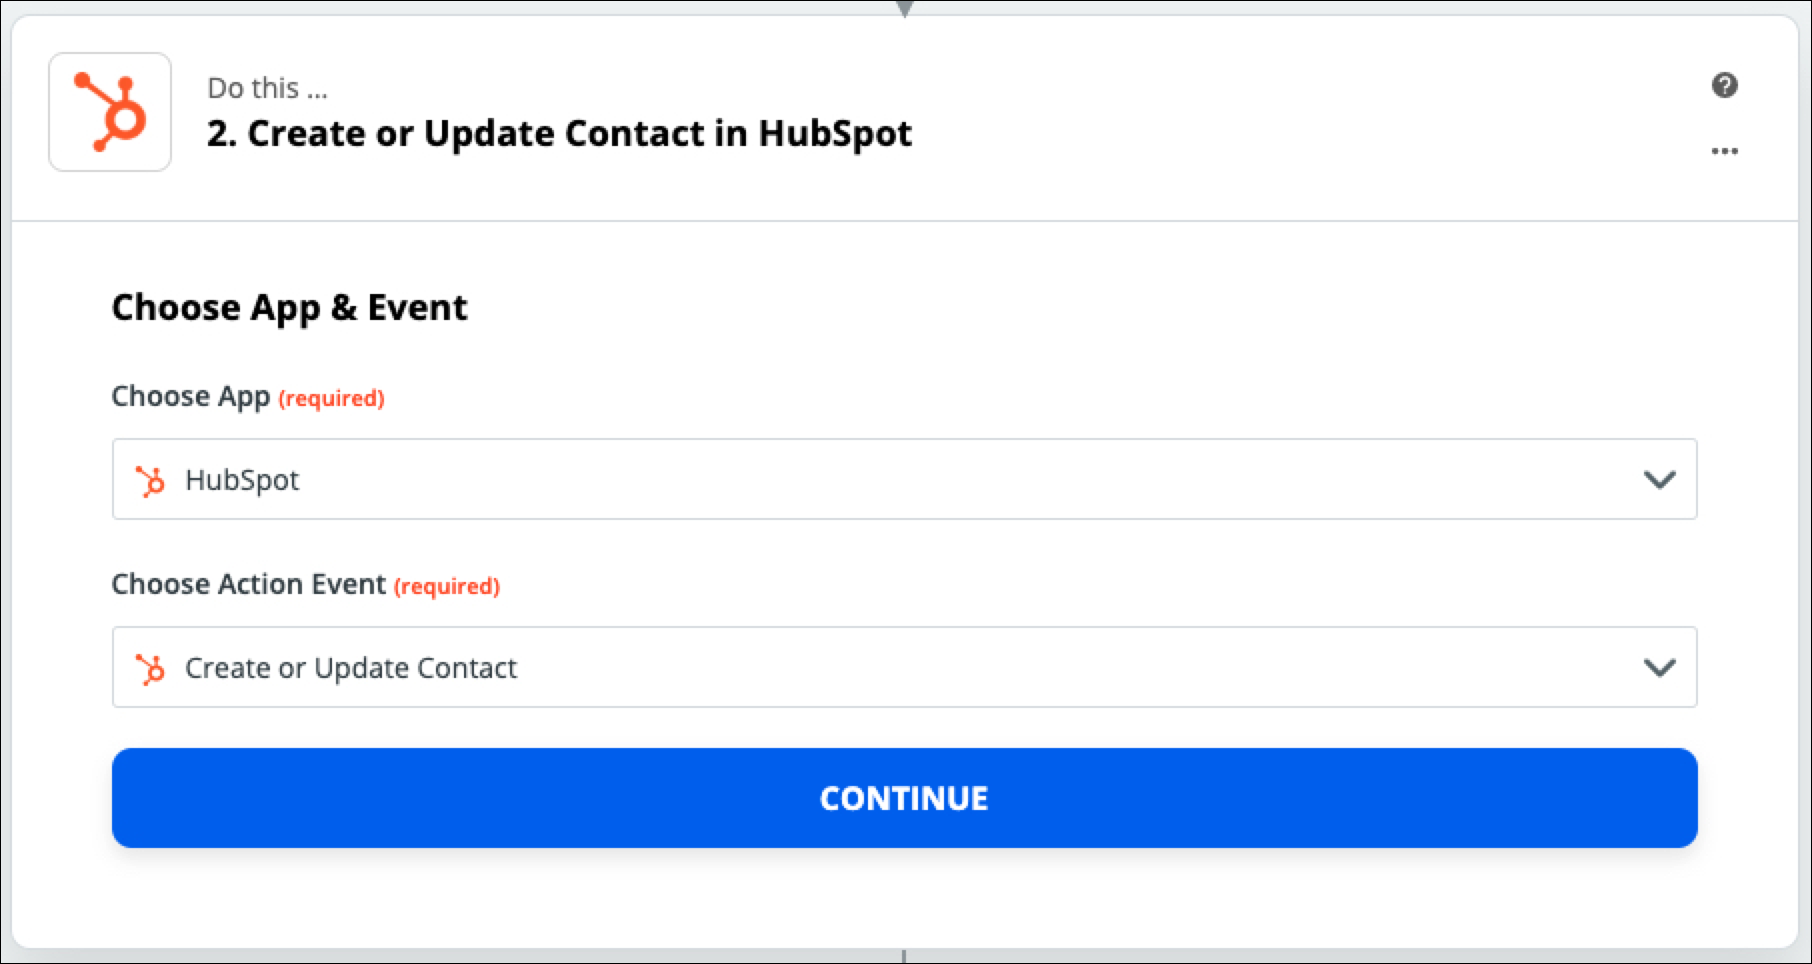
For the new second step, search for HubSpot, then select "Create or Update Contact" from the Action Step dropdown.
If necessary, select the HubSpot account you linked to in Step 9.
Step 9c. Map Your DataNext, map the required email, and any other data you'd like to create/update this contact. Note again, if you have custom contact fields, please first scroll to the bottom of this step and click "Refresh Fields".
We mapped the following during this step, for example:
- First Name
- Last Name
- Phone
- Address (Street 1 and Street 2 in the same field, separated by a comma)
- City
- State
- Country
Unlike previously, testing is required here so Hubspot creates a Contact record we can reference in the next step.
Step 10a. Create "Add Contact to Deal" StepTo add a fourth step, click the Plus sign at the bottom of the "Create a Deal" box.
Once again, search for HubSpot, and then select "Add Contact to Deal" from the Action Event dropdown.
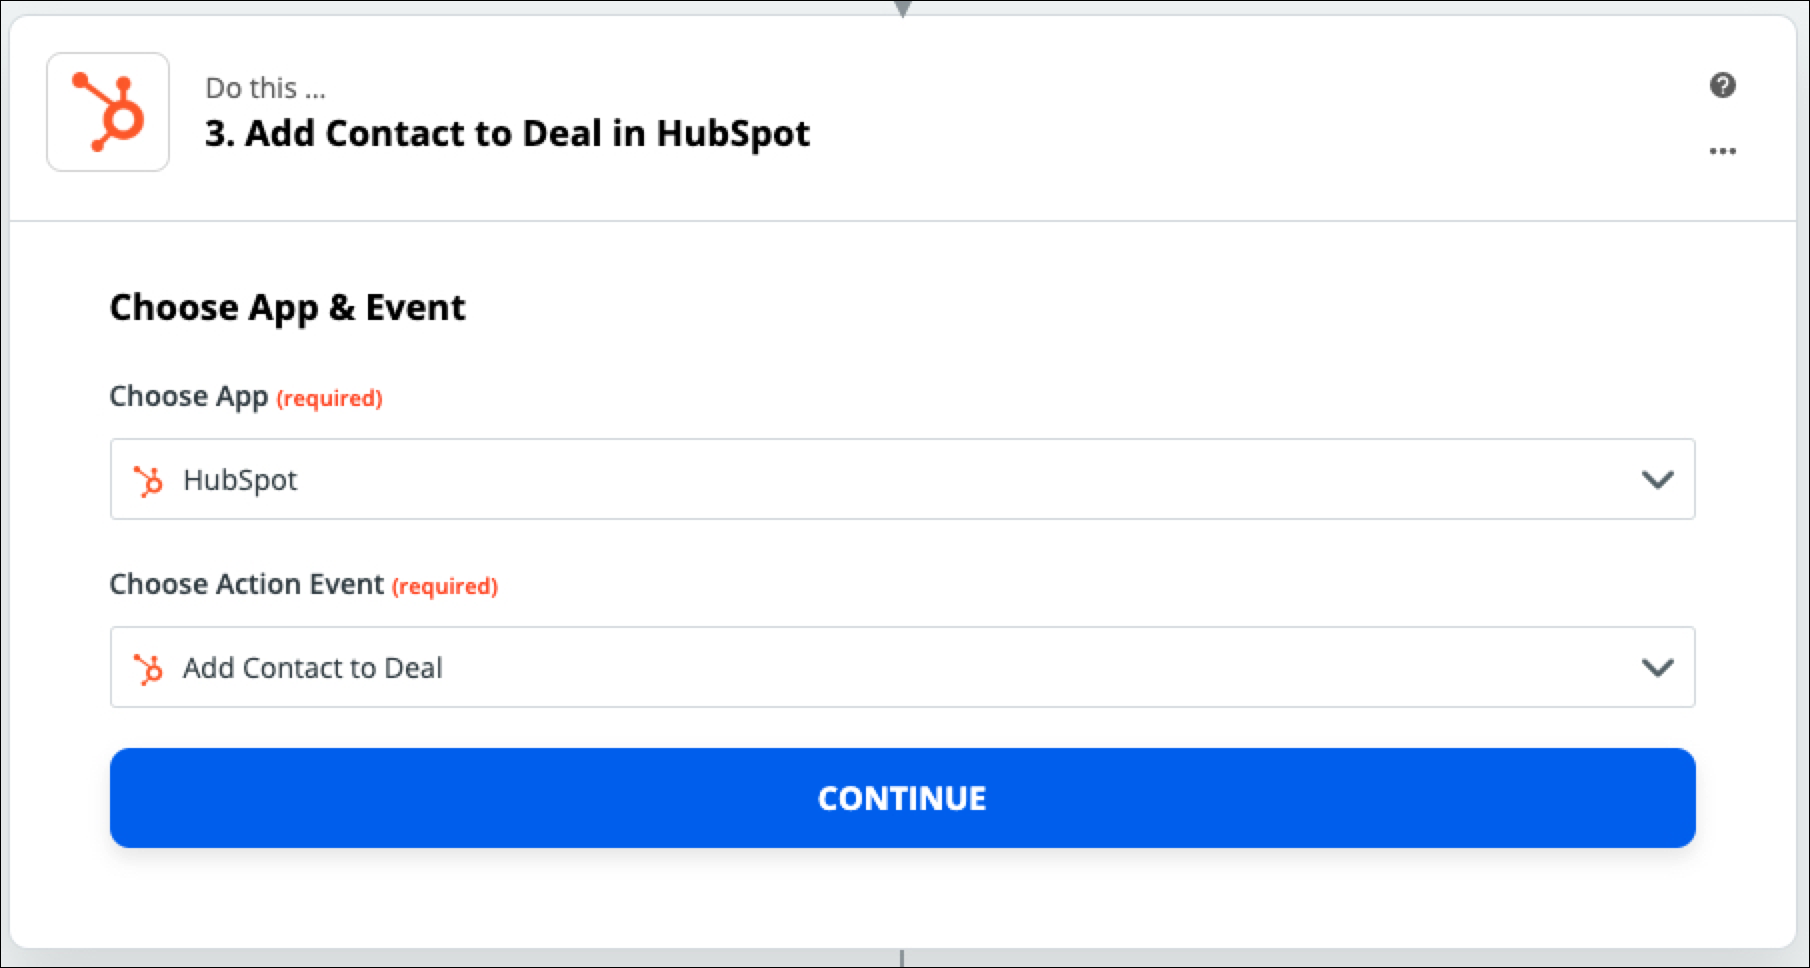
Select your HubSpot account on the next page, and continue on to the data mapping.
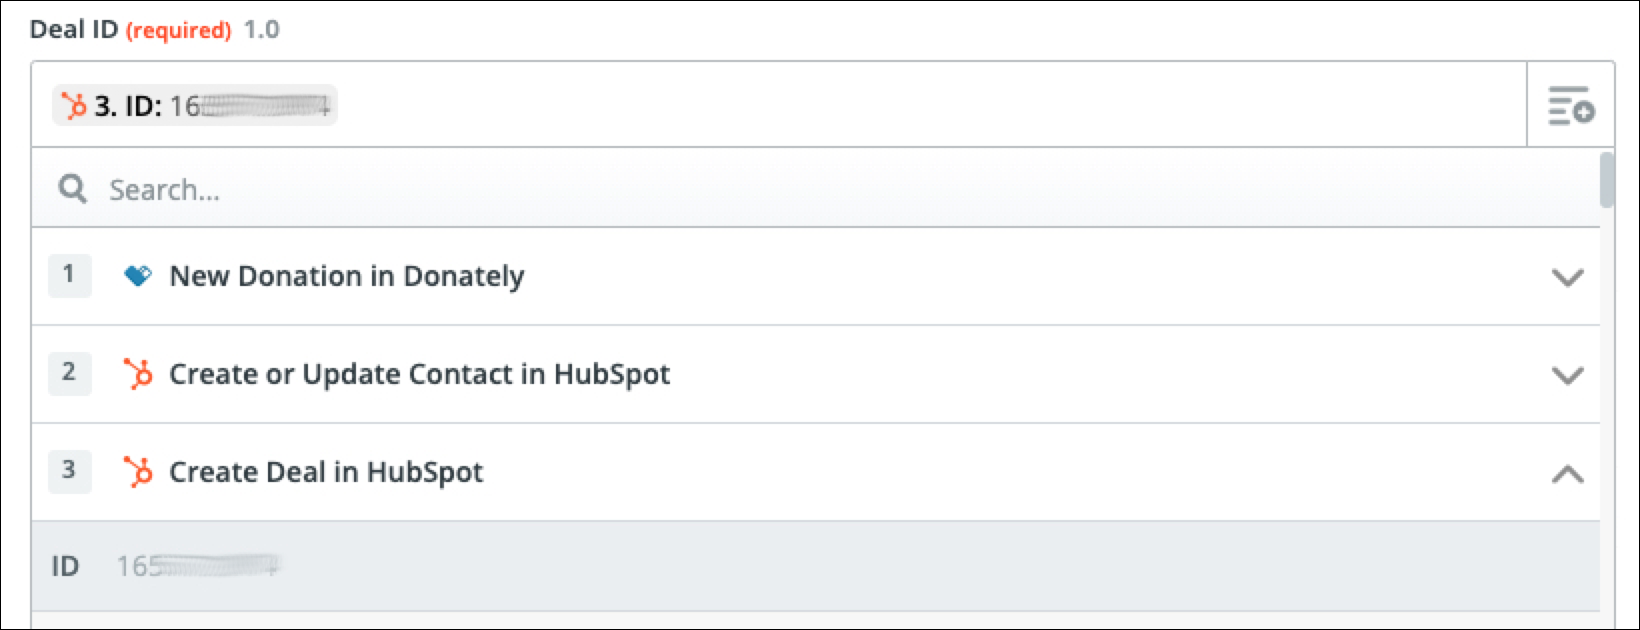
Step 10b. Find Deal IDIn this step, we'll need to connect the exact HubSpot deal ID so that Zapier knows to which deal to attach this contact.
Click on the list/plus button on the right side, then click on the row titled "Create Deal in HubSpot".
It should be a string of numbers as shown here:
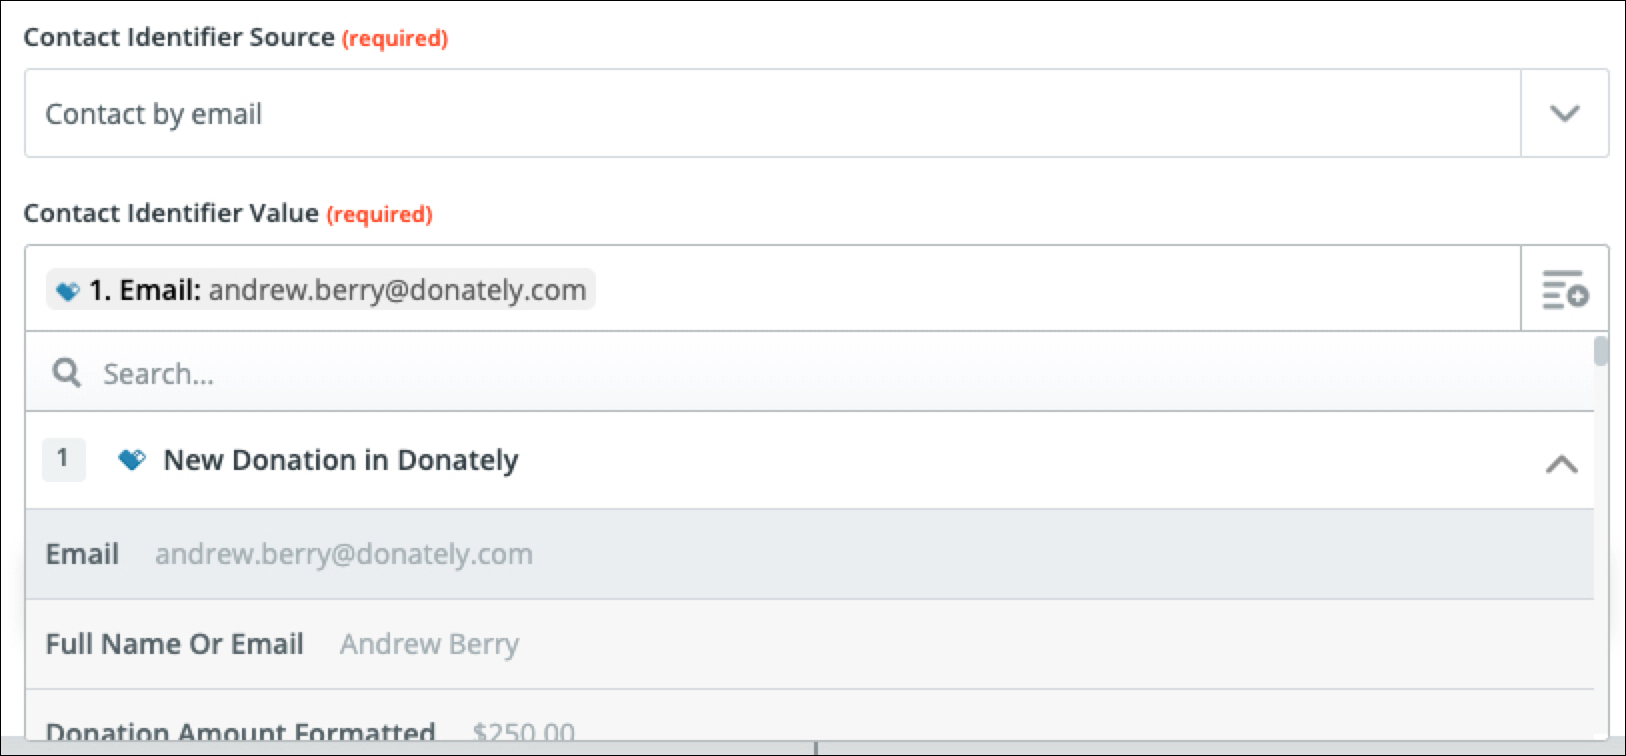
Next, for the "Contact Identifier Source", select "Contact by Email". You can also match using "Contact by ID", however as email is the unique identifier on the Donately system, matching by email lessens the chance of duplicates being created.
Simply click on the right-side button, then under the Donately row, select "Email".
Step 10d. (Optional) Test & Review
Decide whether or not you'd like to test, and you're done!
Now, when a new donation happens via Donately, this Zap will create or update a contact, create a new deal, then attach the two together.
The result is something that looks like this in the Contact record:
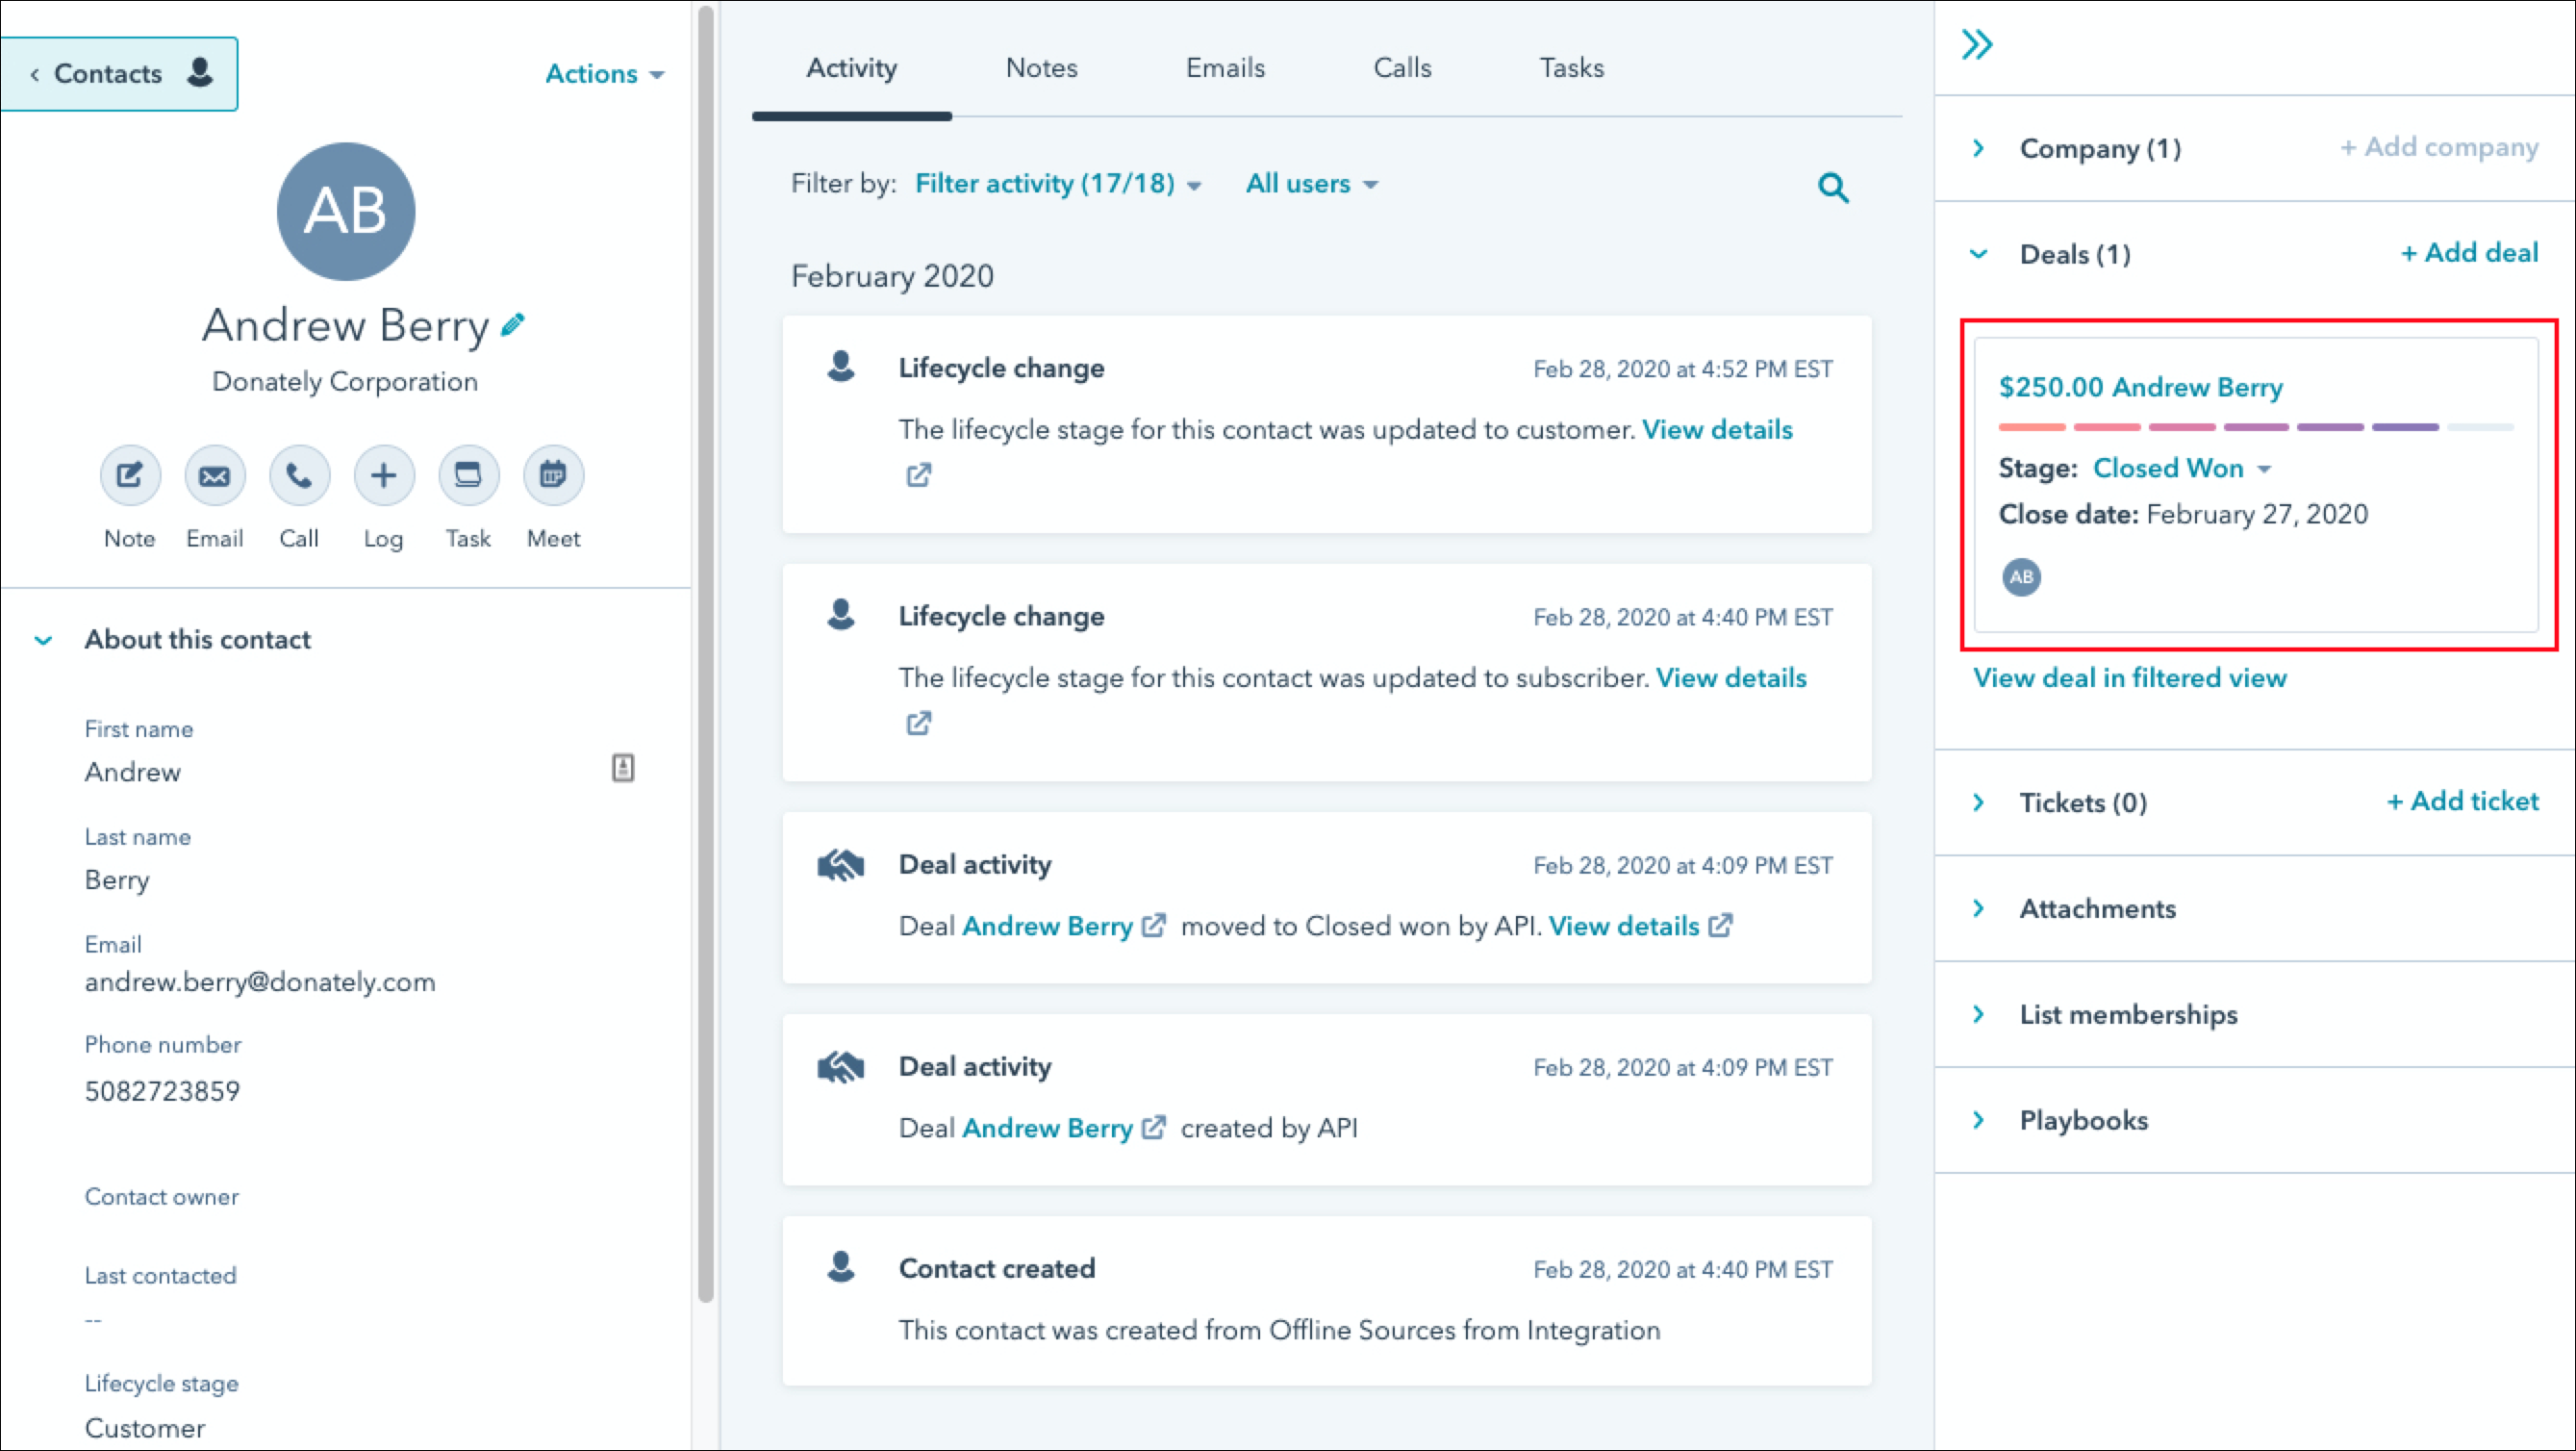
Now, when the donor gives subsequently, each donation will be created a new deal to this contact record, giving you a complete giving history inside of HubSpot.
Similarly, when you look at any individual Deal details, you'll see the contact record linked. This should make it very simple to see all the information across multiple screens and records in HubSpot.
Have any questions? Send us a note and we're happy to help!