
Build a donation form
Create a form from a template, set amounts and currencies, choose which fields are required, split it across steps, preview it on desktop and mobile, and publish.
The form builder is where you create the form donors give through: what it asks, what it costs, how it looks, and how many steps it takes.
The video above walks the whole builder section by section, from picking a template to clicking Publish. The rest of this page is the detail behind each of those sections.
Use a screen at least 960 pixels wide. The builder tells you if the window is too narrow.
Create a form
Go to Forms and click New Form. Pick a starting point:
- Quick Donate for a simple gift.
- Donate & Join Contacts to grow a mailing list alongside donations.
- eCard for tribute gifts that send a card.
- Event Tickets for ticketed events, which starts with cart items.
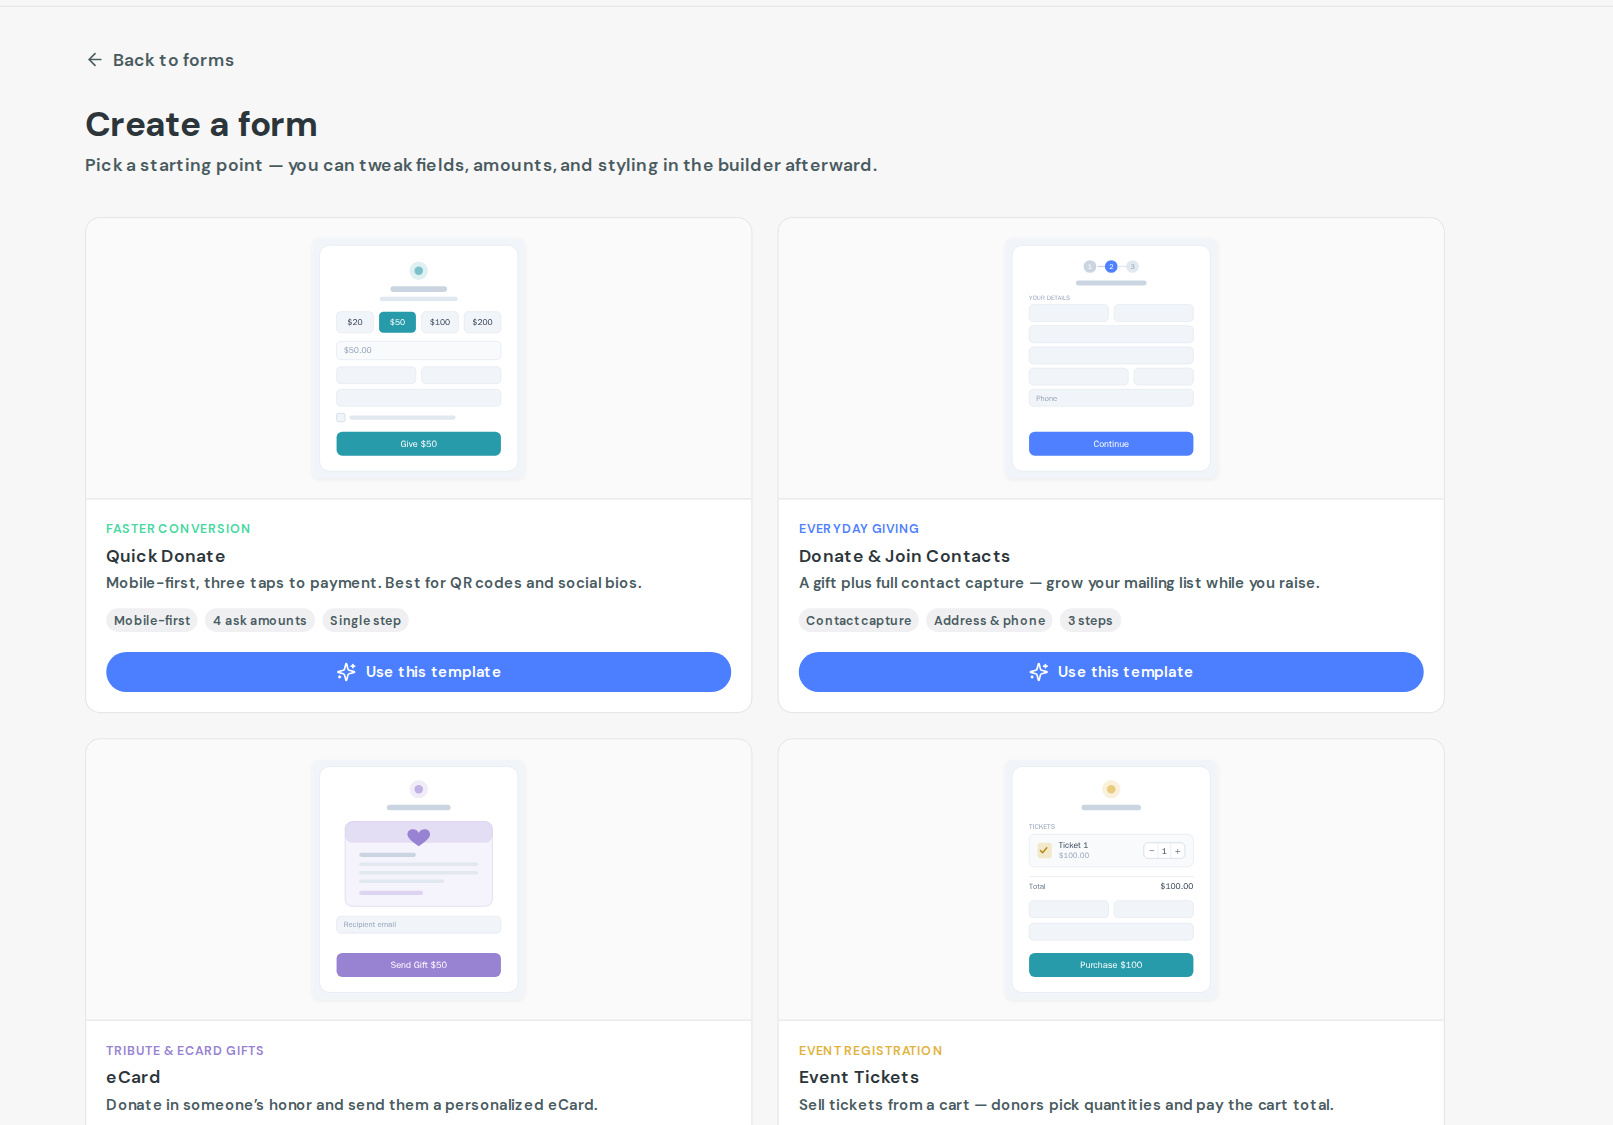
There is no blank form on purpose. Every template is fully editable, so pick the nearest one and change it.
Find your way around
Opening an existing form shows its results. Click Edit to open the builder.
The builder has three parts: the section list on the left, the settings for the current section in the middle, and a live preview on the right that updates as you type.
The sections, in order: Basics, Amounts, Processing Fees, Donor Fields, Cart Items, eCard, Layout & Steps, Payment, After Donation, Design, Language, Integrations.
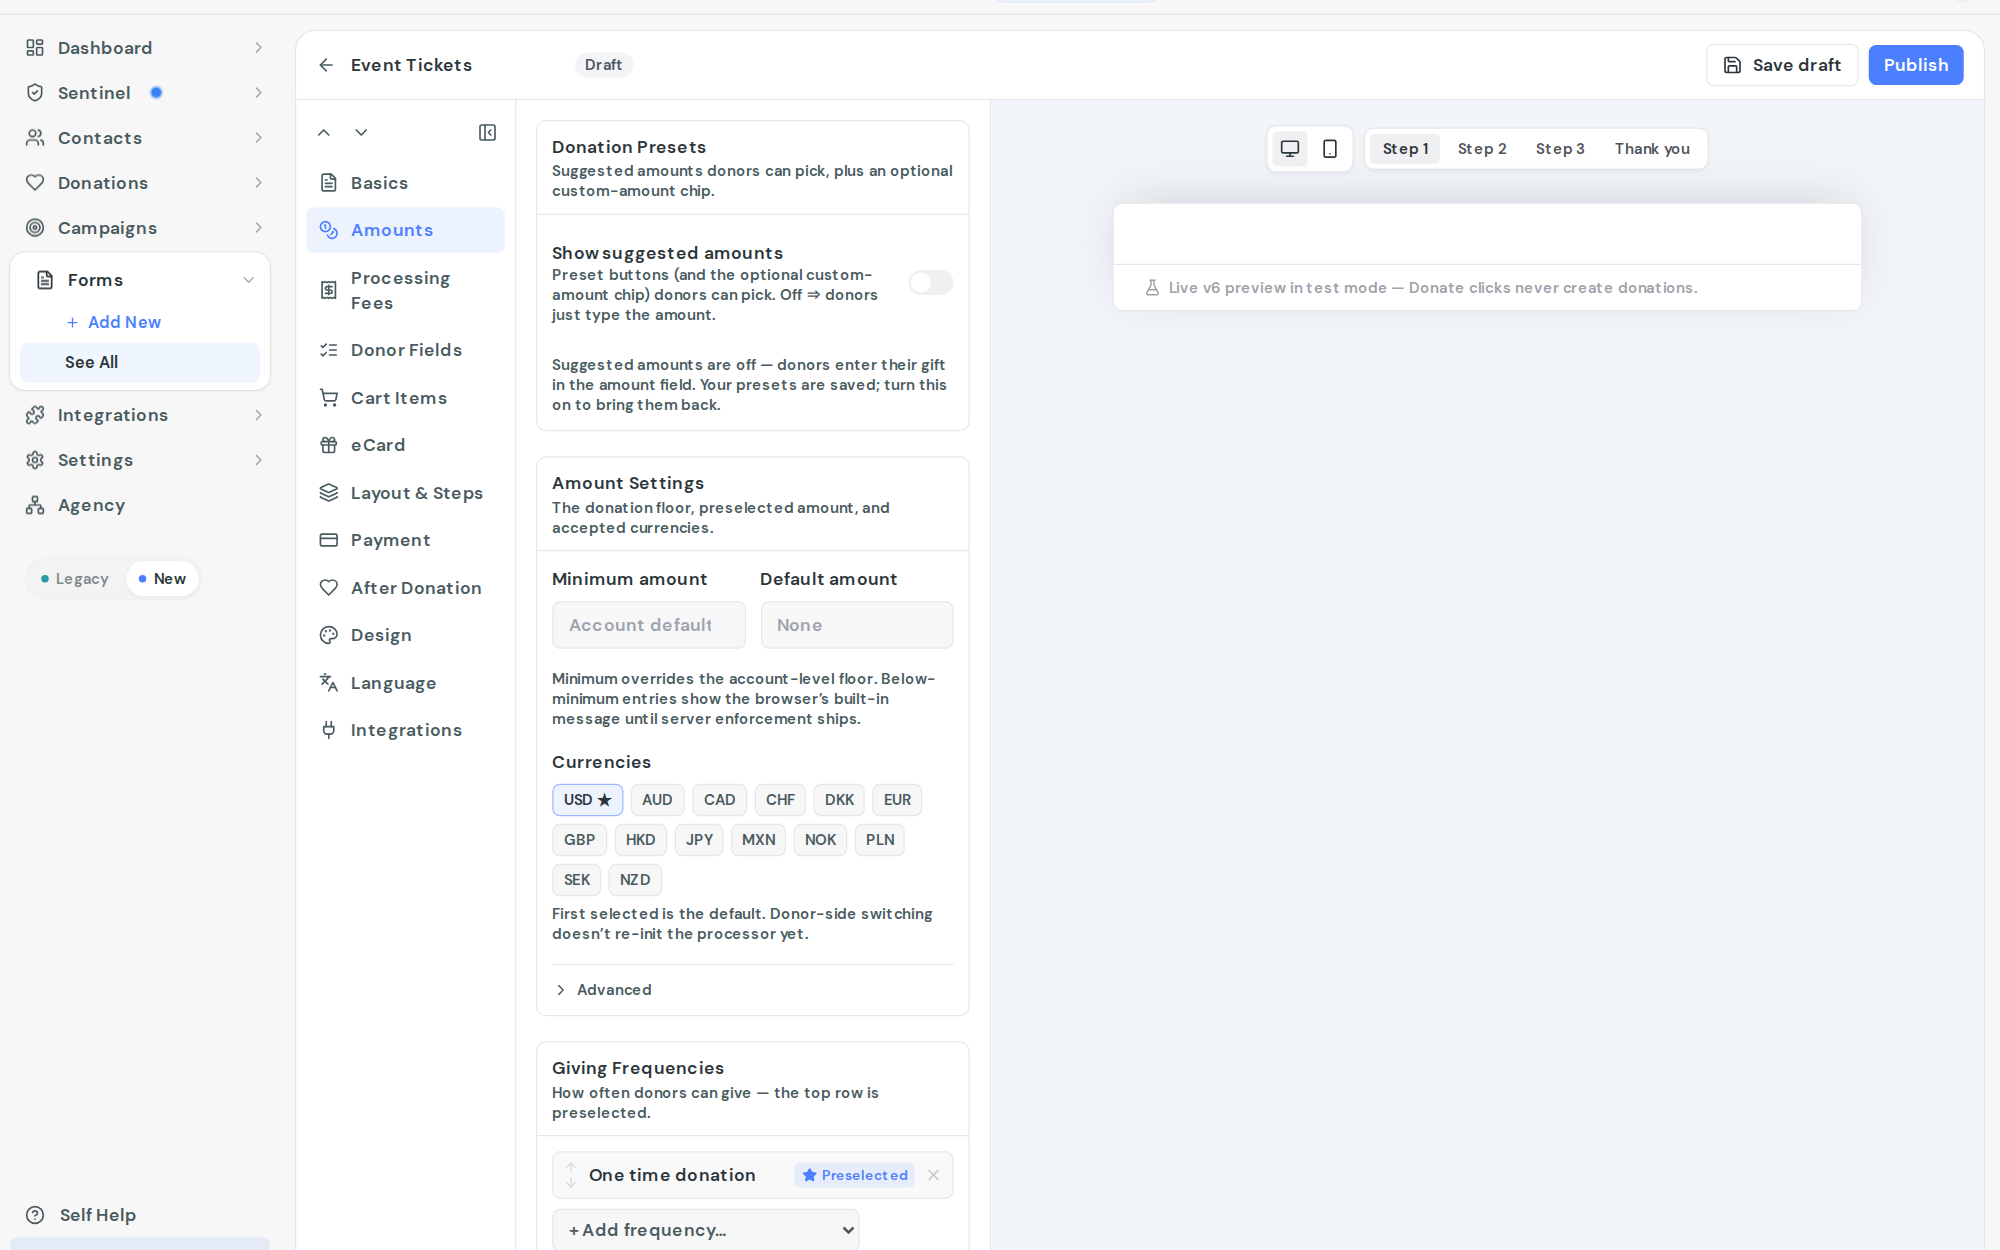
Preview on desktop and mobile
The preview has Desktop and Mobile toggles, and tabs for each step plus the thank-you screen, so you can check every screen a donor sees without leaving the builder.
Set the amounts
In Amounts:
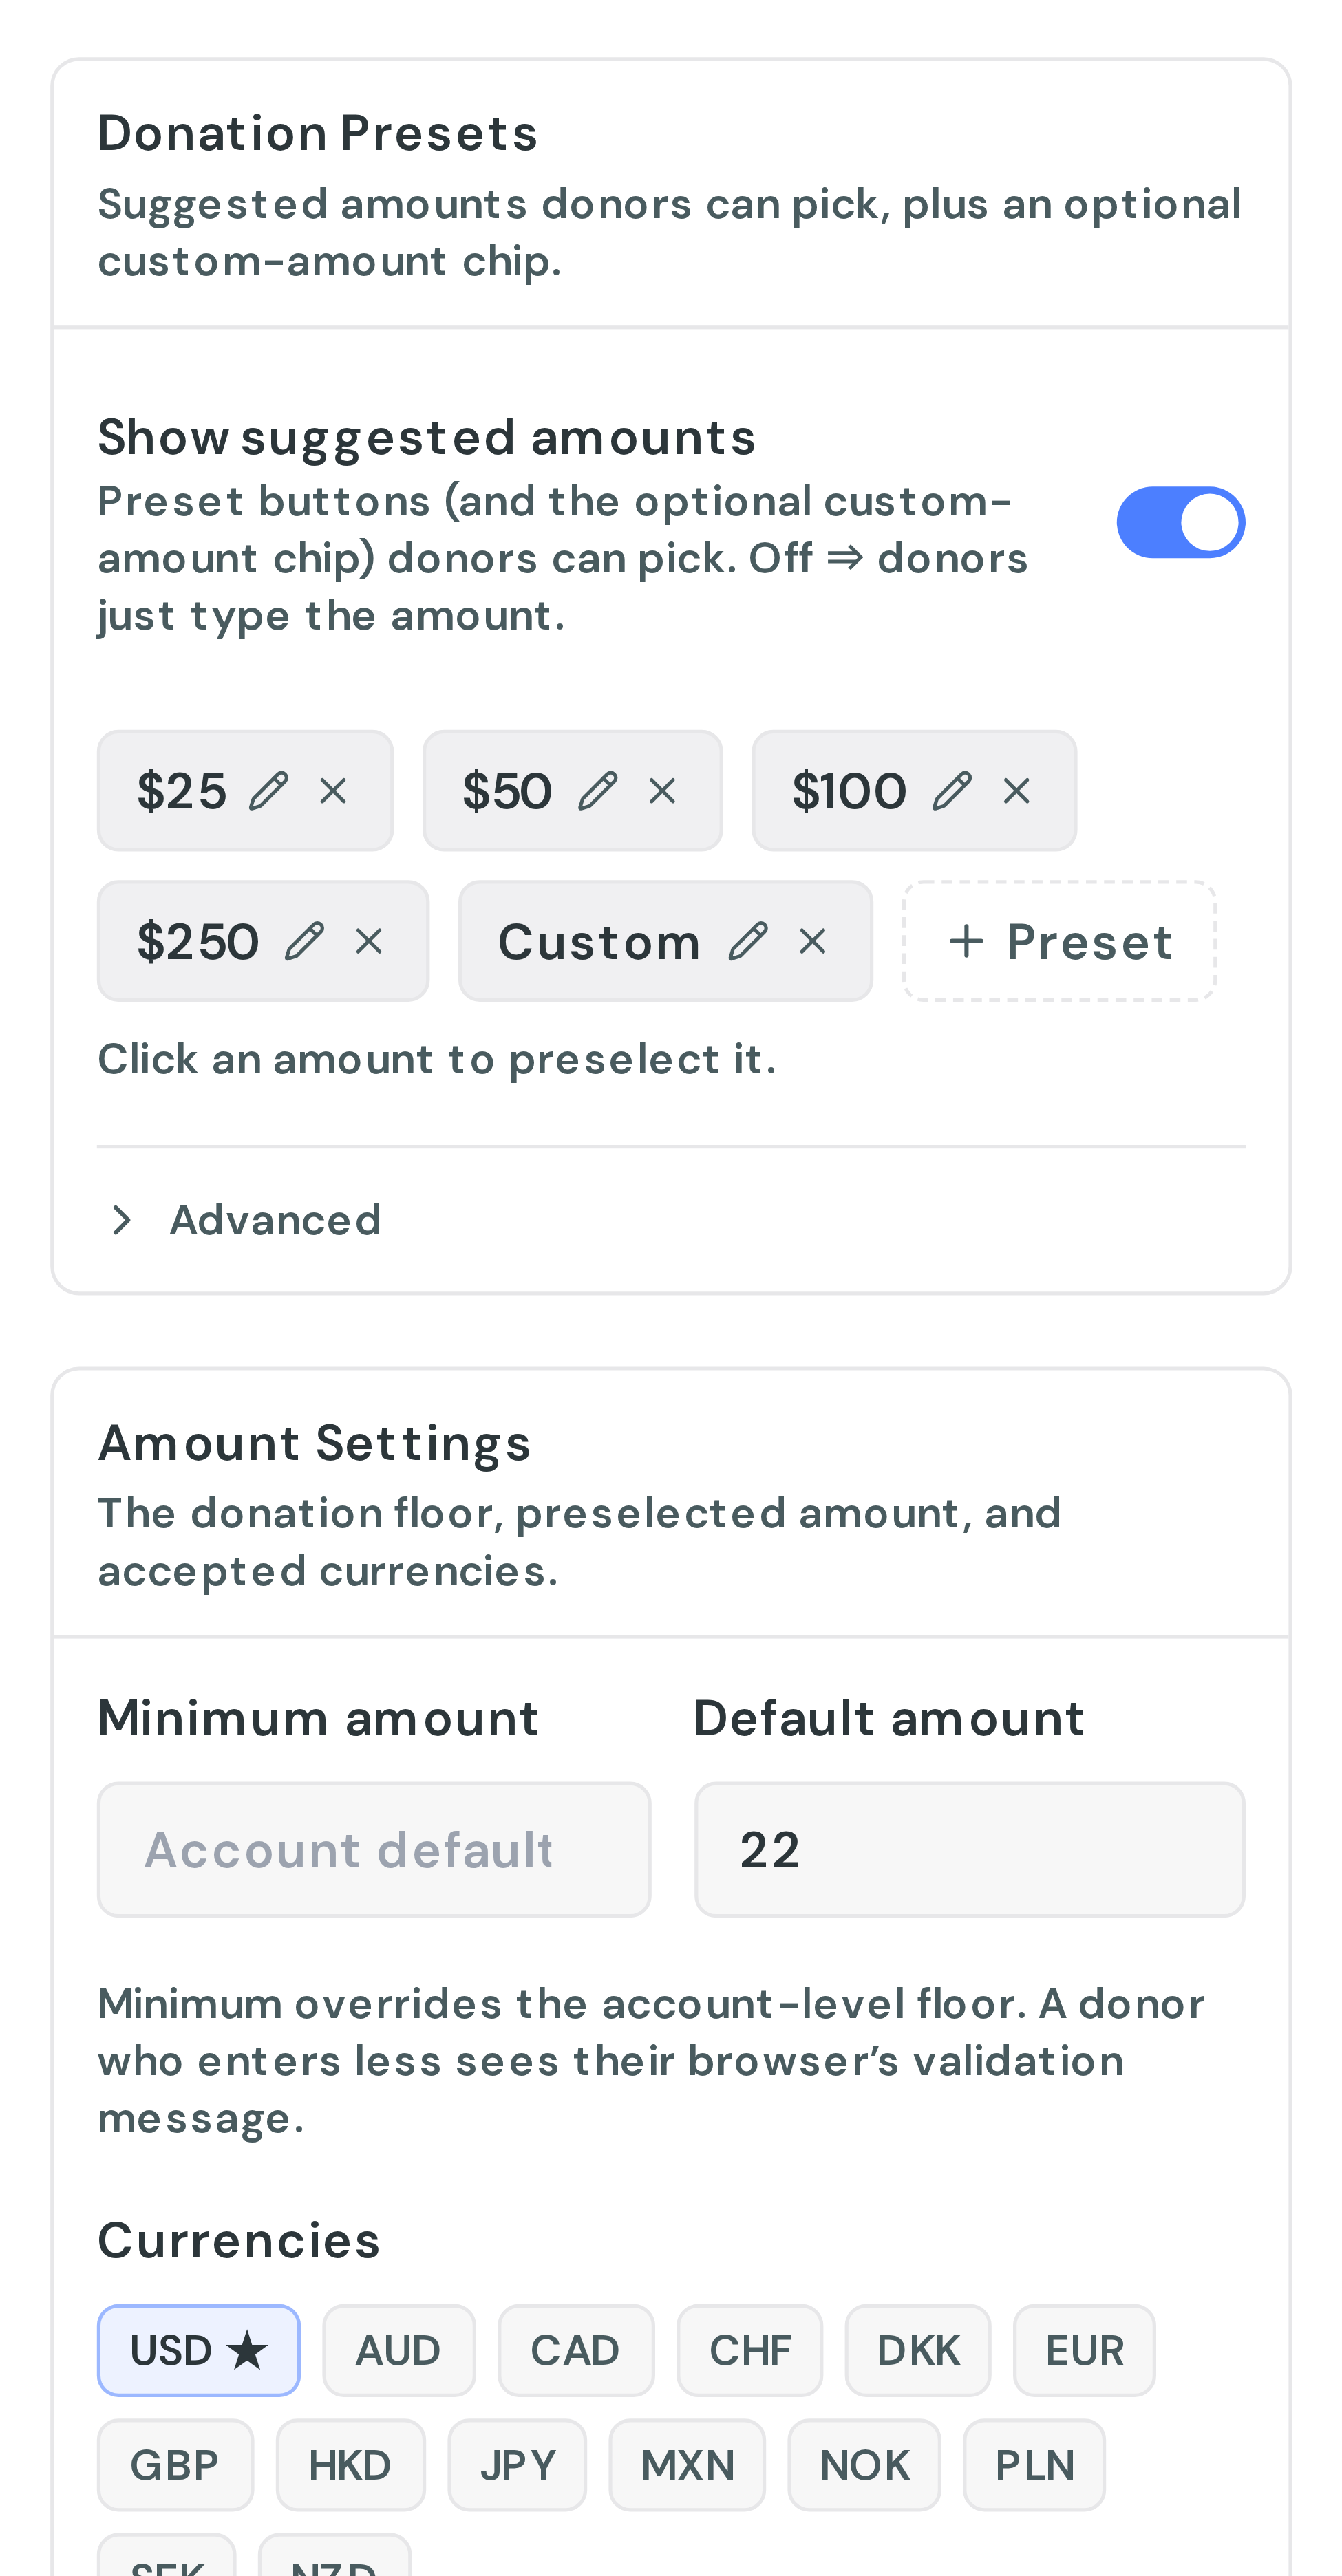
- Donation Presets are the suggested amounts. Add one with + Preset, or add the custom-amount box with + Custom.
- Click any preset to edit its Amount and an optional Label. A label such as "Feeds a family" shows instead of the figure.
- The custom-amount box takes a Placeholder, which is the greyed-out text in the empty field.
- Preset layout arranges them as a standard grid, full-width rows, or a dropdown.
Under Amount Settings:
- Minimum amount sets the donation floor. Leave it blank to use the account default.
- Default amount preselects one of your presets.
- Currencies lists what donors can give in, with 14 available. Add the ones you want and donors choose on the form.
Lock or hide the amount
Under Advanced in the Amounts section, Lock the amount field stops donors changing the figure, and Hide the amount field removes it from view. Both are useful for a fixed-price campaign where you want one amount and no choices.
Setting a maximum
There is no maximum-amount setting on a form. To steer donors towards a range, offer presets without the custom-amount box, or lock the amount so the figure cannot be changed at all.
If you genuinely need a hard ceiling, for example to stop a mistyped gift, contact support. We can set a per-account limit above which donations are refused. That is not something you can set yourself, and it applies to the whole account rather than one form.
Capping the field with your own JavaScript or CSS on the page around an embedded form is not supported and we would not recommend it: it changes what the donor sees without changing what the form accepts.
Choose how often donors can give
Giving Frequencies controls the cadences on offer, from one-time through monthly and annual, with less common intervals under More frequencies. The first row is preselected for donors; use Make default to promote a different one.
Under Advanced, Frequency display switches between buttons, a radio list and a dropdown.
Decide which fields are required
Donor Fields holds the standard fields and any custom ones you add. Open a field to set its Label, Placeholder, Help text and whether it is Required.
Ask for as little as you can. Every extra required field costs completions.
Split the form across steps
Layout & Steps is where a multi-step form is made. Drag fields into the order you want, and use Add step to break them into separate screens. Fields you are not using sit in a tray below the form, and Reset to default order puts everything back.
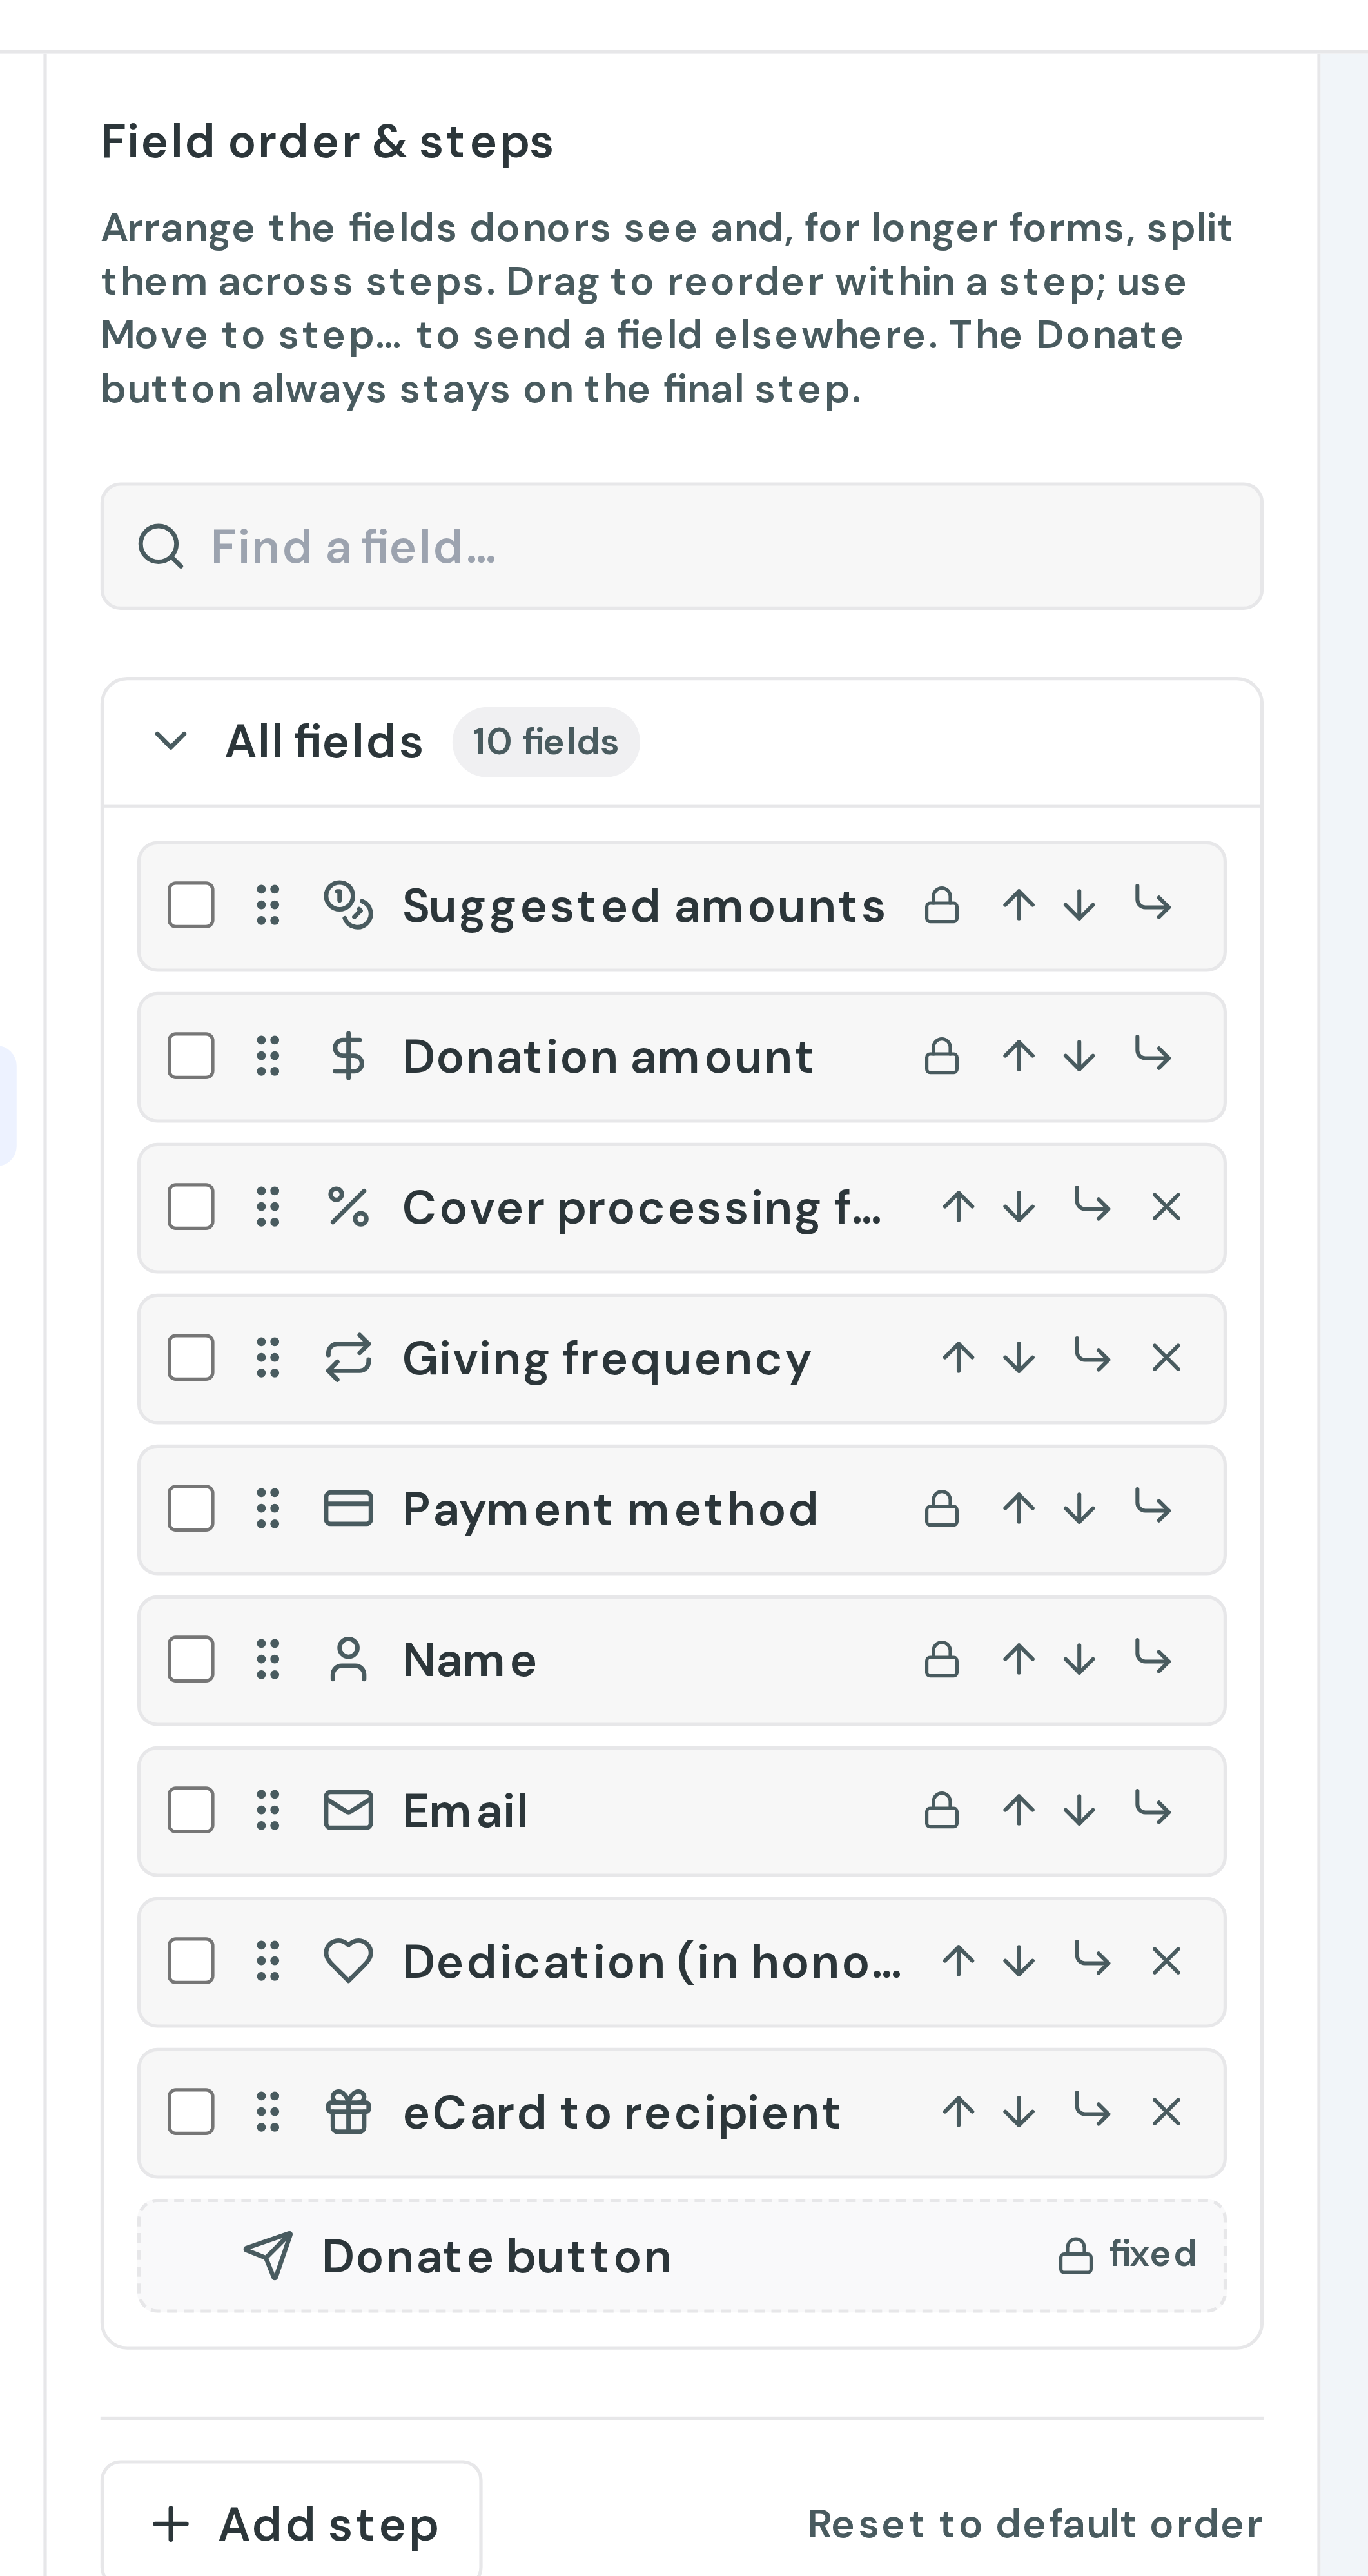
The donate button stays on the last step.
Multi-step forms tend to do better on mobile, where a long single page means a lot of scrolling before the donate button is even visible.
Publish
Edits do not go live as you make them. The builder saves your work continuously as a draft, and the live form changes only when you click Publish.
That means you can rebuild a form in the middle of a campaign without donors seeing a half-finished version.
Two related controls sit beside it:
- Save records a named version, for example "only PayPal", so you can come back to it. You can keep five.
- Versions lists your save points and published versions, and lets you preview or restore one, or discard the current draft and start again from what is live.
Share the form
Once published, Share gives you the hosted link, embed code and a QR code. See Embed a donation form on your website.
Moving a form from the old dashboard
Editing a form that was built in the old dashboard asks you to move it to the new one first. This is one way. The form becomes read-only in the old dashboard and cannot be moved back, so if you share that form with colleagues who still work in the old dashboard, agree the move with them first.
Moving does not change the form's version or its embed, so anywhere it is already embedded keeps working.