Apple Pay needs to be accepted on both your Donately hosted page, as well as, on your website (if you plan to embed your donation form).
We have already accepted the file on our hosted page. Please follow the instructions to allow ApplePay on your own site as well
As of June 2024: Wix does not support ApplePay on embedded forms.
The process is pretty simple, but there are a few steps:
- Log into your Stripe dashboard
- Click the 'Settings' icon in the upper right of your dashboard
- Click on 'Payment methods'
-png.png)
- Select Donately as your platform
- Click the link that says "manual settings page" to set up payment methods requiring action
-png.png)
- Click on the 'Eligible' tab to see payment methods available to integrate
- Find ApplePay >> click the Configure button
-png.png)
- When the configure page loads, click to 'Add New Domain'
-png.png)
- When you are embedding your donation form on your website, you will enter the general page domain url to register your organization's website.
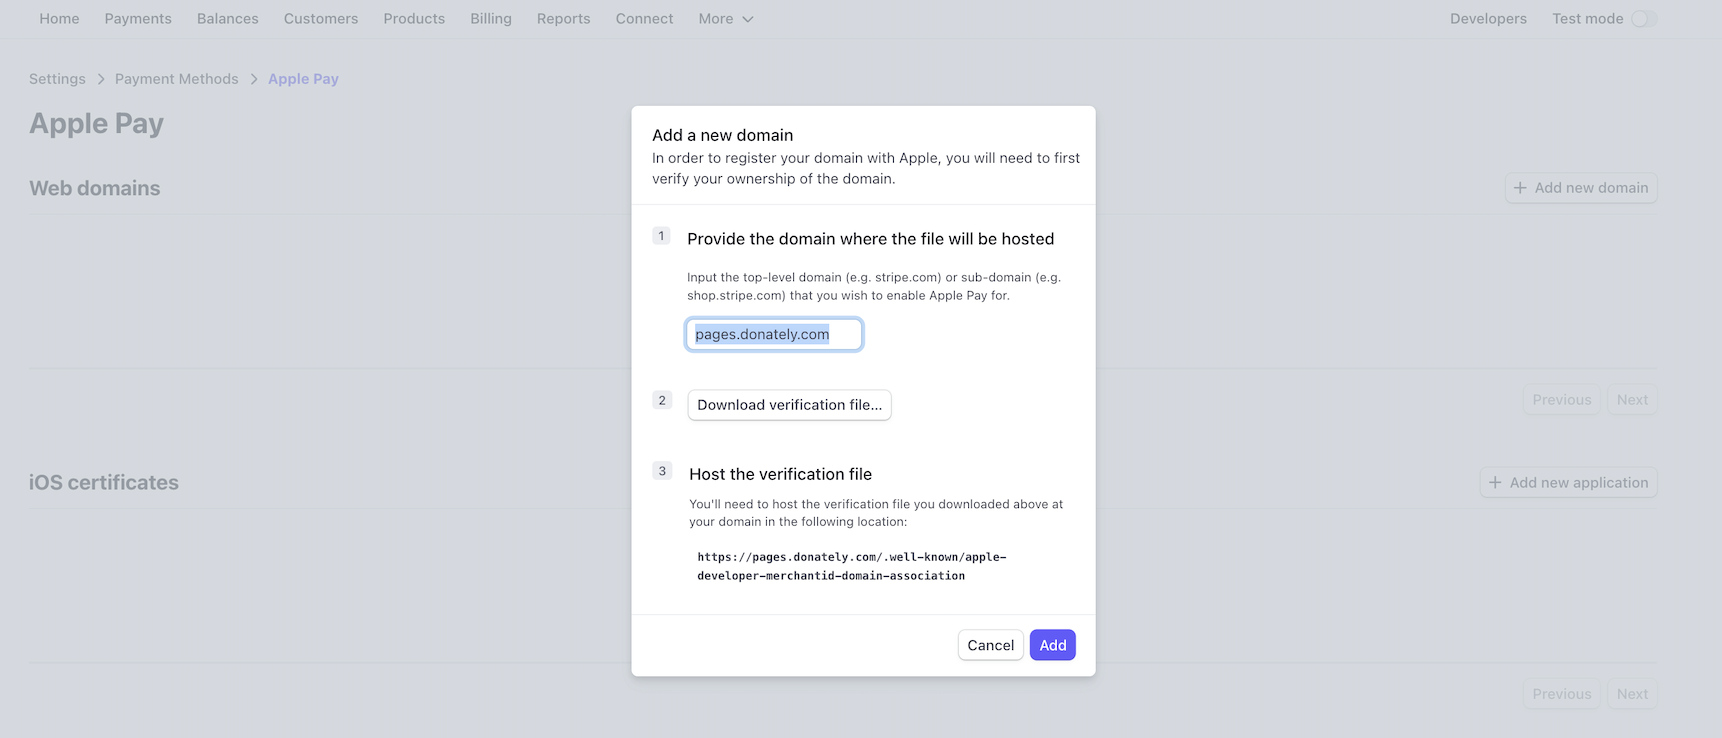
- When you are embedding your donation form on your website, you will enter the general page domain url to register your organization's website.
- Once you've enabled ApplePay on your domain, head back to your Donately dashboard to turn on the mobile wallet functionality on any forms you want to offer this payment method on.
Click Forms >> Select the 'form' you wish to add Mobile Wallet payment option to >> when the Form Builder opens, click 'Fields & Layouts' >> 'Payment Methods' >> toggle ON the 'Mobile Wallet' option >> Click green 'Publish' button to save your update.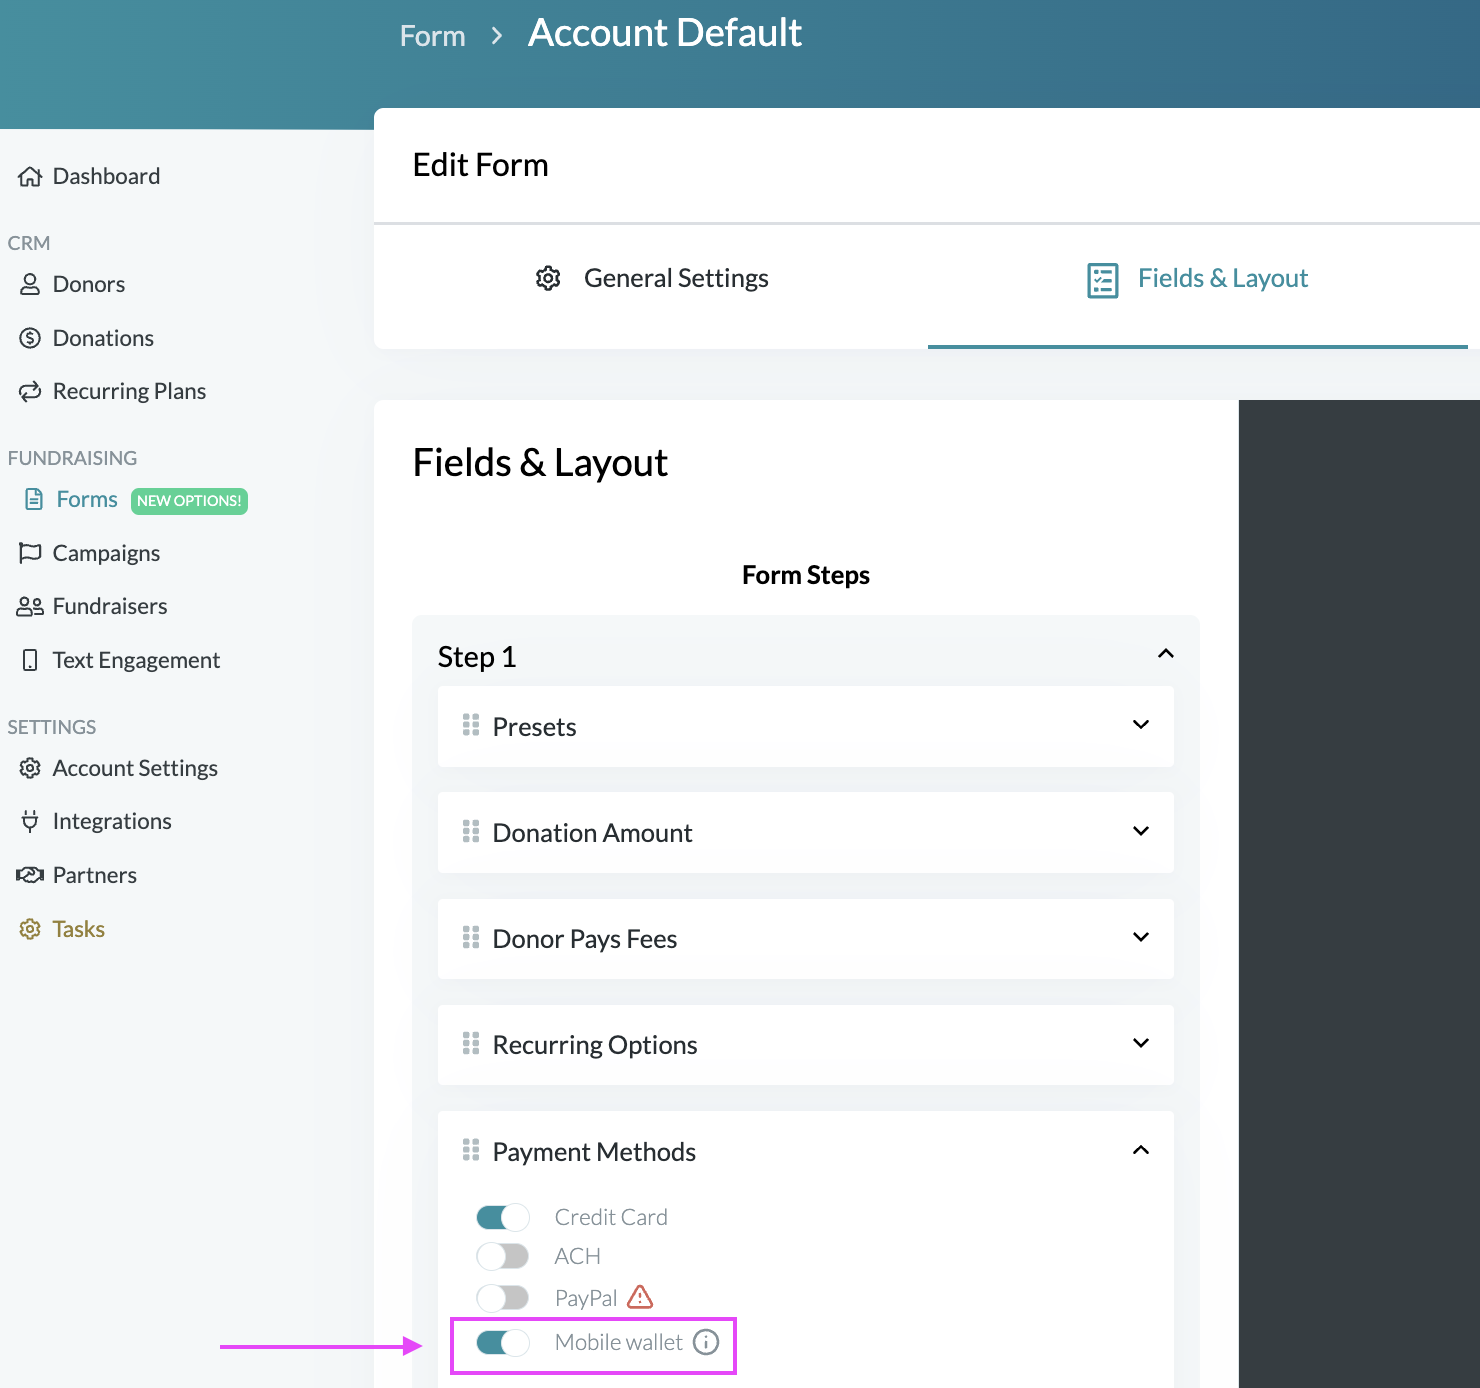
- FINAL STEP: Once everything is set up, it's good practice to test the process.
**Note: while this is usually automatic, if you have any trouble with ApplePay working, be sure that in your Stripe Dashboard, you have ApplePay toggled "ON" as a payment method accepted for your Stripe account. You can view this toggle on/off under the 'Account Edit' of your Stripe Dashboard Settings.**